Picking
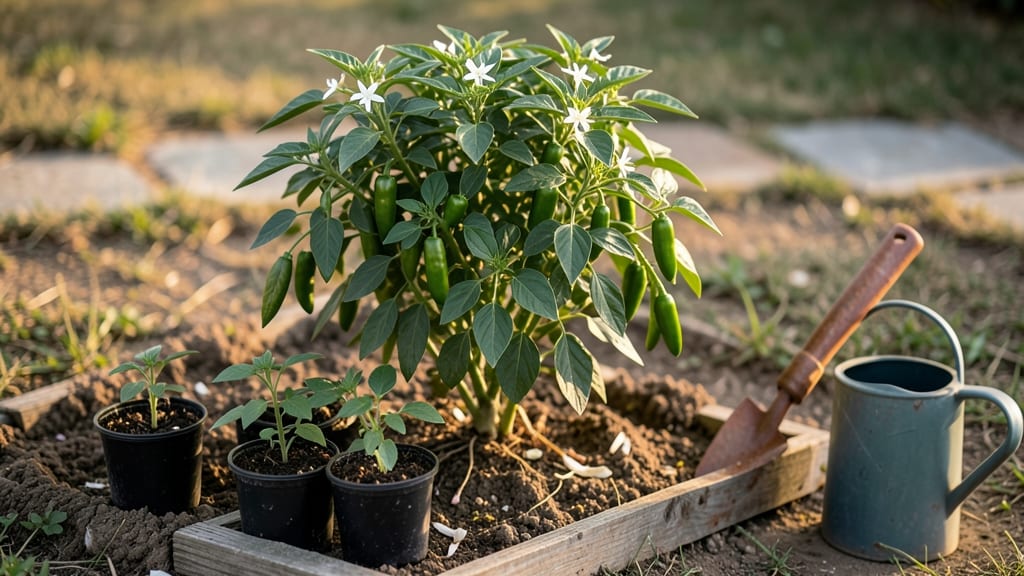
Planting Tabasco peppers starts with a simple truth: these fiery little plants thrive when you give them exactly what they crave—hot sun, well-draining soil, and just enough water to keep them happy, not soggy. 🌿 I’ve grown them for years, and the secret isn’t fancy equipment—it’s matching their needs to your climate, whether you’re starting seeds indoors or transplanting young plants in spring.
The biggest mistake beginners make? Overwatering or planting too deep. Tabasco peppers hate wet feet and need at least 6-8 hours of direct sunlight daily—more if your summers are scorching.
Use a mix of 50% potting soil, 30% compost, and 20% perlite for loose, airy roots, and space plants 18-24 inches apart to prevent crowding. If you’re starting seeds indoors, give them warmth (around 75°F) and bright light from day one.
By midsummer, you’ll be harvesting bright red, finger-length peppers packed with heat—enough to make your neighbors ask for a taste (or a warning). The first harvest comes 80-90 days after transplanting, and with proper care, plants keep producing until frost.
Just don’t let them dry out, and avoid heavy fertilizers—they’ll focus on leaves, not peppers.
Works in USDA Zones 8-11, but even cooler climates can grow them in containers moved indoors before frost. Here’s how to get started without the common pitfalls—so you end up with a bush full of heat, not disappointment.
📚 In This Guide
- What you need
- Instructions
- Tips and common mistakes
- Wrapping up and next steps
What you need
- ● Tabasco pepper seeds – 5-10 seeds (or 2-3 plants if buying seedlings). Look for Capsicum frutescens varieties like 'Tabasco Red' or 'Tabasco Green'.
- ● Well-draining potting mix – 5-10 gallons (sterilized, seed-starting mix works best). Avoid garden soil for seedlings!
- ● Containers or seed trays – 2-4" deep pots (3-4 per seed) or a seed tray with cells. Ensure they have drainage holes.
- ● Grow lights or sunny windowsill – 12-16 hours of light daily for seedlings. A full-spectrum LED grow light is ideal.
- ● Watering can or spray bottle – With a fine mist setting to keep seeds moist without drowning them.
- ● Fertilizer – Balanced liquid fertilizer (5-5-5 or 10-10-10) or organic options like fish emulsion or compost tea.
- ● Transplanting pots or garden space – 5-gallon pots or a sunny garden bed (6+ hours of direct sunlight daily). Tabasco peppers thrive in USDA Zones 8-11.
- ○ Stakes or cages (optional but helpful) – 1-2 feet tall to support plants as they grow.
- ● Pruning shears – For trimming leggy seedlings or harvesting peppers.
- ● pH test kit – To ensure soil pH is between 6.0-7.0 (Tabasco peppers prefer slightly acidic soil).
- ● Mulch – Straw or shredded leaves to retain moisture and regulate soil temperature.
- ● Row covers or shade cloth – For early planting in cooler climates or to protect from pests.
- ○ Harvesting gloves – Optional but recommended—those peppers pack a punch!
Step-by-Step instructions for planting Tabasco peppers
Here's my foolproof method for growing fiery Tabasco peppers—from seed to spicy harvest.
🌱 Step 1: Start Seeds Indoors for Early Heat
Tabasco peppers thrive with a long growing season, so I begin seeds indoors 8-10 weeks before last frost. Use the 2 seedling trays with the sterile seed-starting mix—fill each cell halfway, then press one seed ¼ inch deep (just below the surface). Gently pat the mix around it to ensure good contact.
Place the trays under a grow light (or in a south-facing window) with 14-16 hours of light daily. Without enough light, seedlings stretch leggy and weak. Keep soil consistently moist but never soggy—top inch should feel dry to touch before watering again. I cover the trays with a humidity dome until germination, which takes 7-14 days at 75-85°F.
Once sprouts emerge, remove the dome immediately to prevent damping-off. Thin to the strongest seedling per cell if needed—don’t crowd them, or you’ll get weak, competing plants. After 4-6 weeks, when seedlings have 3-4 true leaves, they’re ready for transplanting.
☀️ Step 2: Harden Off and Transplant Outdoors
Move seedlings outside for 1-2 hours daily starting 2 weeks before transplanting, gradually increasing time. This hardening-off process prevents shock when they hit the garden. Choose a spot with full sun (6+ hours daily)—Tabasco peppers demand heat to develop their signature fire.
Dig holes 12-18 inches apart (since you’re planting 4 plants, this spacing ensures airflow). Amend the soil with 1 cup of compost per hole—Tabasco peppers love fertile, well-draining soil. Gently remove seedlings from their trays, keeping roots intact, and place them in the holes at the same depth they were growing indoors.
Water deeply right after transplanting to settle the soil. Mulch around the base with 2 inches of straw mulch to retain moisture and suppress weeds. Avoid fertilizing immediately—newly transplanted peppers need time to establish roots before feeding.
💧 Step 3: Maintain Soil Moisture and Fertility
Tabasco peppers are drought-sensitive, so water deeply 1-2 times per week, ensuring top 2 inches of soil stay moist. Overhead watering can spread disease, so use a drip irrigation system or water at the base. I check moisture by sticking my finger 1 inch into the soil—if it’s dry, it’s time to water.
After 4-6 weeks, when plants are 12 inches tall, apply a balanced fertilizer (10-10-10) at half-strength. Feed again every 4-6 weeks through the growing season. Too much nitrogen leads to leafy growth at the expense of peppers—focus on potassium and phosphorus for fruit production.
Watch for pests like aphids or spider mites. I spray plants with neem oil at the first sign of trouble—prevention is easier than treatment. Prune suckers (the small shoots in leaf axils) to direct energy into fruit production, but leave the main stem and branches intact.
✂️ Step 4: Harvest and Preserve for Bold Heat
Tabasco peppers mature in 90-120 days, turning bright red when fully ripe. Harvest by snipping stems with clean scissors—this prevents disease spread. I pick peppers every 2-3 days to encourage continuous production. Green peppers are milder but still spicy; red ones pack maximum heat.
For authentic Tabasco sauce, blend 1 pound of ripe peppers with 1 cup vinegar, 1 teaspoon salt, and 1 teaspoon sugar. Simmer for 30 minutes, then strain. Store in a clean jar—this small batch yields 1 pint of fiery condiment. Alternatively, dry peppers for a slower, concentrated heat.
Save seeds from your best peppers by fermenting them in 1 cup water for 24 hours, then rinsing and drying. Store in a cool, dark place for next season’s crop. With proper care, your Tabasco peppers will reward you with bold heat and prolific harvests year after year.
Tips & tricks for perfect Tabasco pepper planting
Growing Tabasco peppers from seed to harvest requires precision—but these pro tips will help you avoid common pitfalls and maximize fiery success.
Lighting is Everything: Those critical 14-16 hours of light daily in Step 1 are non-negotiable. If your seedlings start stretching toward the light (a condition called legginess), supplement with a grow light immediately. I’ve seen seedlings grow 6 inches tall in just 4 days when starved for light, but they’re always weak and prone to falling over. Place trays within 6 inches of the light source and rotate them daily for even growth.
Germination Temperature Control: The 75-85°F range for germination in Step 1 is ideal, but most homes struggle to maintain consistent warmth. I use a seedling heat mat set to 80°F under my trays—this cuts germination time from 14 days to just 7-10 days. If you don’t have a heat mat, place trays on top of your refrigerator (not inside) where it’s naturally warmer. Avoid cold windowsills—temperature fluctuations can delay or prevent sprouting entirely.
Transplanting Technique: When handling those delicate seedlings in Step 2, focus on preserving root integrity. Gently squeeze the sides of the seedling tray to loosen the soil block, then slide the seedling out rather than pulling it. I’ve ruined transplants by yanking seedlings, which tears roots and causes shock. After planting, water deeply but slowly—this helps settle soil around roots without displacing them. A 1-inch layer of straw mulch after transplanting retains moisture while preventing soil-borne diseases from splashing onto leaves.
Fertilizer Timing: The 4-6 week wait before first fertilization in Step 3 is crucial for root establishment. I’ve seen growers rush this and end up with lush foliage but no peppers. After that initial feeding, switch to a 5-10-10 fertilizer ratio (higher phosphorus) to encourage flowering and fruiting. Apply fertilizer in the morning so plants have time to absorb nutrients before evening heat stress. Always water thoroughly after fertilizing to prevent root burn.
Pro Tips for Planting Tabasco Peppers
- Growing Tabasco peppers from seed to harvest requires precision—but these pro tips will help you avoid common pitfalls and maximize fiery success.
- Lighting is Everything: Those critical 14-16 hours of light daily in Step 1 are non-negotiable.
- Germination Temperature Control: The 75-85°F range for germination in Step 1 is ideal, but most homes struggle to maintain consistent warmth.
Frequently asked questions
Got questions about growing your own fiery Tabasco peppers? You’re not alone—this spicy adventure comes with its own set of curiosity! Below, we tackle the most common queries from beginners and seasoned gardeners alike. Whether you're wondering about timing, troubleshooting, or alternatives, we’ve got the heat-proof answers.
When is the best time to plant Tabasco peppers?
Tabasco peppers thrive in warm soil—wait until after the last frost (when nighttime temps stay above 55°F/13°C) and the ground is at least 60°F/15°C. Start seeds indoors 8–10 weeks before transplanting (typically March–April in most climates) for a head start. If you’re in a short growing season, opt for faster-maturing varieties like 'Tabasco Shorty.'
How long does it take for Tabasco peppers to mature and produce?
From seed to harvest, Tabasco peppers usually take 90–120 days—but patience is key! Seedlings may take 6–8 weeks to germinate indoors, then another 60–90 days to bear fruit after transplanting. Pro tip: Prune plants early to encourage bushier growth and more peppers.
What if my Tabasco plants aren’t fruiting? How can I fix it?
No peppers? Don’t panic—common culprits include inadequate sunlight (they need 6+ hours of direct sun daily), overwatering (soil should stay moist but not soggy), or nutrient deficiencies. Try fertilizing with a balanced 10-10-10 or tomato feed when flowers appear. Bonus: Hand-pollinate flowers with a paintbrush if bees are scarce!
Can I grow Tabasco peppers in containers, and what size pot do I need?
Tabasco peppers adapt well to containers, but choose a pot at least 12–18 inches deep with drainage holes. Use a lightweight potting mix (like 60% soil, 30% compost, 10% perlite) and place the pot in a sunny spot. Dwarf varieties (like 'Tabasco Shorty') are ideal for containers—just ensure they get plenty of water and nutrients.
What can I do with Tabasco peppers if I grow too many?
Congrats—you’ve got a spicy surplus! Preserve the heat with homemade hot sauce (blend peppers, vinegar, and salt), fermented sauces (like salsa cruda), or freeze them for later. Share with neighbors (they’ll thank you!) or donate to local food banks. Pro move: Dry peppers for a long-lasting, flavor-packed seasoning.
Why are my Tabasco pepper leaves turning yellow or curling?
Yellow leaves often signal overwatering or nutrient issues, while curling can mean underwatering or pests (like aphids or spider mites). Check soil moisture—it should be damp but not waterlogged. For pests, spray with neem oil or introduce beneficial insects. If leaves are crispy, increase humidity with mulch or a shade cloth.
Wrapping up and next steps
Growing your own Tabasco peppers is a rewarding adventure that brings bold flavors and fiery satisfaction to your kitchen! 🌶️ With the right soil, sunlight, and care, you’ll soon be harvesting peppers perfect for homemade hot sauce or fresh salsas.
Start small, stay patient, and don’t forget to celebrate those first spicy harvests—your taste buds (and dinner guests) will thank you!
Ready to take the next step? Pick a sunny spot, grab your seeds, and get planting! For extra inspiration, check out our guide on nurturing young plants or explore creative ways to use your harvest. Happy growing! 🌱