Propagation
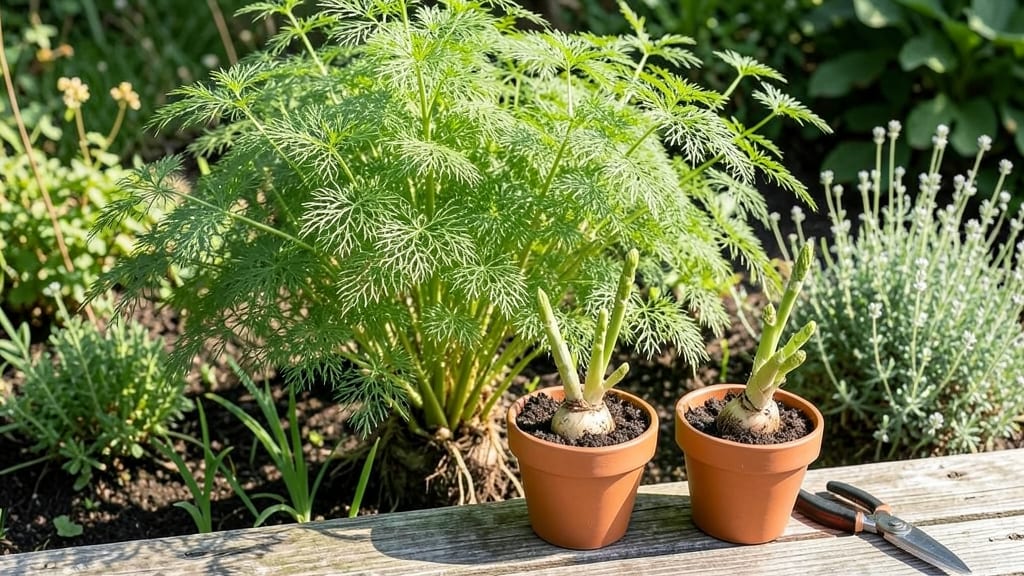
Propagating asparagus plants from existing crowns is how I finally got my own homegrown harvest after years of buying expensive roots at the nursery. The key isn't in the seeds—it's in those thick, knobby crowns hiding under the soil, just waiting to be divided.
Every mature asparagus patch has the potential to double or triple your plants with the right timing and care.
You'll need a sharp spade, some well-draining soil mix, and a sunny spot with at least 6 hours of light daily. The best time to divide is right after harvest, when the plant's energy has shifted underground.
I've found that crowns with 3-5 healthy buds establish fastest—any smaller and they struggle to recover. The soil should be loose, rich in compost, and slightly acidic to mimic asparagus' natural growing conditions.
Once you've carefully lifted and separated the crowns, you'll see those first shoots emerge within 3-4 weeks if conditions are right. The plants won't produce spears for their first 2-3 years, but the roots will grow strong enough to feed you for decades.
That first harvest of thick, tender spears—longer and sweeter than anything store-bought—makes the wait completely worth it.
This method works equally well for backyard plots or large-scale gardens, though container growing requires deeper pots. The real secret? Patience. Asparagus rewards long-term commitment with low-maintenance harvests for 15+ years. Let's get those crowns in the ground!
📚 In This Guide
- What you need
- Instructions
- Tips and common mistakes
- Wrapping up and next steps
What you need
- ● Asparagus crowns: Healthy, disease-free crowns (1-year-old or older) from a trusted source. Aim for 3–5 crowns per 10-foot row for optimal yield.
- ● Garden soil: Well-draining, fertile soil with a pH of 6.5–7.5. Amend with compost (2–3 inches mixed in) for nutrients.
- ● Trench or planting bed: Dig a 6–8-inch-deep trench, 12–18 inches wide.
- ● Space trenches 3–4 feet apart for mature plants.
- ● Organic mulch: Straw, wood chips, or shredded leaves (2–3 inches thick) to retain moisture and suppress weeds.
- ● Watering can or hose: With a gentle spray nozzle for even moisture distribution.
- ● Gloves & pruners: Heavy-duty gloves to protect hands and sharp pruners for trimming ferns in fall.
- ● Soil test kit: To check pH and nutrient levels before planting.
- ● Fertilizer: Balanced organic fertilizer (e.g., 5-5-5) or compost tea for a nutrient boost.
- ● Row covers: Lightweight fabric to protect young plants from pests or frost.
- ● Plant markers: To label trenches and track varieties.
Step-by-Step instructions for propagating asparagus plants
Asparagus crowns multiply like clockwork—here’s how to turn one plant into four strong harvesters.
Select Healthy Mature Crowns for Division
Choose established asparagus crowns that are at least three years old and show vigorous growth. Look for thick, fleshy stems with multiple 1-inch diameter shoots emerging from the center. Avoid crowns with yellowing fronds or sparse growth—they won’t divide well. I dig up entire clumps in early spring, just as new shoots begin to push through the soil but before spears emerge.
Use a sharp spade to carefully lift the crown, shaking off excess soil to reveal the network of roots and buds. The goal is to separate the crown into four equal sections, each with at least three healthy buds and a portion of the fibrous root system. If a section has fewer buds, it’ll produce weaker spears later. Discard any damaged or diseased portions immediately—they’ll spread rot to your new plantings.
Prepare New Planting Sites
Asparagus demands deep, well-draining soil with a pH between 6.5 and 7.5. Work in 2 inches of compost and a handful of bone meal into the top 12 inches of soil for each new planting spot. I space my divisions 18 inches apart in rows 4 feet apart—this gives roots room to spread without competing for nutrients. Mark the area with stakes to avoid disturbing the soil later.
Dig a 6-inch deep trench for each division. The trench should be wide enough to accommodate the crown’s root ball without bending the stems. Avoid digging holes—roots grow downward, and a trench encourages them to establish quickly. If your soil is heavy clay, mix in sand to improve drainage. Asparagus hates soggy roots, and poor drainage is the fastest way to lose a new planting.
Plant and Water for Immediate Establishment
Place each division into its trench with the buds facing upward and the roots spread evenly. Cover the roots with 2 inches of soil, leaving the top of the crown exposed. Press gently but firmly to eliminate air pockets—roots need direct contact with soil to absorb moisture. I water deeply right after planting, soaking the soil until it’s damp 6 inches down. This encourages roots to grow outward instead of circling.
Mulch the area with 2 inches of straw to retain moisture and suppress weeds. Avoid organic mulches like wood chips—they can harbor fungal diseases. Water every 3-4 days until new fronds emerge, keeping the soil consistently moist but never waterlogged. Overwatering now will rot the crown before it establishes. Once fronds reach 6 inches tall, reduce watering to once weekly unless rainfall is scarce.
Manage Growth for First-Year Success
In the first year, do not harvest any spears—let the plant focus on building roots. Cut back fronds to 2 inches above ground in late fall after they turn brown. This prevents disease and redirects energy into the crown. I mark planting spots with flags to avoid accidentally digging them up during winter cleanup. Asparagus roots are deep, and disturbing them in the first year can set growth back by months.
Fertilize lightly in early spring with a balanced 10-10-10 formula, applying 1 tablespoon per plant. Too much nitrogen now will produce lush fronds but weak roots. By the third year, your divisions will produce spears as thick and abundant as the original crown. Patience is key—rushing harvests in year one or two stunts long-term productivity. Think of it as an investment: each spear you skip now means five years of reliable harvests later.
Tips & tricks for perfect asparagus plant propagation
Transforming a single asparagus crown into four thriving plants requires precision—and these insights will help you avoid the common pitfalls that derail even the most eager gardeners.
Bud Count Matters: In Step 1, when dividing your crown into four equal sections, prioritize sections with at least three healthy buds each. I learned this the hard way after planting divisions with only two buds—those sections produced spears so thin they snapped when harvested. Each bud represents potential growth, so don't compromise on quantity. The fibrous root system attached to each section will support these buds as they develop over the first growing season.
Soil Preparation is Non-Negotiable: The instructions emphasize a 6.5-7.5 pH soil, but I can't stress enough how critical this is for asparagus health. Test your soil before planting—if it's outside this range, amend with lime (to raise pH) or sulfur (to lower it). The 2 inches of compost and bone meal called for in Step 2 provide essential phosphorus for root development, but without proper pH, your plants will struggle to absorb nutrients regardless. I've seen asparagus plants in acidic soil develop yellowing fronds despite ample fertilizer.
Trench Planting Technique: Digging trenches rather than planting in holes is a game-changer for asparagus establishment. The downward-growing roots naturally follow the trench walls, creating a more extensive root system. When planting in Step 3, make sure the trench is wide enough to accommodate the entire root ball without bending stems—this prevents stress that can set back growth. I've found that using a garden trowel to create clean trench walls gives roots the best chance to establish quickly.
Watering Discipline: The 3-4 day watering schedule in Step 3 is crucial during establishment, but timing matters just as much as frequency. Water deeply in the morning so the soil has time to dry slightly before evening—a soggy planting site is a recipe for crown rot. I've seen new plantings fail within weeks because gardeners watered in the evening, keeping roots perpetually wet. Once fronds reach 6 inches, reducing to weekly watering prevents over-saturation while still maintaining consistent moisture.
Pro Tips for Propagating Asparagus Plants
- Transforming a single asparagus crown into four thriving plants requires precision—and these insights will help you avoid the common pitfalls that derail even the most eager gardeners.
- Bud Count Matters: In Step 1, when dividing your crown into four equal sections, prioritize sections with at least three healthy buds each.
- Soil Preparation is Non-Negotiable: The instructions emphasize a 6.5-7.5 pH soil, but I can't stress enough how critical this is for asparagus health.
Frequently asked questions
Got questions about growing your asparagus patch from cuttings? Here are the answers to the most common ones—so you can get started with confidence!
Can I propagate asparagus from store-bought spears?
Unfortunately, no—store-bought asparagus is typically harvested from mature plants, not grown from seed or cuttings. For propagation, you’ll need live crowns (the thick, woody base) or healthy ferns from an established asparagus bed. If you’re buying plants, look for nursery-grown crowns labeled for propagation.
How long does it take for asparagus cuttings to establish?
Patience is key! Asparagus is a perennial crop, meaning it takes 2–3 years before you can harvest spears. The first year focuses on root establishment, and the second year yields small harvests. Full productivity (3–5 years) rewards your wait with 10–20 years of harvests!
What’s the best way to divide an existing asparagus bed?
Divide in early spring (before new shoots emerge) or fall (after ferns turn brown). Dig up a section of the crown, ensuring each piece has 3–5 healthy buds. Replant divisions 6–8 inches deep and 12–18 inches apart. Water thoroughly to reduce transplant shock.
Why are my asparagus cuttings dying after planting?
Common culprits include overwatering (roots need drainage!), poor soil (amend with compost), or pests like asparagus beetles. If leaves yellow or wilt, check for root rot or fungal issues. Mulch lightly to retain moisture and deter weeds—without smothering the crown.
Can I grow asparagus in containers?
Yes, but it’s tricky! Choose a deep container (12+ inches) with drainage holes and well-draining soil. Dwarf varieties like ‘Baby Girl’ or ‘Pacific 2000’ work best. Containers dry out faster, so water daily in hot weather. Expect slower growth and smaller harvests than in-ground plants.
Do asparagus plants need winter protection?
Asparagus is hardy to USDA Zone 3–10, but young plants benefit from mulch (3–4 inches) in winter to insulate roots. In extreme cold (<10°F), cover crowns with straw or burlap. Avoid heavy snow buildup—it can suffocate plants. Remove mulch in early spring to prevent rot.
Wrapping up and next steps
Propagating asparagus plants is a rewarding way to expand your garden and enjoy a year-round harvest of fresh, homegrown spears! 🌱 Whether you’re dividing crowns, using seeds, or experimenting with root cuttings, patience and care will pay off with lush, productive plants.
Start small—even just a few crowns can grow into a thriving patch over time.
Now that you’re ready to propagate, take the next step by marking your garden plot, prepping the soil, and planting your new crowns or seeds. Before you know it, you’ll be savoring the sweet taste of success—literally! Happy gardening! 🌿