Vegetables
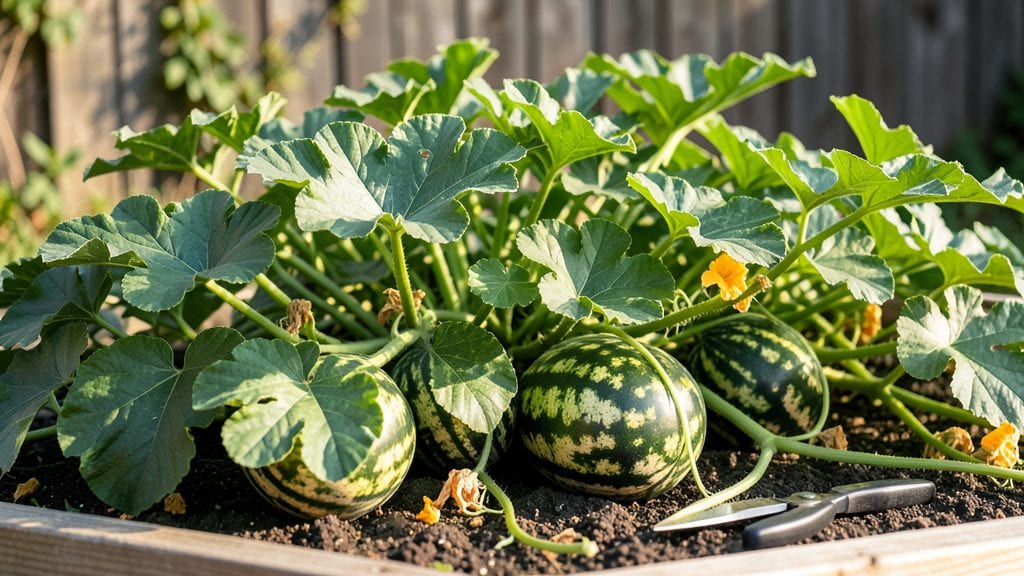
The boldest watermelon in your garden starts with a single crimson watermelon plant seed.
I’ve grown these vibrant beauties for years, and the secret to their deep red flesh and sweetness lies in the right timing, soil, and a little patience—especially when you’re aiming for three harvests across different seasons. 🌱
You’ll need rich, well-draining soil with a pH between 6.0 and 7.0, full sun for at least 8 hours a day, and consistent moisture without waterlogging.
The plants thrive in warm climates but can also be grown in shorter seasons with proper planning—think late spring, summer, or even a fall crop in mild zones. Warmth triggers those iconic striped fruits, so don’t rush planting until the soil hits at least 70°F.
By midsummer, you’ll watch those vines sprawl and flowers bloom, leading to watermelons that weigh in at 15–25 pounds each. The first harvest arrives in about 80 days, but the real magic happens when you time your plantings to stretch the season—imagine fresh slices from June through September.
The key is monitoring vine growth and fruit development, adjusting watering as they near maturity.
Even in cooler climates, you can squeeze in two seasons with early varieties or use black plastic mulch to warm the soil faster. Once you master the rhythm of these plants, you’ll never buy watermelons again—they’re the kind of harvest that turns neighbors into green-eyed friends.
Let’s get those seeds in the ground!
📚 In This Guide
- What you need
- Instructions
- Tips and common mistakes
- Wrapping up and next steps
What you need
- ● Crimson watermelon seeds: 3–5 seeds per plant (or 1–2 per pot if container-growing). Opt for Crimson Sweet or Crimson Tide varieties for vibrant red flesh.
- ● High-quality potting mix: 10–15 lbs of well-draining, organic soil (or a 50/50 blend of garden soil and compost). Avoid heavy clay.
- ● Fertilizer: Balanced starter fertilizer: 10-10-10 (1 lb per 100 sq ft) to kickstart growth.
- ● Organic compost: 2–3 cups per plant (or 1–2 lbs per 10 sq ft) for nutrients.
- ● Mulch: 2–3 inches of straw or black plastic to retain moisture and suppress weeds.
- ● Garden trowel or transplanter: For digging holes (6-inch depth) and planting seeds.
- ● Watering can or hose with a gentle spray nozzle: Watermelons need consistent moisture—aim for 1–2 inches per week.
- ○ Trellis or stakes (optional but helpful): For vining varieties (e.g., 6–8 ft tall trellis or 3 ft stakes).
- ● Pruning shears: To trim excess vines and encourage fruit development.
- ● Garden gloves: Protect your hands from thorns and soil.
- ● Sunlight: Full sun (6–8+ hours daily). Crimson watermelons are sun-lovers!
- ● Warmth: Soil temperature of 70–90°F (21–32°C). Use a soil thermometer to check.
- ● Space: Bush varieties: 3–4 ft between plants.
- ● Vining varieties: 6–8 ft between plants (or train on a trellis).
- ● Container option: At least a 5-gallon pot per plant if growing in containers (ensure drainage holes!).
- ● Test soil pH (aim for 6.0–6.8). Adjust with lime or sulfur if needed.
- ● For faster germination, soak seeds in warm water for 4–6 hours before planting.
- ● Use black plastic mulch to warm soil and speed up growth in cooler climates.
Step-by-Step instructions for growing crimson watermelon plants
Here’s how to grow bold, vine-ready plants that’ll produce those deep red, sweet watermelons you crave.
🌱 Step 1: Choose the Perfect Planting Spot
Crimson watermelons need full sun—that means at least 8-10 hours of direct sunlight daily. I always pick the warmest, sunniest part of my garden, even if it means sacrificing a shadier spot for something else. The soil should also be well-draining—watermelons hate soggy roots.
Before planting, work in 2-3 inches of compost to enrich the soil. Crimson watermelons thrive in loose, fertile ground where roots can spread easily. If your soil is heavy clay, mix in a 5-gallon bucket of coarse sand per 100 square feet to improve drainage. Test the soil pH—it should be between 6.0 and 6.8. If it’s off, add pelletized lime to raise the pH or sulfur to lower it.
🌿 Step 2: Plant Seeds or Transplants at the Right Time
Wait until after the last frost date in your area and soil temperatures reach at least 70°F. I use a soil thermometer to check—cold soil slows germination and weakens seedlings. Plant seeds 1 inch deep, spacing them 6 inches apart in rows 5-6 feet apart. This gives the vines room to sprawl without crowding.
If you’re using transplants, set them in the ground when they have 4-5 true leaves and are at least 4 inches tall. Dig a hole slightly larger than the root ball, place the plant in, and firm the soil around it. Water deeply right after planting to settle the roots. Avoid planting too early—cool nights stunt growth and delay fruiting.
💧 Step 3: Water Deeply and Mulch for Sweet Success
Watermelons need 1-2 inches of water per week, but they hate wet feet. I water deeply 2-3 times per week rather than daily shallow watering. This encourages roots to grow downward for stability and better nutrient uptake. The key is consistency—let the top 2 inches of soil dry out between waterings to prevent disease.
Spread 3-4 inches of mulch (like straw or black plastic) around the base of the plants to retain moisture and keep weeds down. Mulch also keeps fruit off the damp soil, reducing rot. Avoid piling mulch against the stems—leave a 2-inch gap to prevent rot. Crimson watermelons grow best with steady moisture, so don’t skip this step.
☀️ Step 4: Train Vines and Support Growth
Watermelon vines spread 6-10 feet, so I use trellises or raised beds to control their growth and save space. If trellising, guide the main vine up the structure and let side vines trail down—this keeps fruit off the ground and improves airflow. For ground vines, spread them out in a sunny, flat area where they can sprawl freely.
Watch for male and female flowers—female flowers have a tiny watermelon at their base. Once pollinated, these will grow into fruit. Hand-pollinate if needed by transferring pollen with a brush. Thin fruits to 1-2 per vine once they’re golf-ball sized—this ensures larger, sweeter melons. Remove any small, underdeveloped fruit to redirect the plant’s energy.
⏰ Step 5: Harvest at Peak Ripeness
Crimson watermelons typically mature in 75-90 days, but ripeness is all about color, texture, and sound. Look for a deep crimson rind (not green) and a creamy yellow spot where the melon rested on the ground. Tap it—if it sounds hollow, it’s ready. The stem should also feel dry and crisp where it meets the fruit.
Cut the melon from the vine with a sharp knife, leaving 1-2 inches of stem attached. Handle them gently—they bruise easily. Store harvested melons in a cool, dry place (around 50-55°F) for up to 2 weeks. Once cut, enjoy them fresh or freeze the flesh for smoothies. The sweeter the harvest, the more you’ll want to plant next year!
Tips & tricks for growing crimson watermelon plants
Here's what I've learned after growing these vibrant watermelons for years—these tricks will help you avoid common pitfalls and maximize your harvest.
Sunlight Strategy: The 8-10 hours of direct sunlight in Step 1 is non-negotiable, but here's the secret: if you're in a hot climate, provide afternoon shade during peak summer months (around 2-4 PM) to prevent sunburn on the leaves. I use shade cloth that lets 30% of light through during these hours. This keeps the plants healthy while still ensuring they get plenty of sunlight for fruit development.
Soil Temperature Tip: Don't be tempted to plant before the soil reaches 70°F in Step 2—cold soil will delay germination by weeks. I've seen seeds take 3-4 weeks to sprout when planted in 60°F soil, compared to just 5-7 days at 70°F. Use a soil thermometer for 3-5 days before planting to confirm consistent warmth. If your spring is unpredictable, consider using black plastic mulch a week before planting to warm the soil faster.
Watering Wisdom: The 2-3 times weekly deep watering in Step 3 works perfectly, but here's the critical detail: water in the morning so the leaves have all day to dry. Wet foliage at night creates the perfect conditions for powdery mildew, which can devastate your plants. I set my sprinkler for 30 minutes in the early morning and let the soil absorb the water completely before evening. Also, avoid wetting the leaves when possible—direct water to the base of the plant.
Harvesting Hack: For the 50-55°F storage temperature in Step 5, I've found that a root cellar or even a cool basement works better than a standard refrigerator. The high humidity in these spaces prevents the melons from drying out, while the consistent temperature maintains sweetness. If you don't have a root cellar, store them on a wire rack in your crisper drawer with a damp towel—this mimics the humidity of a root cellar environment.
Pro Tips for Crimson Watermelon Plant
- Here's what I've learned after growing these vibrant watermelons for years—these tricks will help you avoid common pitfalls and maximize your harvest.
- I use shade cloth that lets 30% of light through during these hours.
- Soil Temperature Tip: Don't be tempted to plant before the soil reaches 70°F in Step 2—cold soil will delay germination by weeks.
Frequently asked questions
Got questions about growing crimson watermelon plants? You’re not alone! Here are answers to the most common queries—from timing to troubleshooting—to help you cultivate a vibrant harvest with ease.
How long does it take for a crimson watermelon plant to bear fruit?
A crimson watermelon plant typically takes 70–90 days from seed to ripe fruit, depending on your climate and growing conditions. In warmer regions, you might see fruits ready in as little as 60 days, while cooler areas may extend the timeline. Planting in early spring (after the last frost) or late summer ensures optimal growth for a fall harvest.
Can I grow crimson watermelons in cooler climates?
Yes! Crimson watermelons thrive in USDA Zones 4–11, but cooler climates require extra care. Start seeds indoors 4–6 weeks before the last frost or use black plastic mulch to warm the soil. For short seasons, opt for smaller varieties like ‘Crimson Sweet’ or grow them in containers for mobility. A greenhouse or cold frame can also extend the growing season.
What are the most common pests or diseases for crimson watermelon plants?
Watch for cucumber beetles (they spread bacterial wilt), aphids, and powdery mildew in humid conditions. Prevent pests with row covers or neem oil sprays. For mildew, improve airflow and avoid overhead watering. If vines yellow or wilt, check for root rot—ensure well-draining soil and avoid overwatering.
When is the best time to harvest crimson watermelons?
Harvest when the tendril near the stem turns brown and the watermelon sounds hollow when tapped. Crimson varieties often have a deep red rind when ripe. Use a knife to cut (don’t twist!) to avoid damaging the vine. Store in a cool, dry place (50–55°F) for up to 2 weeks, or refrigerate for longer shelf life.
What can I do if my crimson watermelon flowers but no fruit sets?
This usually happens due to temperature extremes (below 70°F or above 95°F), poor pollination, or nutrient deficiencies. Hand-pollinate with a small brush, ensure consistent watering, and fertilize with low-nitrogen, high-potassium feed. If soil is too cold, use row covers to protect blooms. Female flowers (with tiny watermelons at the base) need warmth to develop.
Wrapping up and next steps
Growing a crimson watermelon plant is a rewarding journey that blends patience, care, and a dash of sunshine!
With the right soil, warm climate, and a few strategic seasons under your belt, you’ll soon be savoring juicy, vibrant fruit straight from your garden. Don’t stop here—experiment with varieties, share tips with fellow gardeners, and celebrate each harvest like the sweet victory it is! 🌱🍉
Ready to take the next step? Start small—plant a few seeds this season—and watch your confidence (and watermelon patch!) grow. Happy gardening! 🌿