Vegetables
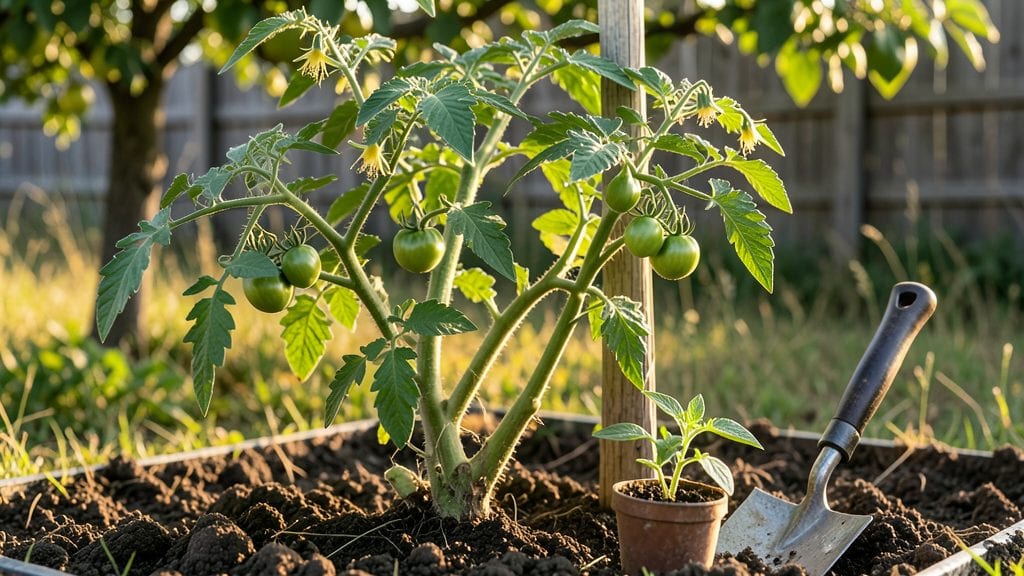
Trench planting tomatoes saves space while boosting yields—my 20-square-foot trench now produces more fruit than my old 4-by-8-foot raised bed. The method works by burying seedlings deep in a narrow ditch, encouraging roots to spread horizontally where soil stays cooler and moister.
This isn't just clever—it's a game-changer for small gardens or areas where every inch counts.
You’ll need a shovel, compost, mulch, and healthy seedlings ready for transplanting. The trench itself should be about 12 inches wide and 12-18 inches deep, filled with a mix of garden soil and compost.
Plant seedlings every 18-24 inches along the trench, burying stems up to their first leaves to encourage root growth. Water thoroughly before covering with mulch to retain moisture and regulate soil temperature.
Once planted, keep soil consistently moist but not soggy—aim for 1-1.5 inches of water per week. The trench’s design naturally conserves water, reducing evaporation while keeping roots cool.
By midsummer, you’ll see vigorous vines sprawling underground, producing fruit that ripens faster and lasts longer. The payoff? More tomatoes with less effort and space.
This method works in most climates but thrives in hotter regions where soil dries out quickly. For cooler areas, start trenches slightly earlier to warm the soil faster. Whether you’re working with limited space or just curious about unconventional techniques, trench planting delivers reliable results—even for beginners.
📚 In This Guide
- What you need
- Instructions
- Tips and common mistakes
- Wrapping up and next steps
What you need
- ● Tomato seedlings or seeds: 2–4 plants per trench (choose disease-resistant varieties like Roma or Cherry for best results).
- ● Garden trench: 12–18 inches deep, 12–18 inches wide (adjust for soil type—sandy soil may need deeper trenches).
- ● Compost or well-aged manure: 2–3 gallons per trench (rich in nutrients for root growth).
- ● Organic mulch: Straw, grass clippings, or leaves (1–2 inches thick to retain moisture).
- ● Garden fork or trowel: For digging trenches and mixing soil.
- ● Watering can or hose with gentle nozzle: For consistent moisture (avoid overwatering!).
- ○ Support system (optional but recommended): Stakes (6–8 feet tall) or cages (for indeterminate varieties).
- ● Twine or plant ties (if using stakes).
- ● Slow-release fertilizer: 1–2 tablespoons per plant (e.g., 10-10-10 or organic options like fish emulsion).
- ● Epsom salt: 1 tablespoon dissolved in water (for magnesium boost, especially for leafy growth).
- ● Row cover or shade cloth: To protect seedlings from pests or harsh sun.
- ● Soil pH tester: Ideal pH for tomatoes is 6.0–6.8 (amend soil if needed with lime or sulfur).
Step-by-step instructions for trench planting tomatoes
This method maximizes root spread and water retention while saving space—ideal for small gardens or urban plots.
Choose the Right Location and Prepare the Soil
Select a spot with at least 6-8 hours of direct sunlight daily, sheltered from strong winds. Tomatoes thrive in well-draining soil with a pH between 6.0 and 6.8. If your soil is heavy clay or sand, amend it with 2-3 inches of compost mixed into the top 12 inches of soil. I like to test soil moisture first—dig a small hole and check if it drains within 30 minutes. If water pools, add organic matter to improve drainage.
Mark a trench 18-24 inches wide and 12-18 inches deep, depending on your soil type. Looser soil needs less depth, while clay benefits from deeper trenches to encourage root expansion. Use a garden fork or broadfork to loosen the soil along the trench without turning it over. This preserves soil structure while creating air pockets for roots to spread.
Plant Tomato Seedlings with Deep Root Encouragement
Dig a hole at the center of the trench deep enough to bury two-thirds of the tomato seedling’s stem, leaving only the top 2-3 sets of leaves above soil level. This buried stem will develop new roots, creating a stronger, more resilient plant. Gently loosen the roots of the seedling before placing it in the hole to encourage outward growth.
Fill the hole with soil, pressing lightly to remove air pockets but not compacting too firmly. Water the seedling deeply until the soil around the base is moist to a depth of 6 inches. Avoid wetting the leaves to prevent disease. I like to use a soaker hose for this step—it delivers water directly to the roots without disturbing the soil.
Build the Trench Walls and Mulch Strategically
Construct the trench walls by piling soil or a mix of soil and compost along both sides of the trench, creating a 12-18 inch high ridge. This ridge will hold water and nutrients near the roots while keeping the plant stable. Leave a 6-8 inch gap between the ridge and the stem to prevent rot. Press the soil firmly but not tightly to maintain structure.
Cover the trench with 3-4 inches of organic mulch, such as straw or shredded leaves, leaving a 2-inch gap around the stem to prevent moisture buildup. Mulch conserves water, suppresses weeds, and regulates soil temperature. Replenish mulch as it breaks down, aiming to maintain the 3-inch layer throughout the growing season. This method keeps roots cool and moist, even during hot spells.
Water and Maintain for Optimal Growth
Water the trench deeply once a week, aiming for 1-1.5 gallons per plant depending on your climate. Check soil moisture by inserting your finger 2 inches below the surface—water when it feels dry. Avoid shallow watering, which encourages surface roots and weakens the plant. Instead, focus on slow, deep watering to encourage roots to grow downward and outward.
As the plant grows, add more soil or compost to the trench walls to maintain height and support. Prune suckers (the small shoots that form in the joint between the stem and branches) to direct energy toward fruit production. Watch for yellowing leaves, which may indicate overwatering or nutrient deficiency. Adjust care accordingly—tomatoes are resilient but need balance.
Harvest and Extend the Season
Harvest tomatoes when they reach full color and slightly soften to the touch, usually 60-85 days after transplanting, depending on the variety. Pick fruits regularly to encourage more production. If frost threatens, cover the trench with row covers or black plastic to extend the season. This method protects roots while allowing light and air to reach the plant.
After harvest, remove plant debris to prevent disease, but leave the trench intact for next season. The improved soil structure and organic matter will benefit future plantings. I’ve used this method for years—it’s a game-changer for space-saving and higher yields, especially in urban or small gardens.
Tips & tricks for perfect trench planting tomatoes
This underground method transforms how you grow tomatoes by maximizing root development and water efficiency—here’s how to optimize every step for maximum yield.
Soil Preparation Secret: Before amending your soil with 2-3 inches of compost, conduct a simple drainage test by digging a small hole and filling it with water. If it drains within 30 minutes, your soil is ready. If not, add more organic matter—this prevents root rot while ensuring nutrients are available. I’ve seen clay-heavy soils transform completely after just one season of this preparation.
Planting Technique: When burying two-thirds of the tomato seedling’s stem in Step 2, focus on creating a slight mound of soil around the base rather than packing it down. This encourages roots to spread outward into the trench walls rather than growing upward. The top 2-3 sets of leaves should remain above soil level to maintain photosynthesis while the buried stem develops new roots.
Watering Strategy: The once-weekly deep watering in Step 4 is critical, but timing matters just as much. Water in the early morning to allow foliage to dry completely before evening, reducing disease risk. Use the 2-inch moisture check as your guide—if the soil feels dry at that depth, it’s time to water again. This method prevents shallow root systems that lead to floppy plants.
Mulch Maintenance: While the 3-4 inches of organic mulch is ideal, don’t let it become a barrier. Replenish the mulch layer as it decomposes to maintain that 3-inch depth throughout the season. I’ve found that adding a thin layer of straw over composted leaves creates the perfect balance—keeping roots cool while preventing compaction.
Pro Tips for Trench Planting Tomatoes
- This underground method transforms how you grow tomatoes by maximizing root development and water efficiency—here’s how to optimize every step for maximum yield.
- Soil Preparation Secret: Before amending your soil with 2-3 inches of compost, conduct a simple drainage test by digging a small hole and filling it with water.
- Planting Technique: When burying two-thirds of the tomato seedling’s stem in Step 2, focus on creating a slight mound of soil around the base rather than packing it down.
Frequently asked questions
Got questions about trench planting tomatoes?
Here are some of the most common ones—plus quick, actionable answers to help you grow like a pro!
What’s the best time to trench plant tomatoes?
Plant your tomatoes in early spring, about 2–4 weeks before your last frost date. This gives roots time to establish before warmer weather arrives. For fall harvests, plant in late summer (6–8 weeks before first frost). Soil should be at least 60°F (15°C)—cooler temps slow growth.
How long does it take for tomatoes to grow after trench planting?
Expect 60–85 days from planting to harvest, depending on the variety. Trench planting can speed this up by improving root access to moisture and nutrients. Early-season varieties (like ‘Early Girl’) may fruit in 55–60 days, while heirlooms (like ‘Brandywine’) take longer. Monitor soil moisture—consistent watering is key!
Can I trench plant tomatoes in containers or raised beds?
Yes! Trench planting works in raised beds (dig trenches 12–18" deep) or large containers (minimum 18" deep). For pots, use a mix of compost and soil to mimic trench benefits. Just ensure drainage holes are present to prevent root rot. Pro tip: Add worm castings to the trench mix for extra nutrients!
What if my trench-planted tomatoes get pests or diseases?
Common issues include blossom end rot (lack of calcium) or hornworms. Fix rot by adding crushed eggshells or lime to the soil. For pests, handpick hornworms or use neem oil. Mulch with straw to deter soil-borne diseases. Watch for: yellow leaves (nutrient deficiency) or wilting (underwatering).
Do trench-planted tomatoes taste different?
Not necessarily! The flavor depends more on sunlight, water, and variety than planting method. However, trench planting can improve yield and size by reducing stress. For sweeter tomatoes, harvest when fully colored and slightly soft to the touch. Bonus: Try ‘Sungold’ or ‘Cherry Tomatoes’—they thrive in trenches and burst with flavor!
Wrapping up and next steps
Trench planting tomatoes is your secret weapon for maximizing space, boosting yields, and enjoying healthier plants—all while keeping your garden tidy! 🌱 Whether you're a backyard gardener with limited room or a curious newbie, this method proves that small spaces can grow big rewards.
Ready to dig in? Start by sketching your trench layout, gather your supplies, and plant your first row—your future tomato harvest is just a shovel’s depth away!
🌟 Next Steps:
- Mark your trenches with stakes or string to plan your layout.
- Grab your tomatoes (or seeds!) and prep the soil—your garden’s about to level up!
- Share your progress with fellow gardeners or tag us in your trench-planting adventures!