Tools
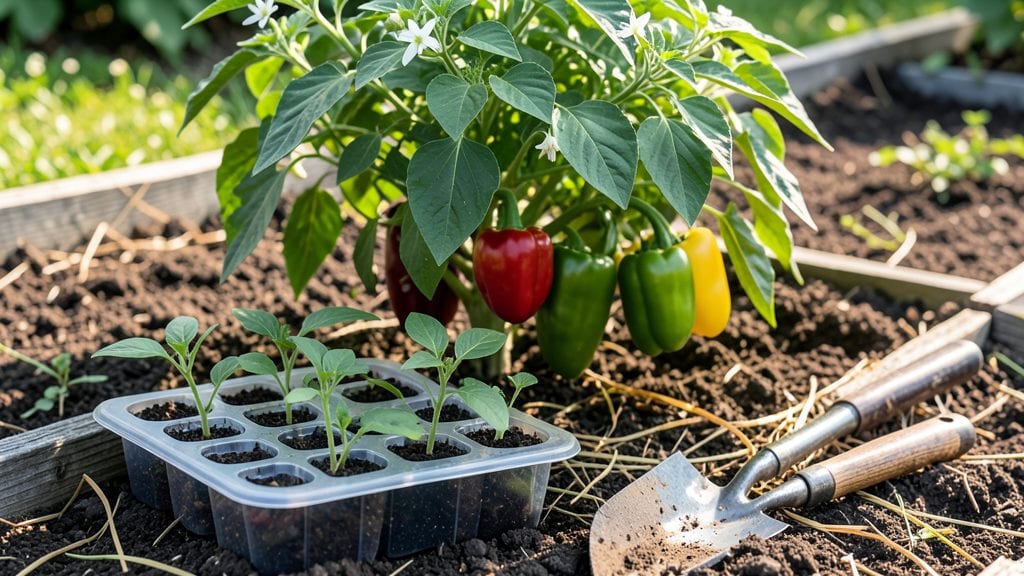
Planting peppers in your garden transforms a simple patch of soil into a spice cabinet you can walk to any time of day. 🌱 I’ve learned the hard way—peppers need more than just sunlight to thrive, and skipping the right prep means wilted seedlings or bitter fruit.
The secret lies in warm soil, proper spacing, and a little patience during those first few weeks.
You’ll need a sunny spot that gets at least 6-8 hours of direct light daily, well-draining soil mixed with compost, and starter plants (or seeds) ready to go. Most gardeners overlook soil temperature—peppers won’t germinate well in cold earth, so wait until the ground reaches at least 60°F.
Plant seeds ½ inch deep or set transplants 12-18 inches apart to avoid crowding, which leads to disease.
Once planted, keep the soil consistently moist but never soggy—peppers hate wet feet. Mulch around the base to lock in moisture and deter weeds, then watch for those first true leaves.
That’s when the real magic starts: within 60-90 days, you’ll have peppers ready to harvest, provided you’ve avoided transplant shock and pests along the way.
This method works for bell peppers, jalapeños, and even habaneros, though heat-loving varieties need extra warmth. Troubleshoot poor germination by testing seed viability or adjusting soil temperature. With these steps, you’ll go from empty beds to a harvest that puts store-bought peppers to shame.
📚 In This Guide
- What you need
- Instructions
- Tips and common mistakes
- Wrapping up and next steps
What you need
- ● Pepper seeds or seedlings: Choose disease-resistant varieties (e.g., Bell, Jalapeño, Cayenne, or Habanero). Buy 5–10 seeds per variety or 3–6 seedlings for a starter garden.
- ● Well-draining potting mix: 5–10 gallons (look for a blend labeled for vegetables or peppers, or mix 60% compost, 30% coconut coir, and 10% perlite).
- ● Containers or garden bed: Containers: 5–10 gallon pots (one per plant) with drainage holes.
- ● Garden bed: A sunny spot with 6+ hours of direct light, 12–18 inches of loose soil, and good drainage.
- ● Fertilizer: A balanced organic fertilizer (10-10-10 or 5-5-5) or compost (apply at planting and every 4–6 weeks).
- ● Mulch: 2–3 inches of straw or shredded leaves to retain moisture and suppress weeds.
- ● Hand trowel (for transplanting seedlings).
- ● Garden gloves (to protect your hands from thorns and soil).
- ● Watering can or hose with a gentle spray nozzle (peppers hate soggy roots!).
- ● Pruning shears (for trimming dead leaves or shaping plants).
- ○ Stakes or cages (optional but helpful): 5–6 ft tall to support heavy pepper plants.
- ○ pH testing kit (optional): Peppers thrive in soil with a pH of 6.0–7.0.
- ○ Row cover or shade cloth (optional): For early planting or hot climates (30–50% shade).
- ● Warm soil: Wait until soil temps reach 60°F+ (use a soil thermometer if unsure).
- ● Last frost date: Plant 2–3 weeks after your area’s last frost (peppers are frost-sensitive!).
- ● Sunny spot: 6+ hours of direct sunlight daily (more = sweeter peppers!).
Step-by-Step instructions for planting peppers in your garden
Here’s how to turn your sunny patch into a pepper powerhouse—no guesswork, just proven results.
🌱 Step 1: Prepare the Soil for Optimal Growth
Peppers thrive in well-draining, nutrient-rich soil with a pH between 6.0 and 6.8. Start by loosening the top 12 inches of soil with a garden fork or tiller, breaking up any compacted layers. This ensures roots spread easily and water penetrates deeply. If your soil is heavy clay, mix in 2-3 inches of compost (from your materials list) to improve drainage and fertility.
Work the compost into the top 6 inches of soil, avoiding deep incorporation—peppers prefer loose, aerated soil near the surface. A quick check: squeeze a handful of soil—it should crumble easily when dry but hold light moisture without dripping. If it sticks to your fingers or feels gummy, add more compost or sand.
☀️ Step 2: Choose the Perfect Sunny Spot
Peppers demand full sun—at least 6-8 hours daily—so scout your garden for the warmest, most sheltered location. Avoid low spots where cold air pools, as peppers wilt easily in chilly conditions. A south-facing bed gets the most consistent sunlight, but west-facing spots work too if they’re protected from afternoon winds.
If your garden lacks a naturally sunny patch, consider raised beds—they warm up faster in spring and give you control over soil conditions. Test your spot by placing a thermometer in the soil at planting depth for a week. Ideal soil temps for transplanting are above 60°F, but 70°F or warmer speeds up growth dramatically.
🪴 Step 3: Plant Transplants at the Right Depth and Spacing
Peppers hate disturbed roots, so handle transplants gently when moving them from pots to the ground. Dig holes slightly deeper than the pot—this encourages root growth downward rather than circling at the soil line. Place each plant so the top of the root ball sits just below soil level, then backfill with loose soil, pressing lightly to eliminate air pockets.
Space plants 18-24 inches apart in rows 24-36 inches apart to allow airflow and prevent diseases like powdery mildew. If you’re planting 4 pepper varieties (as your servings suggest), stagger them in a grid pattern for even sunlight exposure. Water deeply after planting to settle the soil and remove any air gaps around the roots.
💧 Step 4: Water Deeply and Mulch for Retention
Peppers despise soggy roots but need consistent moisture—water deeply once a week (or more in extreme heat) until the top 2 inches of soil feel dry. Use a soaker hose or drip irrigation to deliver water at the base, avoiding wetting leaves to reduce fungal risks. Early morning watering (before 10 AM) minimizes evaporation and gives foliage time to dry.
Spread 2-3 inches of mulch (like straw or shredded leaves) around each plant, keeping it 2 inches away from stems to prevent rot. Mulch locks in moisture, suppresses weeds, and keeps soil temps stable—critical for peppers, which bolt (produce flowers prematurely) in heat stress. Replenish mulch as it breaks down, especially after heavy rains.
✂️ Step 5: Support and Prune for Maximum Yield
As peppers grow, they may need staking or caging—especially taller varieties like jalapeños or bell peppers. Install supports at planting time to avoid disturbing roots later. Prune suckers (the small shoots forming in the leaf axils) to direct energy into fruit production. Remove any leaves touching the soil to improve airflow and reduce disease risk.
Watch for first flowers (small white or yellow blooms) appearing 6-8 weeks after transplanting. These will develop into peppers, but if your plants seem stressed (yellowing leaves, stunted growth), they may need a balanced fertilizer (like 10-10-10) applied lightly to the soil. Harvest peppers when they reach 70-80% of their mature size for peak flavor—don’t wait for full ripeness if you’re in a short season.
Tips & tricks for perfect pepper planting
A few strategic moves will turn your sunny patch into a pepper-producing powerhouse—here's what I've learned from years of trial and error.
The Soil Test Secret: Before amending your soil, do a simple pH test using a kit from your garden center. Peppers need that 6.0-6.8 pH range—if your soil tests lower, add dolomitic lime (follow package instructions) and retest in 2-3 months. I've seen plants struggle in slightly acidic soil even when all other conditions were perfect. The 12-inch deep loosening in Step 1 is crucial because pepper roots grow deep to access nutrients and water during dry spells. Don't rush this step—take your time breaking up compacted layers.
Sunny Spot Strategy: That 6-8 hours of full sun requirement isn't negotiable, but here's the pro move: prioritize west-facing beds in hot climates. Morning sun builds heat, but afternoon sun can scorch leaves. If you're working with limited space, consider vertical gardening with trellises for pepper varieties that naturally grow upward. For the soil temperature check in Step 2, use a minimum-maximum thermometer—it'll show you the daily temperature swings that affect root development. Aim for consistent 70°F+ during the day for optimal transplanting conditions.
Transplanting Technique: The "slightly deeper than the pot" planting depth in Step 3 is a game-changer for establishing strong root systems. When removing transplants from pots, gently squeeze the sides to encourage roots to spread outward before planting. For the 18-24 inch spacing, think about your pepper varieties—taller types like bell peppers can handle the full range, while bushier varieties like jalapeños do best at the closer end. I've found that staggering plants in a grid pattern (as mentioned) creates a natural windbreak effect that reduces stress on individual plants.
Watering Wisdom: That "water deeply once a week" guideline in Step 4 assumes average conditions—adjust for your climate. In extreme heat, you might need to water every 2-3 days, while cooler regions can stretch to 10 days between waterings. The key is always checking that top 2 inches of soil. For mulching, I recommend straw over shredded leaves because it breaks down more slowly and maintains better moisture retention. Refresh your mulch layer every 4-6 weeks to maintain that 2-3 inch thickness—it makes all the difference in heat retention and weed suppression.
Pro Tips for Planting Peppers In Garden
- A few strategic moves will turn your sunny patch into a pepper-producing powerhouse—here's what I've learned from years of trial and error.
- The Soil Test Secret: Before amending your soil, do a simple pH test using a kit from your garden center.
- Sunny Spot Strategy: That 6-8 hours of full sun requirement isn't negotiable, but here's the pro move: prioritize west-facing beds in hot climates.
Frequently asked questions
Got questions about growing peppers? You’re not alone! Here are answers to the most common queries to help you grow a thriving garden.
When is the best time to plant peppers outdoors?
Peppers thrive in warm soil—wait until after the last frost when nighttime temps stay above 50°F (10°C). For cooler climates, start seeds indoors 8–10 weeks before the last frost, then transplant seedlings after they’ve hardened off. Pro tip: Use row covers if early planting is unavoidable!
How long does it take for pepper plants to produce fruit?
Most pepper varieties take 60–90 days from transplanting to harvest, but hot peppers (like jalapeños) may mature faster (45–60 days). Patience is key—peppers need consistent warmth and sunlight to set fruit. Check seed packets for exact days-to-maturity!
What are the most common pepper plant pests, and how do I prevent them?
Watch for aphids, spider mites, and hornworms. Use neem oil or insecticidal soap for soft-bodied pests, and handpick hornworms (they’re sneaky!). Encourage beneficial insects like ladybugs by planting basil or marigolds nearby.
Can I grow peppers in containers? What size pot do I need?
Peppers do well in containers as long as the pot is at least 5 gallons for medium varieties (like bell peppers) or 3 gallons for smaller types (like chili peppers). Ensure pots have drainage holes and use a lightweight potting mix. Place containers in full sun (6+ hours/day) for best results.
What can I plant alongside peppers to improve growth?
Peppers love companions like basil, onions, spinach, and tomatoes (which repel pests). Avoid planting near fennel or brassicas (like broccoli), as they stunt pepper growth. Interplanting with herbs also deters pests naturally!
Wrapping up and next steps
Growing peppers in your garden is a rewarding adventure that brings bold flavors and vibrant colors to your table! 🌱 With the right sunny spot, quality seeds, and a little patience, you’ll soon be harvesting peppers to spice up everything from salsas to stir-fries. Start small, experiment with varieties, and don’t forget to celebrate those first homegrown peppers—you’ve earned it!
Ready to take the next step? Sketch a simple planting plan based on your garden’s layout, or dive into our guide on pepper care to keep your plants thriving all season. Happy gardening—your kitchen (and taste buds) will thank you! 🌶️