Orchid Care
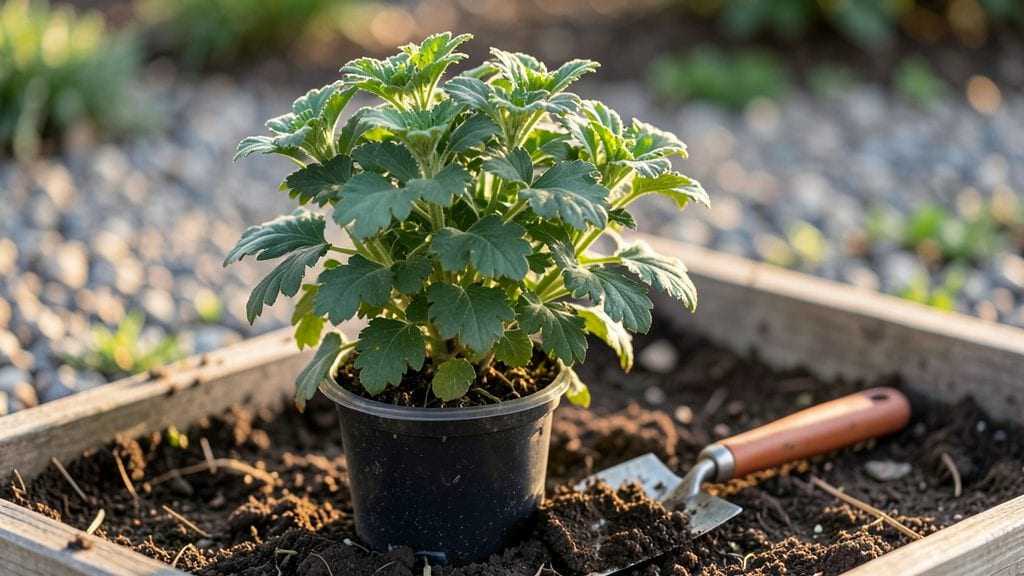
Planting chrysanthemums outdoors gives you bold, long-lasting blooms that thrive with almost no fuss—once you get the timing and spot right. I’ve grown them for years, and the secret isn’t complicated: plant them in late summer or early fall, when the soil’s still warm but nights are cooling.
That timing lets the roots establish before winter, so they burst into color the following spring and fall.
Pick a spot with at least 6 hours of sunlight daily—morning sun and afternoon shade works best in hot climates—and make sure the soil drains well. Chrysanthemums hate soggy feet, so amend heavy clay with compost or sand if needed.
Space plants 18–24 inches apart to give them room to spread, and dig holes just deep enough to cover the root ball without burying the crown too deep.
After planting, water deeply to settle the soil, then keep it evenly moist but not soggy for the first few weeks. A 2-inch layer of mulch helps retain moisture and keeps weeds down.
Once established, these plants are drought-tolerant, but consistent watering in dry spells keeps blooms lush. The payoff? Months of color with almost no maintenance—just deadhead spent blooms to encourage more flowers.
Works for USDA zones 3–11, though timing shifts slightly in warmer climates. In Zone 10, plant in early fall to avoid summer heat stress. Whether you’re adding them to borders, containers, or mass plantings, they’re the easiest way to extend your garden’s season with minimal effort.
📚 In This Guide
- What you need
- Instructions
- Tips and common mistakes
- Wrapping up and next steps
What you need
- ● Chrysanthemum plants: Choose hardy varieties (e.g., ‘Bonanza,’ ‘Mammoth’) for outdoor planting. Buy 3–6 plants per section, depending on desired coverage.
- ● High-quality potting soil or garden soil: Use 1–2 cubic yards for in-ground planting or 5–10 gallons per container if potted.
- ● Compost or organic fertilizer: Mix in 1–2 cups per square foot of balanced 10-10-10 fertilizer or slow-release granules (like Osmocote).
- ● Mulch: 2–3 inches of pine bark, straw, or shredded leaves to retain moisture and regulate soil temperature.
- ● Garden trowel or shovel: For digging holes 12–18 inches deep and wide.
- ● Garden fork or pruning shears: To loosen soil and trim dead foliage.
- ● Watering can or hose with a gentle spray nozzle: Chrysanthemums need 1–1.5 inches of water per week.
- ● Gloves and knee pads: For comfort during planting.
- ● Slow-release fertilizer spikes: For low-maintenance nutrient delivery.
- ● Plant stakes or cages: To support tall varieties (e.g., ‘Dynasity’).
- ● Soil pH test kit: Chrysanthemums prefer slightly acidic to neutral soil (pH 6.0–7.0).
- ● Drip irrigation system: For automated watering in dry climates.
Step-by-step instructions for planting chrysanthemums outdoors
Here’s how to establish hardy chrysanthemums that thrive year after year with vibrant blooms and minimal fuss.
Choose the Right Location and Prepare the Soil
Chrysanthemums demand full sun—at least 6-8 hours of direct sunlight daily—to produce their signature abundant blooms. I always scout the site in late afternoon when shadows are longest to ensure you’re picking the sunniest spot available. Avoid low-lying areas where cold air settles, as these plants are frost-sensitive once established.
Test your soil’s drainage by digging a 6-inch deep hole and filling it with water. If it drains within 30 minutes, your soil is suitable. Amend heavy clay with 2-3 inches of compost mixed into the top 12 inches of soil. Chrysanthemums prefer slightly acidic to neutral soil (pH 6.0-7.0), so if your soil tests higher, work in 2 pounds of sulfur per 100 square feet and retest in 2-3 months.
Dig Holes and Plant at the Correct Depth
Dig holes twice as wide as the root ball but only as deep as the container’s base. Chrysanthemums resent being buried too deep, which can cause stem rot. Gently remove the plant from its container and loosen any circling roots with your fingers—this encourages outward growth rather than a tangled mass.
Place the plant in the hole so the top of the root ball sits level with the surrounding soil. Press the backfill soil firmly around the roots to eliminate air pockets, then water deeply to settle everything. I always add 1 tablespoon of balanced 10-10-10 fertilizer to the backfill for an immediate nutrient boost without burning tender roots.
Space Plants Properly for Airflow and Sunlight
Space chrysanthemums 18-24 inches apart in rows 24-30 inches apart to allow for mature growth and prevent fungal diseases. Crowding leads to poor airflow, which traps moisture and invites powdery mildew. If you’re planting in a border, stagger plants in a herringbone pattern for a fuller, more natural look.
After planting, water again to a depth of 6 inches, checking that moisture reaches the root zone. Mulch with 2-3 inches of shredded bark or straw, keeping it 2 inches away from the stems to prevent rot. This conserves moisture, regulates soil temperature, and suppresses weeds—three problems chrysanthemums hate.
Water and Fertilize for Continuous Blooms
Keep the soil evenly moist but never soggy during the first 4-6 weeks to help roots establish. After that, water deeply once a week, increasing to twice weekly during hot, dry spells. You’ll know you’re watering correctly when the top 2 inches of soil feel dry to the touch—chrysanthemums wilt dramatically if thirsty but bounce back quickly once rehydrated.
Feed with a low-nitrogen, high-phosphorus fertilizer (like 5-10-10) every 4-6 weeks starting when new growth appears in spring. Stop fertilizing 6-8 weeks before your first frost to encourage hardiness. Deadhead spent blooms weekly by snipping stems just above a set of leaves—this redirects energy to new flowers and prolongs the blooming season.
Prune and Winterize for Year-Round Success
In late fall, cut back stems to 4-6 inches above the ground once the first hard frost blackens the foliage. This prevents disease overwintering in dead stems and reduces the plant’s energy demands. Leave the lowest set of leaves intact—they protect the crown from freezing temperatures.
Mulch heavily (4-6 inches) with straw or leaves after the ground freezes to insulate roots. In spring, remove the mulch when daytime temperatures consistently reach 50°F, then prune again to just above a set of buds to encourage bushy, vigorous new growth. This two-step pruning keeps chrysanthemums compact, disease-free, and ready to bloom year after year.
Tips & tricks for perfect chrysanthemum planting
These essential strategies will help you establish thriving chrysanthemums that reward you with vibrant blooms season after season.
Location and Sunlight Precision: The 6-8 hours of full sun requirement is non-negotiable for chrysanthemums, but timing matters just as much. I've found that planting in late afternoon helps you accurately gauge sunlight exposure by observing shadow patterns. If your garden has afternoon shade from trees or structures, consider placing chrysanthemums near the north or east sides of buildings where they'll receive maximum morning sun—the critical period for photosynthesis and bloom production.
Soil Preparation Technique: When testing soil drainage with that 6-inch hole, I recommend using a clear tube or straight-sided container to measure water absorption more precisely. For heavy clay soils, don't just add compost—work in a mix of 60% compost and 40% coarse sand to improve drainage while retaining moisture. The pH adjustment with sulfur is particularly important: test your soil first, as some garden soils already fall within the ideal 6.0-7.0 range and don't need modification.
Planting Depth and Root Care: The key to proper planting depth lies in understanding the root ball's natural shape. When you remove the plant from its container, gently squeeze the sides to encourage roots to spread outward. This prevents that classic "pot-bound" look where roots circle tightly. After planting, I always do a "firmness test"—press your thumb into the backfilled soil around the roots. If it feels like packing sand at the beach, you've achieved the right compaction without being too dense.
Seasonal Timing for Winterization: The 50°F threshold for removing spring mulch is your signal that soil temperatures are warming consistently. I've learned that in colder climates, waiting until daytime temperatures reach 55°F provides even better protection against late frosts. For the fall pruning, use sharp pruners to make clean cuts at the 4-6 inch mark—this prevents ragged edges that can harbor fungal spores over winter.
Pro Tips for Planting Chrysanthemums Outdoors
- These essential strategies will help you establish thriving chrysanthemums that reward you with vibrant blooms season after season.
- Location and Sunlight Precision: The 6-8 hours of full sun requirement is non-negotiable for chrysanthemums, but timing matters just as much.
- Soil Preparation Technique: When testing soil drainage with that 6-inch hole, I recommend using a clear tube or straight-sided container to measure water absorption more precisely.
Frequently asked questions
Got questions about bringing those vibrant chrysanthemums into your outdoor space? You’re not alone! Here are answers to the most common queries to help you grow confidently—no green thumb required.
When is the best time to plant chrysanthemums outdoors?
For most climates, spring (after the last frost) or early fall (4–6 weeks before the first frost) are ideal. This gives roots time to establish before extreme weather. In warm zones (USDA 8–10), you can plant year-round, but avoid peak summer heat.
Can I plant chrysanthemums in winter?
In cold climates (USDA 5–7), wait until spring. Chrysanthemums are hardy but struggle with frozen soil. If you’re in a mild zone, plant in late fall for winter blooms—but protect them with mulch. Avoid winter planting in frost-prone areas!
How do I keep pests and diseases away from my chrysanthemums?
Prevent issues with proper spacing (18–24 inches apart) and good airflow. Watch for aphids, spider mites, or powdery mildew—spray with neem oil or insecticidal soap if needed. Remove dead leaves to reduce fungal risks, and avoid overhead watering.
What if my chrysanthemums aren’t blooming?
Blooms often skip if plants get too much nitrogen (use a low-N, high-P fertilizer like 5-10-10) or lack sunlight (6+ hours/day). Pinch back stems in early summer to encourage bushier growth. If they’re leggy, they may need more light or less water.
Are there chrysanthemum varieties that thrive in containers?
Dwarf varieties
like ‘Little Princess’ or ‘Bonanza’ (12–18 inches tall) do great in pots. Use well-draining soil and a container at least 12 inches deep. Just remember: container plants dry out faster—water consistently and fertilize every 2–3 weeks in growing season.
Wrapping up and next steps
Planting chrysanthemums outdoors is a rewarding way to add vibrant color and texture to your garden with minimal effort! 🌸 With the right soil, sunlight, and care, these hardy blooms will thrive year after year—even in cooler climates.
Whether you're a beginner or a seasoned gardener, their resilience and beauty make them a perfect choice for low-maintenance landscaping.
Now that you’re ready to plant, take the next step—grab your gloves, pick your favorite varieties, and let your garden bloom with confidence! 🌱 Happy planting!