Propagation
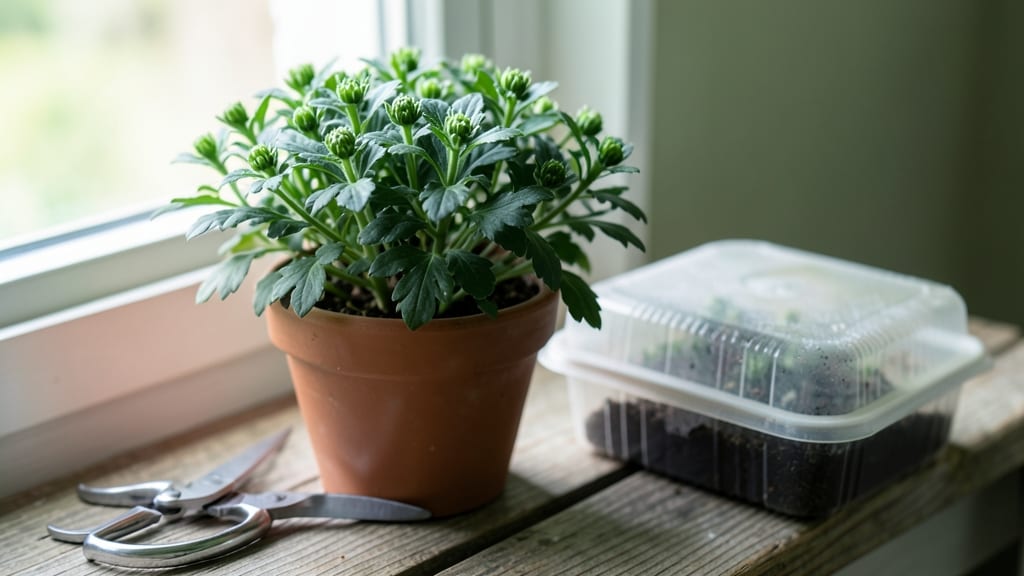
Propagating chrysanthemums from stem cuttings lets you multiply your favorite blooms without spending a dime. 🌿 I’ve turned one stunning plant into a dozen over the years, and the secret is timing—late summer or early fall, when new growth is strong but hasn’t hardened off yet.
The best part? These cuttings root easily in water or soil, giving you a head start for next season’s garden.
You’ll need sharp scissors, rooting hormone (optional but helpful), small pots, and a mix of perlite and peat moss for drainage. The whole process takes about 30 minutes to prep and 4-6 weeks to root, but the payoff is worth it—vibrant blooms that keep coming back year after year.
Even if you’ve never propagated before, chrysanthemums are one of the most forgiving plants to try.
Once rooted, your new chrysanthemums will reward you with bold, long-lasting flowers in shades of pink, purple, and white. The key is keeping them in bright, indirect light and watering just enough to keep the soil moist—not soggy.
By late spring, you’ll have lush, bushy plants ready to fill your garden with color.
This method works for both indoor and outdoor chrysanthemums, and you can even share cuttings with friends. The only real challenge? Patience—rooting takes time, but the results are undeniably satisfying. Let’s get those cuttings growing!
📚 In This Guide
- What you need
- Instructions
- Tips and common mistakes
- Wrapping up and next steps
What you need
- ● Healthy chrysanthemum plants: Choose non-flowering stems (4–6 inches long) from mature, disease-free plants.
- ● Sharp pruning shears or clean knife: Sterilize with rubbing alcohol to prevent infection.
- ○ Rooting hormone (optional but recommended): A powder or gel to boost root growth (e.g., Rootone).
- ● Well-draining potting mix: A blend of perlite, peat moss, or coconut coir (sterilized).
- ● Small pots or propagation trays: 3–4 inch pots with drainage holes (or a tray with cells).
- ● Plastic wrap or humidity dome: To retain moisture while roots establish (clear plastic bags work too!).
- ● Spray bottle: For gentle watering to avoid disturbing cuttings.
- ● Grow lights or sunny windowsill: Bright, indirect light (6–8 hours/day) for best results.
- ● Heat mat: Speeds up rooting in cooler climates (70–75°F ideal).
- ● Fungicide: A preventative spray (e.g., Neem oil) to guard against rot.
- ● Label markers: To track varieties and planting dates.
- ● Misting system: Automates humidity control for fuss-free propagation.
Step-by-Step instructions for propagating chrysanthemum plants
Here's my foolproof method for multiplying your chrysanthemums using stem cuttings—guaranteed to root and bloom.
🌱 Step 1: Select Healthy Mature Stems
Choose stems from last year's plants that are 4-6 inches long with 3-4 sets of leaves. Look for stems that are slightly woody but still flexible—these will root best. Avoid stems with flowers or buds, as they won’t root as easily. I always pick stems from the middle of the plant where growth is vigorous.
Use clean, sharp scissors or pruning shears to make a clean cut just below a leaf node (the bump where leaves attach). This is where roots will sprout. If you see any yellow or damaged leaves, trim those off—they’ll only slow down rooting. Keep your cuttings in a cool, shaded spot until you’re ready to plant them.
💧 Step 2: Prepare the Cuttings for Rooting
Remove the lower leaves from each cutting, leaving only the top 2 sets of leaves. This reduces moisture loss and prevents rot. Dip the cut end of each stem in rooting hormone to encourage faster root growth. I like to swirl the base gently in the powder to coat it evenly—no need to press hard.
Fill small pots or containers with well-draining potting mix (I use a mix of perlite and peat moss for best results). Moisten the mix until it’s damp but not soggy—you should be able to squeeze a handful and feel slight resistance. Make a hole about 2 inches deep with your finger and insert the cutting, pressing lightly to secure it.
☀️ Step 3: Create Ideal Rooting Conditions
Place the pots in a location with bright, indirect light—think morning sun or filtered light from a sheer curtain. Too much direct sun can dry out the cuttings before roots form. I keep mine on an east-facing windowsill or under a grow light set to 12 hours of light daily.
Cover each pot loosely with a plastic bag or humidity dome to retain moisture. This creates a mini greenhouse effect that speeds up rooting. Check the soil every 2-3 days and mist lightly if the surface feels dry. Roots typically form in 3-4 weeks, but be patient—some may take up to 6 weeks depending on temperature.
✂️ Step 4: Encourage New Growth and Transplant
Once you see new leaves emerging (a sign roots have formed), it’s time to acclimate your cuttings. Gradually remove the plastic cover over 5-7 days to harden them off. Start by lifting the bag for an hour daily, then increase the time until it’s fully removed.
After 4-6 weeks, when the cuttings have 2-3 inches of new growth, they’re ready to transplant. Gently remove them from the pots and replant in individual containers or your garden bed. Keep them in partial shade for a week to reduce stress before moving to full sun.
🌿 Step 5: Maintain for Year-Round Blooms
Water your new chrysanthemums when the top inch of soil feels dry. Overwatering is the biggest killer—let excess water drain completely to avoid root rot. Fertilize lightly every 4-6 weeks with a balanced, water-soluble fertilizer to encourage strong growth.
Pinch back the tips of the stems when they’re 6-8 inches tall to promote bushier growth and more blooms. This is where the magic happens—your plants will branch out and produce more flowers. With proper care, your propagated chrysanthemums will bloom year after year, even indoors.
Tips & tricks for perfect chrysanthemum propagation
Here's what I learned after propagating dozens of chrysanthemums—these little details make all the difference between success and disappointment.
Stem Selection is Everything: In Step 1, focus on stems with 3-4 sets of leaves that are slightly woody but still flexible. These stems have the best balance of maturity and growth potential. I've found that stems from the middle of the plant often have the most vigorous rooting potential because they're well-established but not yet flowering. Avoid stems with yellow leaves—they'll slow down rooting and may introduce disease.
Rooting Hormone Technique: When dipping your cuttings in rooting hormone during Step 2, don't press hard—just swirl gently to coat the base. I've ruined cuttings by pressing too firmly, which can damage the delicate tissue. Also, make sure your rooting hormone is fresh. Old powder loses potency and can lead to poor root development. For best results, use a hormone specifically formulated for woody plants like chrysanthemums.
Light Balance is Critical: The bright, indirect light mentioned in Step 3 is non-negotiable. Too much direct sun will dry out your cuttings before roots form, while too little light means weak, leggy growth. I've had success using a simple grow light on a timer for 12 hours daily when natural light isn't sufficient. If you notice your cuttings stretching toward the light, they need more brightness. The goal is even, gentle light that encourages root formation without stressing the plant.
Transplant Timing Matters: When you're ready to transplant after 4-6 weeks, look for cuttings with 2-3 inches of new growth as mentioned in Step 4. This shows they've established roots, but don't rush—wait until you see new leaves emerging. I've made the mistake of transplanting too early, which caused shock and stunted growth. After transplanting, keep them in partial shade for that crucial first week to help them adjust to their new environment.
Pro Tips for Propagating Chrysanthemum Plants
- Here's what I learned after propagating dozens of chrysanthemums—these little details make all the difference between success and disappointment.
- Stem Selection is Everything: In Step 1, focus on stems with 3-4 sets of leaves that are slightly woody but still flexible.
- Rooting Hormone Technique: When dipping your cuttings in rooting hormone during Step 2, don't press hard—just swirl gently to coat the base.
Frequently asked questions
Got questions about propagating chrysanthemums? You’re not alone! Here are some of the most common concerns—and their straightforward answers—to help you grow lush, blooming plants with confidence.
When is the best time to take chrysanthemum stem cuttings?
The ideal window is late spring to early summer (May–June in most climates), when new growth is vigorous but before flowering. Avoid cutting during dormancy (winter) or extreme heat—your cuttings need energy to root! For indoor plants, you can propagate year-round with proper lighting.
How long does it take for chrysanthemum cuttings to root?
With patience and the right conditions, most cuttings root in 2–4 weeks. Keep them in a humid, warm environment (70–75°F) and avoid overwatering. A quick test: Gently tug the cutting—if resistance meets your fingers, roots are forming!
Can I propagate chrysanthemums from store-bought flowers?
Yes, but with a caveat! Store-bought mums are often bred for one season and may not reliably produce true-to-type plants. For best results, propagate from healthy, disease-free garden-grown mums or ask local nurseries for cutting-friendly varieties.
Why are my chrysanthemum cuttings turning yellow or mushy?
This usually signals overwatering or fungal issues. Let the soil dry slightly between waterings and ensure pots have drainage holes. If yellowing persists, check for root rot—trim affected areas and repot in fresh, sterile soil.
Do I need to use rooting hormone for chrysanthemum cuttings?
Not required, but it boosts success rates (especially for beginners). Dip the cut end in hormone powder or gel before planting. For a natural alternative, try cinnamon powder—it’s antifungal and can encourage rooting!
How do I encourage blooms on propagated chrysanthemums?
Mums need 12–14 hours of daylight and cooler temps (50–60°F nights) to flower. Pinch back new growth in early summer to promote bushiness, then reduce watering slightly in fall to trigger blooming. Fertilize lightly with low-nitrogen feed for vibrant flowers.
Wrapping up and next steps
You’ve now unlocked the secret to growing vibrant chrysanthemums year-round through simple stem-cutting propagation! Whether you’re a beginner or a seasoned gardener, this method ensures lush blooms with minimal effort—and the best part? You can share your new plants with fellow green thumbs. 🌸
Ready to level up your garden game? Start by experimenting with a few cuttings this season, then expand your collection. Before you know it, you’ll be gifting bouquets or filling your yard with stunning fall color—all thanks to your own propagated plants!