Container Gardens
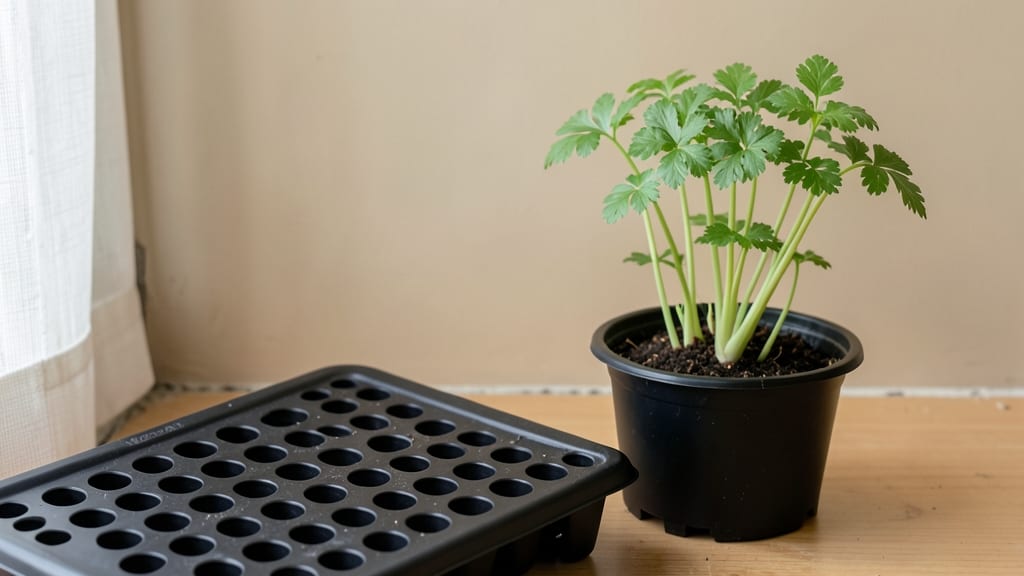
Planting celery indoors has transformed my herb garden into a vibrant celery patch, and the difference between store-bought and homegrown is shocking—thicker stalks, brighter leaves, and no bitter aftertaste. 🌱 The key is patience and the right setup, and I’ll show you exactly how to do it in just a few simple steps.
You’ll need a 6-inch-deep container (celery roots run deep), well-draining potting mix, and either a sunny south-facing window or a grow light for 12–14 hours a day. Start with seeds or seedlings, and keep the soil consistently moist—celery hates drying out.
A humidity tray or pebble tray underneath helps mimic its natural damp environment, especially if your home runs dry in winter.
By week 6, you’ll see those signature celery stalks forming, and with proper care, you’ll harvest crisp, leafy bunches in 8 weeks. The flavor is sweeter and the texture firmer than anything you’ll find in the produce section.
Plus, you’ll avoid the wilting that happens within days of store-bought celery hitting your counter.
This method works year-round, whether you’re in a cramped apartment or a sunny kitchen. The only real challenge is avoiding pests like aphids, but a quick spray of soapy water keeps them at bay. Ready to grow your own? Let’s get those seeds in the soil!
📚 In This Guide
- What you need
- Instructions
- Tips and common mistakes
- Wrapping up and next steps
What you need
- ● Celery seeds or a celery stalk (for regrowth) – 1 packet (50+ seeds) or 1 organic celery stalk (for cutting propagation).
- ● Container – 1 6-inch-wide pot (minimum) with drainage holes (or a repurposed container like a recycled plastic tub with holes drilled in).
- ● Potting mix – 1 bag of well-draining, seed-starting mix (avoid garden soil—it’s too dense!).
- ● Drainage tray or saucer – 1 (to catch excess water and prevent root rot).
- ● Spray bottle – For gentle watering (especially for seeds).
- ● Grow lights or sunny windowsill – A 12–16 hour daily light source (south-facing window or LED grow lights work best).
- ○ Fertilizer (optional but helpful) – A balanced liquid fertilizer (like 10-10-10) or compost tea for nutrient boosts.
- ● Humidity dome or plastic wrap – To retain moisture while seeds germinate.
- ● Pruning shears – For trimming outer leaves to encourage thicker stalks.
Step-by-Step instructions for planting celery indoors
Here’s how to grow crisp, flavorful celery indoors—no greenhouse needed.
🌱 Step 1: Prepare Containers and Seed Starting Mix
Use the 4-inch deep containers from your supplies to give celery roots room to grow. Fill each with 50% potting mix and 50% perlite—this ensures drainage while keeping moisture. Celery hates soggy roots, so avoid heavy garden soil. Tap the containers gently to settle the mix, then moisten it until damp but not dripping.
I like to add a pinch of slow-release fertilizer to the mix before planting. This gives seedlings a steady nutrient supply without burning tender roots. Press the soil down lightly—just enough to remove air pockets but not compact it. Celery roots need loose soil to spread properly.
🌱 Step 2: Plant Seeds at the Right Depth
Place 2-3 seeds per container about ¼ inch deep—celery seeds are tiny, so don’t bury them too deep. I use a toothpick to make small holes, then drop the seeds inside. Cover them lightly with a sprinkle of the mix and mist the surface with water until evenly damp.
Keep the containers in a warm spot (65-75°F) until germination, which takes 10-14 days. A seedling heat mat helps speed this up, but a sunny windowsill works too. Avoid overwatering—just keep the soil consistently moist. You’ll see tiny sprouts emerge first, followed by the first true leaves.
☀️ Step 3: Provide Bright, Indirect Light
Once seedlings appear, move them to a south-facing window or under grow lights for 12-14 hours of light daily. Celery needs bright light to stay compact and avoid leggy growth. If using grow lights, keep them 4-6 inches above the plants and raise them as the seedlings grow.
Watch for signs of light stress—if leaves turn pale or stretch toward the light, your setup isn’t strong enough. Rotate the containers a quarter turn every few days so plants grow evenly. You’ll notice stronger stems and darker green leaves within a week of proper lighting.
💧 Step 4: Thin and Maintain Moisture
When seedlings reach 2 inches tall, thin to the strongest plant per container. Use scissors to snip weaker stems at the base—this prevents competition for nutrients. Water the remaining plant at the base, keeping the soil evenly moist but not soggy. Celery loves humidity, so mist the leaves occasionally if your home is dry.
After 4 weeks, fertilize with half-strength liquid fertilizer every 2 weeks. You’ll see new growth spurt after feeding—this is when celery starts forming its signature thick stems. If the soil dries out completely, the stems may become tough and fibrous, so check moisture daily.
✂️ Step 5: Harvest for Crisp Stems
Celery is ready to harvest in 8-10 weeks when the stalks reach 8-10 inches tall and the leaves are lush. Cut the entire plant at the base with clean scissors. For regrowth, trim the outer stalks, leaving the center intact. Keep the plant in bright light and water regularly—it’ll produce 3-4 more harvests over time.
Store harvested celery in the fridge with a damp paper towel wrapped around the stalks. This keeps it crisp for up to 2 weeks. If you notice yellowing leaves, it’s time to harvest or trim the plant—celery tells you when it’s ready!
Tips & tricks for perfect indoor celery growth
Growing crisp celery indoors takes patience, but these tricks will help you avoid common pitfalls and get the best results every time.
Soil Mix Matters: In Step 1, don't skimp on the perlite—it's what prevents soggy roots that celery absolutely hates. I've found that adding a handful of coarse sand to the 50/50 mix improves drainage even more. After mixing, press the soil down gently but firmly—this removes air pockets while keeping the mix loose enough for those thick celery roots to spread properly.
Germination Secrets: The 10-14 day germination window in Step 2 can feel like forever, but there's a trick to speed things up. Place your containers in a plastic bag (like a produce bag) after planting—this creates a mini greenhouse effect that raises humidity. Just remove the bag once you see sprouts to prevent mold. Keep that warm spot between 65-75°F consistently, as cooler temps can delay germination by weeks.
Lighting Strategy: For Step 3, if you don't have a south-facing window, grow lights are your best friend. I use LED grow lights on a timer for those 12-14 hours daily, but here's the pro move: add a red LED bulb to your setup. Plants respond strongly to red light (660nm wavelength), which promotes leafy growth—exactly what we want for celery. Just keep them 4-6 inches above the plants and adjust as they grow.
Thinning Technique: When you reach Step 4 and need to thin to the strongest plant, don't just pull—snip with clean scissors. This prevents disturbing the remaining plant's roots. Here's what I've learned: if you're hesitant to thin because you're worried about losing plants, you can actually leave 2 strong seedlings per container. Just space them about 2 inches apart and thin to one when they're 1 inch tall.
Pro Tips for Planting Celery Indoors
- Growing crisp celery indoors takes patience, but these tricks will help you avoid common pitfalls and get the best results every time.
- Soil Mix Matters: In Step 1, don't skimp on the perlite—it's what prevents soggy roots that celery absolutely hates.
- Germination Secrets: The 10-14 day germination window in Step 2 can feel like forever, but there's a trick to speed things up.
Frequently asked questions
Got questions about growing celery indoors? You’re not alone! Here are answers to the most common concerns—from timing to troubleshooting—to help your crispy, homegrown celery thrive.
Can I grow celery indoors year-round?
Yes! Celery thrives indoors with proper light (12–14 hours daily) and warmth (60–70°F). Use a grow light if natural light is weak, and avoid drafts. Just be patient—indoor celery may take 8–12 weeks to mature, compared to 3–4 months outdoors.
How long does it take to harvest celery indoors?
With consistent care, you can harvest small bunches in 6–8 weeks (for tender stalks) or wait 10–12 weeks for full-size heads. Snip outer stalks first to encourage regrowth—just leave the center intact!
Why is my indoor celery turning bitter or tough?
Bitter/tough celery often means overcrowding or underwatering. Thin seedlings to 4–6 inches apart and keep soil consistently moist (not soggy). For crispness, harvest when stalks are 12+ inches tall but before seeds form.
Can I regrow celery from store-bought stalks?
Save the root base (2–3 inches), trim leaves to 2 inches, and place it in 1 inch of water. Keep it in bright light (no direct sun) and change water every 2 days. Sprouts appear in 1–2 weeks—transplant after roots form!
What’s the best way to use homegrown celery?
Enjoy it raw in salads, blended into soups, or roasted with olive oil and lemon for a sweet twist. For extra crispness, store harvested stalks in a sealed container with a damp paper towel in the fridge for up to 2 weeks.
Wrapping up and next steps
Growing celery indoors is a rewarding journey that brings fresh, crisp stems straight to your kitchen in just 8 weeks! With the right setup—like a sunny spot, consistent moisture, and a dash of patience—you’ll enjoy homegrown greens packed with flavor and nutrients.
Whether you’re a beginner or a seasoned gardener, this project proves that container gardening can be both fun and productive.
Ready to take the next step? Start with a single container and experiment with varieties like Utah or Pascal celery. Once you’ve mastered the basics, expand your indoor garden with herbs or leafy greens. Happy growing—your future salads will thank you! 🌱