Propagation
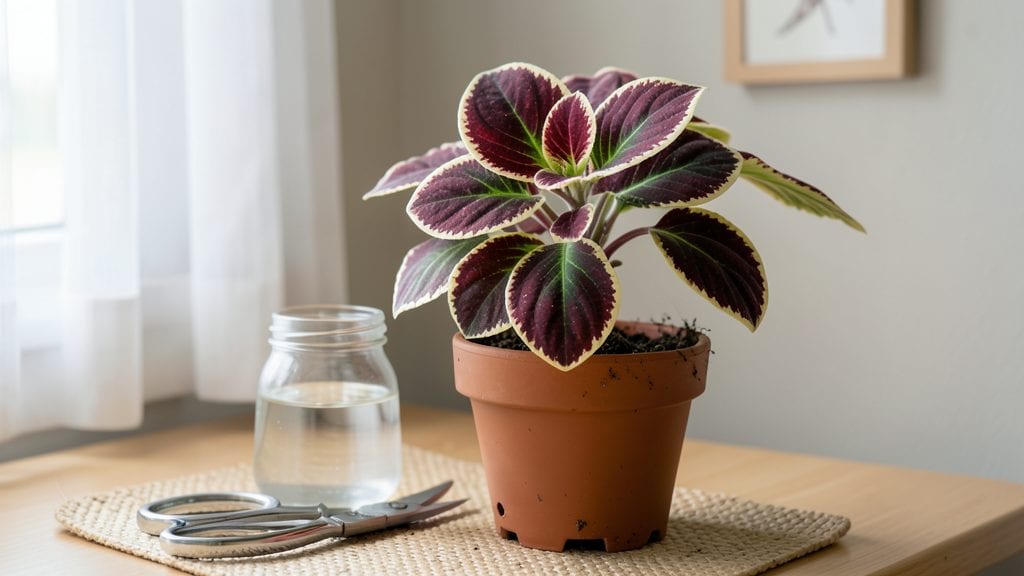
Plant cutting propagation turns scraps into thriving plants—no fancy equipment needed. ✨ I’ve grown everything from mint to fuchsia this way, and the best part? You’re basically cloning your favorite plants for free.
The secret lies in knowing where to cut, how to prep the stem, and whether water or soil works best for your plant type.
Most people think propagation is complicated, but it boils down to three things: sharp scissors, clean cuts, and patience. You’ll need a few basic supplies—a jar of water for some plants, a small pot for others, and maybe rooting hormone if you’re feeling ambitious.
My first attempt with a coleus cutting in water took just 10 days to root, and now I’ve never bought a plant again.
By the end, you’ll have lush new growth ready to transplant, whether you’re filling gaps in your garden or sharing cuttings with friends. The key is watching for those first tiny roots—it’s like witnessing magic happen right in your kitchen or greenhouse. Ready to turn clippings into plants?
Works for herbs, shrubs, and even some trees, though tropical plants often prefer humidity. Here’s how to avoid the most common pitfalls—like rot or stunted growth—and get reliable results every time.
📚 In This Guide
- What you need
- Instructions
- Tips and common mistakes
- Wrapping up and next steps
What you need
- ● Healthy plant cuttings: 3–6 inches long, with at least 2–3 leaf nodes (use sterile, sharp scissors or pruners 🔪).
- ○ Rooting hormone (optional but helpful): Powder, gel, or liquid (e.g., Clonex or Dyna-Gro).
- ● Containers: For water: Clear glass jars, small vases, or plastic cups (8–12 oz, with a narrow neck to reduce evaporation).
- ● For soil: 4–6 inch pots with drainage holes (or seedling trays with propagation mix).
- ● Well-draining propagation medium: Soil option: Perlite, vermiculite, or a 50/50 mix of peat moss and perlite.
- ● Water option: Filtered or room-temperature tap water (changed every 3–5 days).
- ○ Humidity dome or plastic bag (optional): To retain moisture (e.g., clear plastic wrap or a humidity tent).
- ● Spray bottle: For misting cuttings (especially in dry climates).
- ● Labels & markers: To track plant types and dates (use toothpicks + Sharpie!).
- ● Clean workspace: Disinfect tools with rubbing alcohol (70% or higher) to prevent disease.
- ● Patience: Root growth can take 2–8 weeks, depending on the plant type and conditions.
- ● Light conditions: Bright, indirect light (avoid direct sun, which can overheat cuttings).
- ● Temperature control: Ideal range: 65–75°F (18–24°C) for most plants.
Step-by-Step instructions for plant cutting propagation
Here's how to turn healthy cuttings into thriving new plants—whether in water or soil.
🌱 Step 1: Select and Prepare Healthy Cuttings
Choose non-flowering stems with at least 4-6 inches of growth and 2-3 sets of leaves. Use clean, sharp scissors or pruners to make a 45-degree angle cut just below a leaf node—this increases surface area for root growth. Remove any lower leaves that would sit underwater or below soil level, leaving only the top leaves intact.
I always dip the cut end in rooting hormone (if using) to speed up root development. Skip this step only if you're working with easy-to-root plants like mint or pothos. Let the cutting sit for 10-15 minutes to let the hormone settle before placing it in water or soil.
💧 Step 2: Choose Your Propagation Method
For water propagation, fill a clean glass or jar with room-temperature water and place the cutting so only the lower 1-2 inches are submerged. Change the water every 3-5 days to prevent bacterial growth. You'll see tiny root hairs appear in 1-2 weeks, with roots reaching 1-2 inches in 4-6 weeks.
For soil propagation, fill a small pot with moist, well-draining potting mix and make a hole with your finger. Insert the cutting so the node sits just below the soil surface. Water lightly until moisture drains from the bottom. Keep the soil consistently damp but never soggy—overwatering causes rot.
☀️ Step 3: Provide Ideal Conditions for Root Growth
Place your cuttings in bright, indirect light—a north or east-facing window works best. Avoid harsh afternoon sun, which can stress tender new roots. Maintain a temperature between 65-75°F; cooler spots slow rooting, while heat above 80°F causes wilting.
Cover the cutting with a clear plastic bag to create a humid microclimate if using soil. Remove the bag daily for 10 minutes to prevent mold. In water, roots develop faster because they're not competing with soil-borne pathogens. Watch for roots growing toward the light—this means your cutting is ready to transplant.
✂️ Step 4: Transplant When Roots Are Established
For water-rooted cuttings, wait until roots reach 1-2 inches long before transferring to soil. Gently rinse off any algae or sediment from the roots. Plant the cutting at the same depth it was in water, firming soil around the base to support upright growth.
For soil-rooted cuttings, check for new growth above ground before transplanting. You'll see 2-3 new leaves or stems—this means roots have anchored well. Water thoroughly after transplanting to help settle the soil and reduce shock.
🌿 Step 5: Care for New Plants Through Establishment
Keep newly transplanted cuttings in bright, indirect light for 1-2 weeks to help them adjust. Water when the top ½ inch of soil feels dry, but avoid overwatering—young roots are fragile. Fertilize lightly with a diluted half-strength balanced fertilizer after 4-6 weeks.
Watch for signs of stress like yellowing leaves or wilting. If you see this, move the plant to a shadier spot and reduce watering. Once your cutting has 4-5 sets of leaves and shows steady growth, it's ready to be treated like a mature plant.
Tips & tricks for perfect plant cutting propagation
These simple but game-changing tips will help your plant cuttings thrive whether you're rooting in water or soil.
Angle Matters: That 45-degree angle cut in Step 1 isn't just for looks—it creates more surface area for root growth. The wider the cut, the more cells can develop into roots. I've found using a clean, sharp knife makes all the difference compared to scissors, which can crush the stem. For stubborn plants, make the angle slightly steeper to expose more of the vascular tissue where roots form.
Rooting Hormone Hack: If you're using rooting hormone in Step 1, don't just dip and go! Let the cutting sit for those full 10-15 minutes after dipping. This gives the hormone time to properly adhere to the cut end. For stubborn plants, I like to gently roll the cut end in the hormone powder to coat it more thoroughly. Just remember—this step is optional for easy-rooters like mint or pothos.
Water Quality Tip: In Step 2, when using water propagation, distilled or filtered water works better than tap water. The chlorine and minerals in tap water can slow root growth or even cause root rot. If you must use tap water, let it sit out uncovered for 24 hours first to allow chlorine to evaporate. And always change that water every 3-5 days—stale water becomes a bacterial breeding ground.
Transplant Timing: The 1-2 inch root length in Step 4 is your green light for transplanting, but don't rush it. Roots growing toward the light (a sign they're ready) combined with 2-3 new leaves above ground means your cutting is ready. I've seen cuttings with 1-inch roots fail when transplanted too early—patience pays off here!
Pro Tips for Plant Cutting Propagation
- These simple but game-changing tips will help your plant cuttings thrive whether you're rooting in water or soil.
- Angle Matters: That 45-degree angle cut in Step 1 isn't just for looks—it creates more surface area for root growth.
- Rooting Hormone Hack: If you're using rooting hormone in Step 1, don't just dip and go!
Frequently asked questions
Got questions about plant cutting propagation?
You’re not alone! Whether you’re a beginner or just need a quick refresher, here are some of the most common queries—and straightforward answers to help you succeed.
What’s the best time of year to take cuttings?
The ideal time depends on your plant, but spring and early summer are generally best for most houseplants and herbs. During this period, plants are actively growing, making it easier for cuttings to root. Avoid winter unless your plant is dormant or tropical (like pothos or philodendrons), which can root year-round with proper care.
How do I know if my cutting will root successfully?
Look for these signs: healthy leaves (no yellowing or browning), at least 2-3 nodes (where roots grow), and a clean, sharp cut at a 45-degree angle. Avoid woody stems—they’re harder to root. If your cutting has thick, fleshy leaves (like succulents), reduce leaf surface area to minimize water loss.
Water vs. soil propagation—what’s the difference?
Both work, but it depends on your plant:
- Water: Great for fast root growth (like pothos or mint) and monitoring progress. Change water every 2-3 days to prevent bacteria.
- Soil: Better for drought-tolerant plants (like lavender or rosemary) or those prone to rot (e.g., ferns). Use a well-draining mix and keep humidity high.
Pro tip: Some plants (like African violets) root better in soil—experiment to see what works!
Why is my cutting rotting instead of rooting?
Overwatering or poor airflow are the usual culprits. Here’s how to fix it:
- Reduce moisture: If in water, trim mushy roots and replant in dry soil. If in soil, let it dry out slightly between waterings.
- Improve airflow: Use a small fan (24/7) or move to a brighter, less humid spot.
- Check the cutting: If the stem is soft or black, it’s too far gone—start fresh!
Prevent rot by using sterilized tools and avoiding crowded containers.
Can I propagate plants from grocery store cuttings?
Many grocery store plants (like basil, mint, or snake plants) root easily. Just snip a healthy stem with nodes, follow your preferred method (water or soil), and add a rooting hormone (optional but helpful) for faster results. Avoid plants treated with growth inhibitors (common in commercial setups)—ask staff if unsure.
Wrapping up and next steps
Mastering plant cutting propagation is like unlocking a green thumb superpower—whether you’re rooting in water or soil! 🌱 With the right tools, patience, and a few expert tips, you can multiply your favorite plants and even experiment with new varieties.
Start small, track your progress, and soon you’ll be sharing cuttings with fellow gardeners or expanding your indoor jungle with confidence.
Ready to dive deeper? Pick one plant to propagate this week—grab those shears, follow the steps, and watch your garden grow! 🌿✨