Vegetables
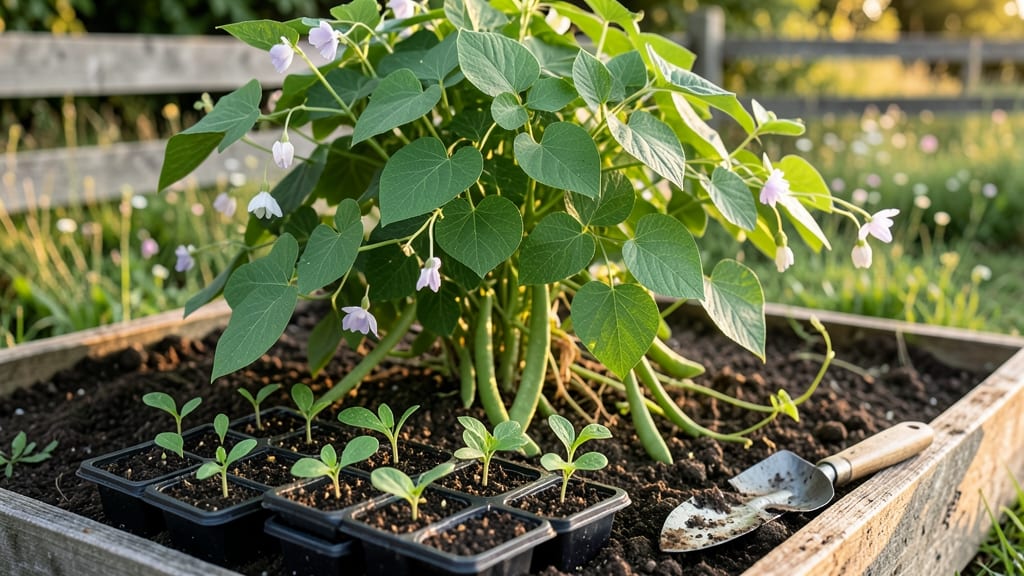
Planting butter beans in your compact garden means fast harvests of tender, buttery pods—no sprawling vines required. I’ve grown these in 4x4-foot plots for years, and the secret lies in their quick germination and bushy growth habit.
The right variety (like ‘Fordhook’ or ‘Contender’) cuts down on trellising while delivering sweet, flavorful beans in just 60 days.
Start with well-draining soil amended with compost—beans need warmth to sprout, so wait until soil hits 65°F before planting. Space seeds 4-6 inches apart in rows 18-24 inches apart, and plant just 1 inch deep.
They thrive in full sun (6+ hours daily) and prefer consistent moisture, especially during flowering. A light mulch keeps roots cool and conserves water.
You’ll see sprouts in 5-7 days—much faster than many bush beans—and pods ready to pick within weeks. The key to avoiding pests is companion planting: intermingle with nasturtiums or marigolds to deter aphids, and keep an eye out for spider mites on dry days.
A quick spray of water usually resets them.
This method works in containers too—just use 5-gallon pots for a single plant. Whether you’re in a warm climate or short-season zone, butter beans adapt well. The real payoff? Fresh, homegrown beans that outshine store-bought in both taste and speed.
📚 In This Guide
- What you need
- Instructions
- Tips and common mistakes
- Wrapping up and next steps
What you need
- ● Butter bean seeds: Choose fast-germinating varieties like ‘Contender’ or ‘Otole’. Plant 3–4 seeds per spot (thin to 1 plant per hill after sprouting).
- ● Well-draining soil: Mix 2 parts topsoil with 1 part compost (pH 6.0–7.0). For containers, use a 10-inch-deep pot with drainage holes.
- ● Fertilizer: Start with a balanced 10-10-10 granular fertilizer (1 tbsp per plant) or compost tea for organic growth.
- ● Watering can or hose: With a gentle spray nozzle to avoid disturbing seeds.
- ● Garden trowel or transplanter (for digging holes 1–2 inches deep).
- ● Measuring tape or ruler (to space plants 4–6 inches apart in rows 18–24 inches apart).
- ○ Mulch (optional): Straw or shredded leaves (1–2 inches thick) to retain moisture and suppress weeds.
- ○ Trellis or stakes (optional): For bush varieties, use 3–4 ft tall stakes or a lightweight trellis to support climbing types.
- ● Garden gloves (to protect hands while handling soil or seeds).
- ● Sunlight: Full sun (6–8 hours daily)—butter beans thrive in warm climates (plant after last frost when soil is at least 60°F).
- ● Water access: Consistent moisture (keep soil evenly damp, not soggy).
- ● Patience: Germination takes 7–14 days—stay consistent with care!
Step-by-step instructions for planting butter beans in compact gardens
Here’s how to get your butter beans growing quickly in small spaces—no fuss, just reliable results.
Choose the Right Location and Prepare the Soil
Butter beans thrive in full sun—select a spot that receives at least 6-8 hours of direct sunlight daily. If your garden is shaded, prioritize the sunniest area you have, even if it’s just a few hours more than others. Avoid low-lying spots where cold air settles, as butter beans are sensitive to frost.
Loosen the soil to a depth of 12 inches using a garden fork or tiller. Butter beans prefer well-draining soil with a slightly acidic to neutral pH (6.0-7.0). If your soil is heavy clay, mix in 2-3 inches of compost or aged manure to improve drainage and fertility. Work the amendments into the top 6 inches of soil, breaking up any clumps to create a fine, crumbly texture.
Plant Seeds at the Correct Depth and Spacing
Butter beans germinate quickly—within 5-10 days—so plant seeds as soon as the soil warms to at least 60°F. For compact gardens, space seeds 4-6 inches apart in rows that are 18-24 inches apart. This spacing allows vines to spread without overcrowding, which can lead to disease.
Plant seeds 1 inch deep, pressing them lightly into the soil. If you’re sowing in rows, use a stick or your finger to create small furrows for even depth. Water the soil gently after planting to settle the seeds without displacing them. Avoid soaking the area—excess moisture can cause seeds to rot before they germinate.
Provide Consistent Moisture and Mulch for Fast Growth
Butter beans need consistent moisture to grow quickly, but their roots are shallow, so water deeply once a week unless rainfall provides 1 inch of water. The key is to keep the soil evenly moist but not soggy—top inch should feel dry to the touch before watering again. Water at the base of plants in the morning to reduce evaporation and fungal risks.
Apply a 2-3 inch layer of organic mulch, like straw or shredded leaves, around the plants once they reach 6 inches tall. Mulch conserves moisture, suppresses weeds, and keeps soil temperatures stable. Replenish mulch as it breaks down, especially during dry spells. Avoid piling mulch directly against stems to prevent rot.
Train Vines and Monitor for Pests Early
Butter beans are bushy but can sprawl, so if your garden is tight, gently guide vines along a trellis or stakes as they grow. This saves space and improves air circulation, reducing the risk of fungal diseases. Install supports at planting time—driving stakes 6-8 inches deep or setting up a lightweight trellis near the rows.
Watch for bean beetles or aphids within 3-4 weeks of germination. These pests suck sap and weaken plants. If you spot them, spray plants with neem oil or introduce ladybugs for natural control. Avoid chemical sprays, as they can harm beneficial insects and leave residues on edible pods. Regularly inspect the undersides of leaves where pests hide.
Harvest at Peak Maturity for Maximum Yield
Butter beans are ready to harvest 50-60 days after planting, when pods are 3-4 inches long but still tender. Check plants every 2-3 days—pods left too long become fibrous and lose flavor. Pick in the morning when pods are firm and snap easily when bent. Harvesting frequently encourages more production.
Use sharp scissors or pruners to cut pods at the stem to avoid damaging the plant. If a vine stops producing, trim it back by half to stimulate new growth. With proper care, a single plant yields 6-8 pods, so your 4-plant setup should provide a steady supply. Store harvested pods in the fridge for up to 5 days or blanch and freeze for long-term storage.
Tips & tricks for planting butter beans in compact gardens
Fast germination and reliable growth depend on these key strategies that turn small spaces into productive gardens.
Soil Preparation Secret: The 12-inch soil depth and 6.0-7.0 pH range are critical for butter beans, but don't overlook the texture. After loosening the soil, run your fingers through it—it should feel like crumbly cake batter, not compacted dirt. For heavy clay soils, mix in that 2-3 inches of compost or aged manure and let it sit uncovered for 24 hours before planting. This pre-aeration prevents waterlogging, which butter beans hate.
Planting Precision: When creating those 1-inch deep furrows, use a stick or your finger to make them straight and consistent. I've found that seeds planted in perfectly straight lines germinate more uniformly, making it easier to thin seedlings later. For compact gardens, consider using a small trowel to create individual planting holes instead of rows—this gives you more flexibility to adjust spacing as plants grow.
Watering Wisdom: The once-weekly watering guideline assumes average rainfall patterns, but your local conditions matter. In hotter climates, you might need to water every 4-5 days, while cooler regions could stretch it to 10 days. Always check that top inch of soil—if it's dry to the touch, it's time to water. Morning watering is non-negotiable; evening water can lead to fungal issues.
Pest Prevention: Those 3-4 weeks after germination are the critical window for pest control. I've had success with a preventative approach: mix 1 tablespoon of neem oil with 1 quart of water and spray lightly on the soil surface around plants every 7 days. This creates a protective barrier without harming beneficial insects. Remember to check undersides of leaves regularly—pests often hide there first.
Pro Tips for Planting Butter Beans
- Fast germination and reliable growth depend on these key strategies that turn small spaces into productive gardens.
- Soil Preparation Secret: The 12-inch soil depth and 6.0-7.0 pH range are critical for butter beans, but don't overlook the texture.
- Planting Precision: When creating those 1-inch deep furrows, use a stick or your finger to make them straight and consistent.
Frequently asked questions
Got questions about growing butter beans?
You’re not alone! Here are answers to the most common queries from gardeners just like you.
When is the best time to plant butter beans?
Butter beans thrive in warm soil—wait until after the last frost when temperatures stay above 60°F (15°C). In most regions, this means late spring to early summer. For extended harvests, plant a second crop in mid-summer (60–70 days before your first frost).
How long do butter beans take to grow?
Butter beans are fast growers! From seed to harvest, expect 50–70 days, depending on the variety. Dwarf varieties (like ‘Contender’ or ‘Henderson’) mature quicker, making them perfect for small gardens. Keep an eye out for pods 4–6 inches long—that’s your cue to harvest!
Can I grow butter beans in containers?
Butter beans are compact and bushy, ideal for containers. Use a 5–10 gallon pot with drainage holes, and plant 2–3 seeds per container. Ensure they get 6+ hours of sunlight daily and water consistently. Just avoid overcrowding—they’ll reward you with plenty of pods!
What pests should I watch for with butter beans?
Butter beans are generally pest-resistant, but keep an eye out for bean beetles, aphids, or spider mites. For organic control, spray neem oil or introduce ladybugs. If you spot holes in leaves, handpick pests early to protect your crop. Healthy plants (with proper spacing and water) are your best defense!
Why aren’t my butter bean seeds germinating?
Seeds need warmth and moisture to sprout. If they’re slow to germinate (7–10 days max), check these fixes:
- Soil temperature: Keep it at least 60°F (15°C)—use a seedling heat mat if needed.
- Moisture: Keep soil consistently damp (not soggy) until sprouts appear.
- Seed viability: Test old seeds by soaking them—if fewer than 50% float, they may be bad.
If all else fails, try fresh seeds or a quick-start indoor tray.
Wrapping up and next steps
Planting butter beans is a rewarding way to enjoy fresh, fast-growing vegetables—even in small spaces! 🌱 With the right quick-germinating varieties and a few simple steps, you’ll be harvesting tender beans in just a few weeks.
Whether you’re a beginner or a seasoned gardener, these compact plants are perfect for balconies, containers, or backyard plots.
Now that you’re equipped with the knowledge, take the next step—grab your seeds, mark your calendar, and start planting! Soon, you’ll be savoring homegrown butter beans in salads, soups, or stir-fries. Happy growing! 🌟