Vegetables
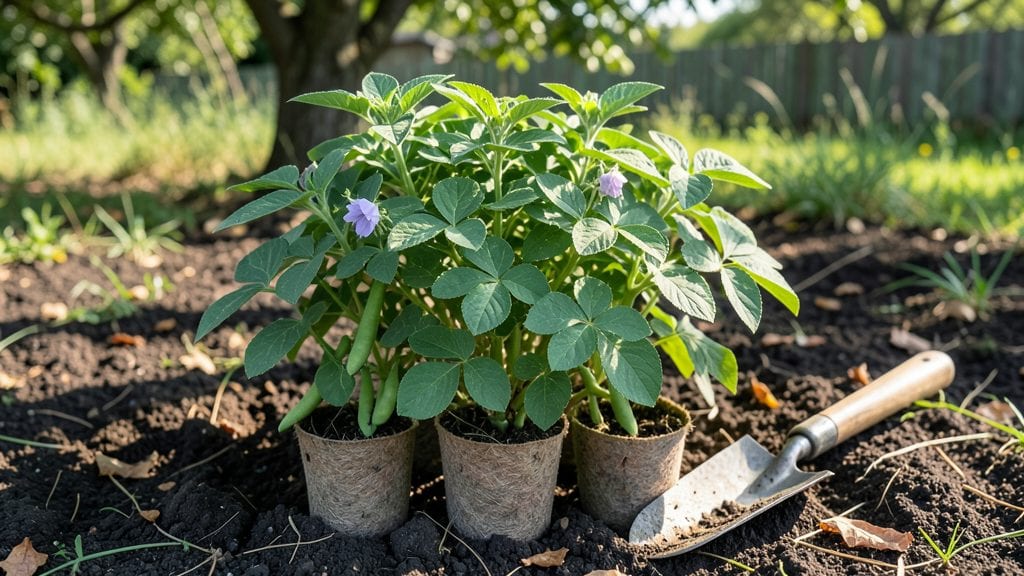
Planting adzuki beans in warm soil cuts your wait time for sprouts in half—no more staring at cold, stubborn seeds. 🌱 I learned the hard way that these little beans need soil at least 60°F to wake up, and a black plastic mulch or row cover does the trick faster than waiting for spring.
The first time I rushed them into cool earth, I watched my neighbors' plants pop up while mine sat stubborn as rocks.
You'll need a sunny spot with loose, well-draining soil—think crumbly like cake batter, not compact like wet clay. Adzuki beans hate soggy feet, so raise beds or amend heavy soil with compost before planting.
Direct-sow seeds 1 inch deep, 4-6 inches apart, and keep the soil moist but not soggy—think damp sponge, not dripping washcloth. Transplants? Just dig holes, pop them in, and pat the dirt gently.
Within 7-14 days, you'll see those first emerald leaves unfurling, and the plants will grow 2-3 inches per week once established. The secret to speed isn't fancy fertilizers—it's that warm soil.
A simple black plastic sheet laid down a week before planting can add 10°F to soil temps, turning sluggish seeds into eager sprouts overnight. Just remember to remove it once leaves appear to avoid overheating.
These beans thrive in USDA Zones 4-10, but the timing is everything: wait until after last frost when soil temps consistently hit 60°F. In cooler climates, start seeds indoors 4-6 weeks before the last frost date, then transplant when soil warms.
Pair them with corn and squash for a classic three-sisters support system, and avoid planting near onions or garlic—they don’t play well together.
📚 In This Guide
- What you need
- Instructions
- Tips and common mistakes
- Wrapping up and next steps
What you need
- ● Adzuki bean seeds: 1–2 lbs (450–900g) per 100 sq ft (for home gardens; adjust for larger plots). Choose heirloom or organic seeds for best results.
- ● Well-draining soil: Mix 60% topsoil, 30% compost, and 10% perlite or sand to improve aeration. Aim for a pH of 6.0–7.0.
- ● Sunlight access: Full sun (6–8+ hours daily) or partial shade (4–6 hours) in hot climates.
- ● Watering can or hose: With a gentle spray nozzle to avoid disturbing seeds.
- ● Plant markers: Biodegradable labels or popsicle sticks to track varieties.
- ● Hand trowel or small shovel: For digging planting holes (4–6 inches deep).
- ● Garden gloves: To protect hands from soil and sharp seed coats.
- ○ Row cover or shade cloth (optional but highly recommended): Use 30–50% shade fabric in hot climates to retain soil moisture.
- ● Mulch: Straw or wood chips (2–3 inches thick) to lock in warmth and suppress weeds.
- ● Thermometer (soil probe): To monitor soil temps (ideal: 70–85°F for sprouting).
- ● Warm soil: Adzuki beans thrive in heat—wait until soil temps reach 60°F+ (use a soil thermometer to check).
- ● Last frost date: Plant 2–3 weeks after your region’s last frost (or start indoors 4–6 weeks early in cool zones).
- ● Support structures (for trellising): Bamboo stakes or netting if growing pole-type adzuki beans.
Step-by-step instructions for planting adzuki beans
Here's how to get your adzuki beans sprouting in under a week using soil warmth tricks.
🌱 Step 1: Prepare the Soil for Optimal Warmth
Adzuki beans need soil at 80-85°F to germinate quickly. If your spring soil is still cool, create a warm bed by spreading 2-3 inches of compost over the planting area two weeks before sowing. This raises soil temperature naturally while adding nutrients. Work the compost into the top 6 inches of soil using a broadfork to loosen without disturbing the structure.
For containers, fill them with sterile potting mix and place them on a seedling heat mat set to 80°F. This ensures consistent warmth, especially in cooler climates. Test soil temperature with a soil thermometer—if it’s below 75°F, wait a few days or use black plastic mulch to absorb sunlight and warm the earth.
💧 Step 2: Plant Seeds at the Right Depth and Spacing
Sow seeds 1 inch deep and 4-6 inches apart in rows 18 inches apart. Adzuki beans are sensitive to overcrowding, so avoid planting more than 4 seeds per foot of row. Use a dibber or your finger to make small holes—planting too deep slows germination, while shallow planting risks drying out the seed.
After planting, water gently but deeply to settle the soil around the seeds. The soil should feel moist but not soggy—like a wrung-out sponge. Cover the area with 1-2 inches of straw mulch to retain moisture and regulate temperature. This step is critical: too much water causes rot, while too little leads to dry, cracked soil that stunts sprouts.
☀️ Step 3: Maintain Consistent Moisture and Warmth
Keep the soil surface evenly moist—never let it dry out completely. Adzuki beans germinate fastest when soil stays between 75-85°F. If daytime temps drop below 65°F, use a clear plastic tunnel or row cover to trap heat. Check soil moisture daily by pressing your finger 1 inch deep—if it feels dry, water lightly.
Watch for sprouts in 5-7 days under ideal conditions. Once they emerge, remove the mulch or plastic to prevent overheating. Thin seedlings to 3-4 inches apart when they reach 2 inches tall, keeping the strongest, straightest plants. This ensures each has enough space for root and vine development.
⏰ Step 4: Transition to Outdoor Conditions
After 10-14 days, when seedlings have 2-3 sets of true leaves, gradually introduce them to outdoor conditions. Start by placing pots or rows in partial shade for 2-3 hours daily, then increase exposure over 5-7 days. This hardening-off process prevents shock and encourages sturdy growth.
By day 14, your adzuki beans should be ready for full sun. Monitor for pests like bean beetles—handpick them early to avoid damage. With consistent warmth and moisture, you’ll see first flowers in 4-6 weeks, followed by pods ready for harvest in 80-90 days. The key to fast sprouting? Warm soil and patience—your beans will reward you with quick, vigorous growth.
Tips & tricks for perfect adzuki bean germination
The secret to those lightning-fast sprouts lies in precision—temperature, moisture, and timing all work together like a well-orchestrated symphony. Here's how to conduct your own garden symphony for adzuki beans.
Soil Thermometer is Your Best Friend: Don't guess—actually measure that soil temperature! The 80-85°F range is non-negotiable for fast germination. I've seen beans sprout in just 4 days when soil hits 85°F consistently, but drop below 75°F and you're looking at 2-3 week delays. Place your thermometer at 2-inch depth where the seeds will be, not just at the surface.
Compost Timing is Everything: That 2-3 inches of compost two weeks before planting isn't just about nutrients—it's about creating a thermal blanket. Spread it when daytime temps are already climbing above 65°F so it starts warming the soil immediately. For containers, pre-warm your sterile potting mix on a heat mat for 24 hours before planting to jumpstart the process.
Watering Technique That Prevents Rot: The "wrung-out sponge" test is crucial, but here's the pro move: water in the early morning so excess moisture evaporates by evening. I use a fine-mist spray bottle for the first 3 days after planting to avoid disturbing the seeds while keeping them hydrated. Once sprouts appear, switch to gentle watering at the base to prevent fungal issues.
Thinning Strategy for Stronger Plants: When you thin to 3-4 inches apart, don't just pull—snip with clean scissors at soil level. This prevents disturbing the roots of your remaining plants. Save the thinnings for compost (they'll still be viable for another 24 hours), and replant them in a separate container if you want extra plants. The key is to do this when seedlings are 2 inches tall—any earlier and you risk damaging the root systems.
Pro Tips for Planting Adzuki Beans
- The secret to those lightning-fast sprouts lies in precision—temperature, moisture, and timing all work together like a well-orchestrated symphony.
- Soil Thermometer is Your Best Friend: Don't guess—actually measure that soil temperature!
- Compost Timing is Everything: That 2-3 inches of compost two weeks before planting isn't just about nutrients—it's about creating a thermal blanket.
Frequently asked questions
about planting adzuki beans—because even the best gardeners need a little extra guidance! Here are answers to common queries to help you grow these nutritious legumes like a pro.When is the best time to plant adzuki beans?
Adzuki beans thrive in warm soil—aim for late spring or early summer after the last frost when soil temps hit 60°F (15°C) or higher. They’re sensitive to cold, so don’t rush! If your climate is mild, you can try a second planting in early summer for a fall harvest. Pro tip: Use a soil thermometer to check—consistency is key!
How long does it take for adzuki beans to sprout?
With ideal warmth (70–85°F / 21–29°C), sprouts appear in 7–14 days. Slow germination? Check your soil moisture (keep it evenly damp, not soggy) and ensure seeds aren’t buried too deep (1–2 inches max). If using black plastic mulch or row covers, monitor temps—too hot (>90°F) can delay growth. Patience pays off!
Can I grow adzuki beans in containers or small spaces?
Adzuki beans are compact—perfect for containers (minimum 12-inch depth) or small gardens. Use a 5-gallon pot per plant, with trellises for vining varieties. Just ensure containers drain well and get 6+ hours of sun. Bonus: Their bushy habit makes them great for urban gardens or balconies!
What pests or diseases should I watch for?
Common threats include bean beetles (handpick eggs/larvae) and powdery mildew (improve airflow, avoid overhead watering). Adzuki beans are less prone to root rot than other legumes, but poor drainage can cause issues. Rotate crops yearly and mulch to deter pests. Need organic fixes? Try neem oil or companion planting with nasturtiums!
What can I plant with adzuki beans for better yields?
Adzuki beans benefit from companion planting! Pair them with:
- Corn (beans climb, corn provides shade)
- Cucumbers or squash (shared space, pest deterrence)
- Onions or garlic (repel beetles naturally)
What if my adzuki beans aren’t flowering?
No flowers? Likely due to cool temps (<60°F) or nutrient imbalances. Boost growth with:
- A balanced fertilizer (low nitrogen) at planting
- Consistent watering (1–1.5 inches/week)
- White or yellow flowers? That’s normal—just wait for the purple/pink blooms that signal pods!
Wrapping up and next steps
Planting adzuki beans is a rewarding journey that blends tradition with science—especially when you harness the power of soil warmth to speed up sprouting! 🌱 Whether you’re a seasoned gardener or just starting, these beans offer a delicious and nutritious harvest with the right care.
Now that you’re equipped with the soil warmth secrets and answers to common questions, it’s time to roll up your sleeves and give it a try.
Start small—plant a few seeds in a pot or a sunny patch of your garden—and watch your confidence (and your crop!) grow. Next up? Share your progress with fellow gardeners or experiment with companion planting to maximize your yield. Happy growing! 🌿