Aphids
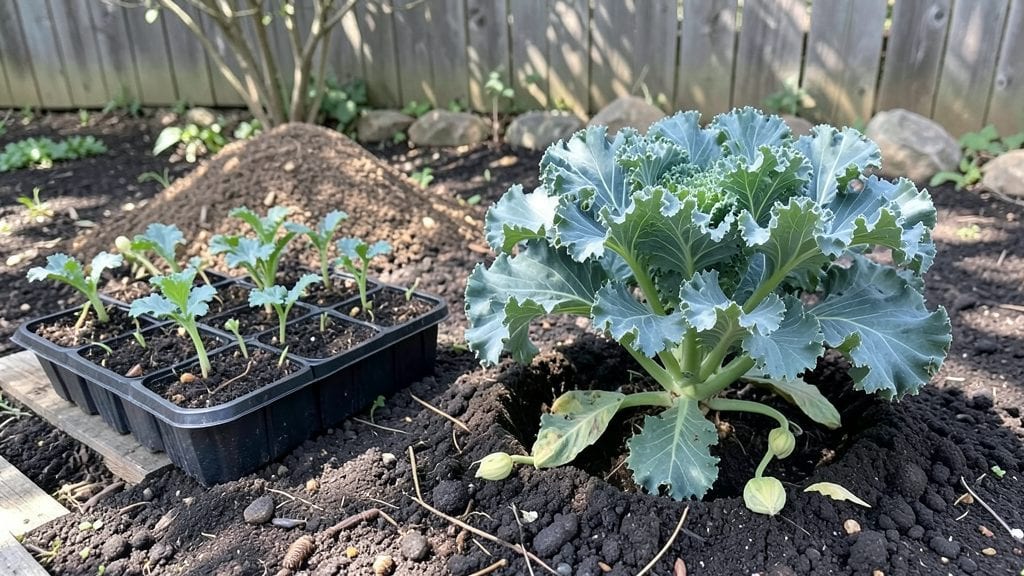
Planting kale in summer might seem counterintuitive, but with the right timing and care, you'll harvest bold, crisp leaves in just 60 days. I learned this the hard way—my first summer kale bolted into bitter flowers before I could even pick a leaf.
Now I plant it strategically to beat the heat.
The secret lies in late summer timing—aim for late July to early August in most zones (4-8), when days start shortening and temperatures dip slightly. Start seeds indoors 4-6 weeks before transplanting or buy sturdy transplants from nurseries that specialize in heat-tolerant varieties like 'Winterbor' or 'Red Russian.'
You'll end up with sweet, tender leaves that hold up better than spring kale in the heat. The key is shade cloth during peak afternoon sun and consistent moisture—never let the soil dry out completely.
A thick layer of mulch keeps roots cool and conserves water, while regular harvesting encourages new growth.
This method works even in hot climates if you adjust timing to early September and use shade. The payoff? Kale that thrives when most gardeners are packing up for winter. Ready to try it?
📚 In This Guide
- What you need
- Instructions
- Tips and common mistakes
- Wrapping up and next steps
What you need
- ● Kale seeds or seedlings: 1–2 oz of organic, non-GMO kale seeds (e.g., Lacinato, Red Russian, or Curly Kale), or
- ● 6–10 healthy kale seedlings (transplants) from a nursery.
- ● Growing space: Container: 12–18" deep pots (2–3 plants per container) or
- ● In-ground garden bed: 18" rows, spaced 12–18" apart.
- ● Soil: 1–2 cubic feet of well-draining, nutrient-rich soil (mix compost or aged manure into garden soil for best results).
- ● Watering: Garden hose with adjustable nozzle or watering can (1–2 gallons capacity).
- ○ Optional: Drip irrigation kit for consistent moisture.
- ● Fertilizer: Balanced organic fertilizer (e.g., 10-10-10) or compost tea.
- ○ Optional: Slow-release granules (like worm castings) for extra nutrients.
- ○ Protective gear (optional but helpful): Row covers or lightweight shade cloth (to deter pests like aphids).
- ● Gloves (for handling soil or prickly kale stems).
- ● Sunlight: 4–6 hours of direct sunlight daily (partial shade in hot climates).
- ● Temperature: Ideal planting range: 50–85°F (avoid planting when temps exceed 85°F).
- ● pH Level: Soil pH of 6.0–7.0 (test with a soil kit if unsure).
- ● Patience: Kale takes 60 days to mature—plan ahead for harvests!
Step-by-step instructions for summer kale planting
Summer kale thrives with the right timing and care—here’s how to grow it bold and ready in just two months.
Prepare the Planting Site for Optimal Growth
Kale prefers well-draining soil with a pH between 6.0 and 7.0. Before planting, work in 2-3 inches of compost into the top 6 inches of soil to enrich it with organic matter. This ensures your kale has the nutrients it needs to develop thick, flavorful leaves. Avoid fresh manure, as it can burn young seedlings.
Choose a location with partial shade during the hottest part of the day—direct afternoon sun can cause bolting, where the plant prematurely flowers and becomes bitter. If you’re in a hot climate, opt for a spot that gets morning sun and afternoon shade. Loosen the soil to a depth of 12 inches to encourage deep root growth, which helps kale withstand heat stress.
Direct-Sow Seeds at the Right Depth and Spacing
Plant kale seeds ¼ inch deep, spacing them 18-24 inches apart in rows 24 inches apart. Sowing too shallowly can lead to poor germination, while burying seeds too deep delays emergence. I like to plant seeds in small clusters of 3-4 every 12 inches—this makes thinning easier later and ensures a continuous harvest.
Water the soil thoroughly before sowing to help seeds settle at the correct depth. After planting, keep the soil consistently moist but not soggy—damp like a wrung-out sponge—until germination, which typically occurs in 5-10 days. Use a fine mist or drip irrigation to avoid displacing seeds. If you’re planting in hot weather, consider using a shade cloth for the first week to protect seedlings from stress.
Thin Seedlings for Stronger Plants
Once seedlings reach 2 inches tall, thin them to leave the strongest 12-18 inches apart. Use sharp scissors to snip unwanted seedlings at soil level—this prevents disturbing the roots of the plants you’re keeping. Thinning ensures each remaining plant has enough space to grow without competing for nutrients or light, which is critical for producing large, tender leaves.
Harvest the thinned seedlings immediately—they’re still edible and can be used in salads or sautéed like greens. If you’re planting in rows, thin in stages: first reduce clusters to 2-3 plants, then thin further to 1 plant every 18 inches once they’re 4 inches tall. This gradual approach minimizes shock to the remaining plants.
Maintain Soil Moisture and Fertility
Kale needs 1-1.5 inches of water per week, delivered evenly at the soil level—not overhead—to prevent fungal diseases like downy mildew. Water deeply 2-3 times per week, early in the morning so leaves dry quickly. Mulch around plants with 2-3 inches of straw or shredded leaves to retain moisture and suppress weeds, which compete for nutrients.
Fertilize 4-6 weeks after sowing with a balanced organic fertilizer (like 5-5-5) to support leafy growth. Avoid high-nitrogen fertilizers, which promote leaf production at the expense of flavor. Instead, focus on potassium-rich amendments to improve cold tolerance and disease resistance. If your soil is sandy, add 1 inch of compost every 4-6 weeks to replenish nutrients.
Harvest for Continuous Yield and Pest Management
Start harvesting outer leaves when plants reach 6-8 inches tall, cutting just above a set of leaves to encourage regrowth. This method ensures your kale keeps producing for 60+ days. Avoid harvesting more than ⅓ of the plant at once—this prevents stress and bolting. For baby kale, harvest entire small plants when they’re 4-6 inches tall for tender, sweet leaves.
Watch for pests like cabbage worms and aphids, which can defoliate plants quickly. Handpick larger pests or spray with neem oil in the evening to avoid harming beneficial insects. If you notice yellowing leaves, check for clubroot or black rot—remove affected plants immediately and rotate crops next season to prevent soil-borne diseases. With consistent care, your summer kale will stay productive well into fall.
Tips & tricks for perfect summer kale planting
Summer kale rewards patience and precision—here’s how to maximize your harvest with these essential strategies.
Soil Preparation Secret: Before amending your soil with 2-3 inches of compost, test its pH using a simple kit. Kale thrives between 6.0-7.0, and adjusting the pH before planting prevents future nutrient imbalances. I’ve found that adding a handful of wood ash (for acidic soils) or sulfur (for alkaline soils) before composting makes a noticeable difference in leaf development. The deeper you loosen that 12-inch layer, the more your kale’s roots will explore for nutrients during heat waves.
Seed Placement Precision: That ¼-inch planting depth is critical—any shallower and seeds may dry out before germinating, while deeper planting risks stunted growth. Use a toothpick to create precise furrows, then cover seeds with a fine layer of sifted soil. The cluster method of 3-4 seeds every 12 inches works beautifully because it creates natural windbreaks for seedlings while making thinning less traumatic. I’ve noticed that seedlings in clusters emerge slightly faster than isolated seeds, likely because of shared moisture.
Thinning Technique: When thinning to 12-18 inches apart, focus on selecting the most vigorous seedling in each cluster—the one with the darkest green leaves and sturdiest stem. Use clean, sharp scissors to snip at soil level rather than pulling, which can damage remaining roots. The two-stage thinning process (first to 2-3 plants, then to single plants) gives your kale time to establish before full competition begins. I’ve seen plants that were thinned too aggressively early on struggle to recover, even with ideal conditions.
Watering Wisdom: The "damp like a wrung-out sponge" guideline is perfect, but timing matters just as much. Water in the early morning so leaves dry completely by evening—this prevents fungal spores from taking hold. For the first 10 days, I set up a gentle drip irrigation system on a timer, which maintains consistent moisture without the risk of overwatering. Once seedlings establish, you can shift to the 2-3 times weekly schedule, always directing water to the soil rather than the leaves.
Pro Tips for Kale Summer Planting
- Summer kale rewards patience and precision—here’s how to maximize your harvest with these essential strategies.
- Soil Preparation Secret: Before amending your soil with 2-3 inches of compost, test its pH using a simple kit.
- Seed Placement Precision: That ¼-inch planting depth is critical—any shallower and seeds may dry out before germinating, while deeper planting risks stunted growth.
Frequently asked questions
Got questions about growing kale in summer? You’re not alone!
Here are answers to the most common concerns—so you can plant with confidence and enjoy those crisp, nutrient-packed leaves in just 60 days.
Can kale survive the summer heat?
Kale thrives in cooler weather, but with the right strategies, it can handle summer! Plant in early summer (before peak heat) or opt for shade-tolerant varieties like 'Dwarf Blue Curled'. Mulch heavily, water deeply, and consider row covers during heatwaves. If temps hit 90°F+, bolt-resistant types like 'Winterbor' may still produce, but yields will shrink.
What’s the best time to plant kale in summer?
For summer planting, aim for late spring to early summer (4–6 weeks before your last frost date). If you’re in a hot climate, late summer (August–September) works too—just give plants 60+ days before the first frost to mature. Pro tip: Start seeds indoors 4–6 weeks before transplanting to jumpstart growth!
How do I protect kale from pests like aphids?
Aphids love kale, but you can fight back! Preventively: Spray plants with neem oil or insecticidal soap weekly. For heavy infestations: Introduce ladybugs or blast aphids off with water. Resistant varieties like 'Red Russian' are less appealing to pests. Bonus: Plant garlic or dill nearby to repel bugs naturally!
Can I plant kale alongside other summer crops?
Kale plays well with companion plants like:
- Onions/garlic (deter pests)
- Beets (share nutrients)
- Herbs (dill, mint) (repel insects)
What if my kale bolts or tastes bitter in summer?
Bitter flavor and bolting (flowering) happen when kale gets too hot or stressed. To fix it:
- Harvest young leaves first (don’t let plants mature fully).
- Provide afternoon shade with a shade cloth (30–50%).
- Water consistently (drought stress = bitterness).
- Try heat-tolerant varieties like 'Lacinato' (less prone to bolting).
Wrapping up and next steps
Planting kale in the summer may seem counterintuitive, but with the right timing and care, you’ll be harvesting bold, nutrient-packed leaves in just 60 days—perfect for fall and winter meals! 🌱 Whether you’re a beginner or a seasoned gardener, this method proves that summer can still yield a thriving kale crop.
Now that you’re armed with the materials, timing tips, and troubleshooting tricks, it’s time to roll up your sleeves and get growing!
Your next step? Mark your calendar for late summer planting and watch your garden transform into a leafy-green powerhouse. Ready to start? Grab your seeds, find a shady spot, and let the kale magic begin! 🚀