Transplanting
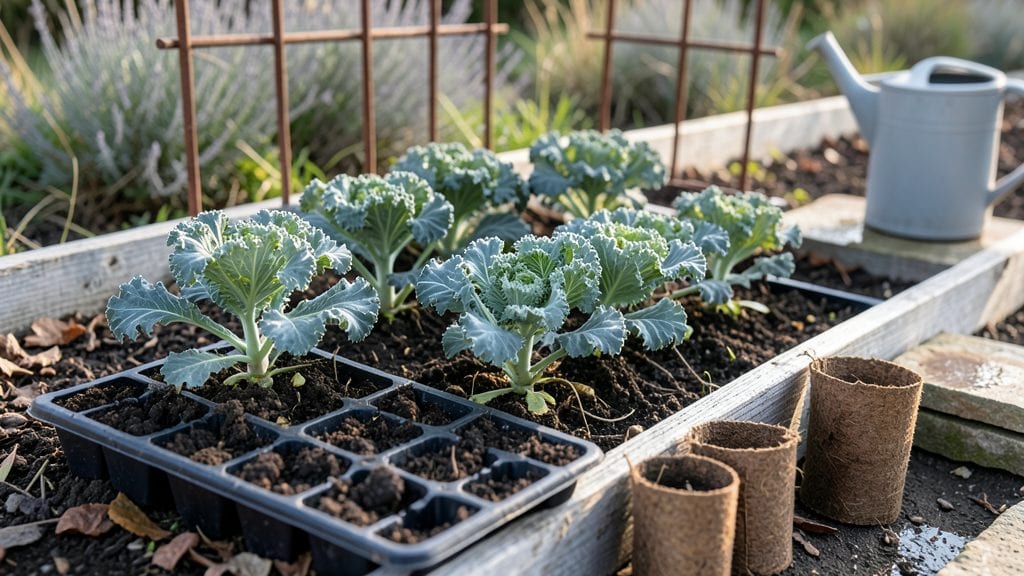
Planting kale seedlings gives you crisp, nutritious greens in just three weeks—but only if you nail the first few steps. I’ve learned the hard way that kale hates soggy soil and crowded roots, and those mistakes can turn your seedlings into sad, yellowing stumps instead of towering, frost-resistant plants.
The secret lies in loose, well-draining soil, proper spacing, and a little extra TLC after transplanting.
Start with a spot that gets at least 6 hours of sunlight daily, and prep the soil by mixing in 2-3 inches of compost to give those seedlings a nutrient boost.
Dig small holes just deep enough to cover the roots without burying the stem—think "up to the first set of leaves," not deeper. If your soil drains poorly, add a handful of perlite or coarse sand to keep roots happy and oxygen flowing.
Water deeply right after planting to settle the soil, then keep it consistently moist (not soggy) for the first week. A light mulch around the base helps retain moisture and keeps weeds at bay.
Within 21 days, you’ll see those leaves filling out with that signature kale texture—rugged, slightly crinkled, and packed with flavor. The key is patience: resist harvesting until plants are at least 6 inches tall, or you’ll stunt their growth.
This method works year-round in mild climates, but if you’re planting in late summer or fall, give seedlings a little shade during the hottest part of the day. And here’s a pro tip: side-dress with compost every 3-4 weeks to keep them producing through winter.
Once you master this, you’ll wonder why you ever bought kale at the store.
📚 In This Guide
- What you need
- Instructions
- Tips and common mistakes
- Wrapping up and next steps
What you need
- ● Kale seedlings: 3–6 healthy, disease-free seedlings (choose varieties like Winterbor, Curly Blue, or Red Russian for best results).
- ● Garden space: Full sun (6+ hours/day) or partial shade (4–6 hours) in hot climates.
- ● Well-draining soil (pH 6.0–7.0). Amend with compost if your soil is heavy or sandy.
- ● Transplanting tools: Garden trowel or transplanting spade.
- ● Watering can or hose with a gentle spray nozzle.
- ○ Fertilizer (optional but recommended): Balanced, organic fertilizer (e.g., 10-10-10 or compost tea) to boost early growth.
- ● Mulch (straw or shredded leaves) to retain moisture and suppress weeds.
- ● Plant markers (to label varieties if growing multiple types).
- ● Row covers (lightweight fabric) for young seedlings if frost or pests are a concern.
- ● Epsom salt (1 tbsp per gallon of water) for a magnesium boost (especially for yellowing leaves).
Step-by-step instructions for planting kale seedlings
Here's the method I use to get sturdy, disease-resistant kale growing strong within weeks.
Prepare the Planting Site for Optimal Growth
Kale thrives in loose, nutrient-rich soil with excellent drainage. Work the first 6 inches of soil with a garden fork, breaking up any compacted layers. Kale prefers a slightly acidic to neutral pH between 6.0 and 7.0, so test your soil if you're unsure. If your soil is heavy clay, mix in 2-3 inches of compost to improve structure and fertility.
Choose a location that receives full sun to partial shade—at least 4-6 hours of direct sunlight daily. Kale can tolerate light shade, especially in hot climates, but it produces the most robust growth with plenty of sun. Clear the area of weeds and debris, as competition for nutrients will stunt your seedlings.
Space Seedlings Properly for Maximum Yield
Kale seedlings need room to grow, so space them 12-18 inches apart in rows that are 24 inches apart. This spacing allows for good air circulation, reducing the risk of fungal diseases like downy mildew. If you're planting in a raised bed, follow the same spacing but adjust slightly if the bed is narrower—12 inches apart works well in 12-inch-wide beds.
Dig a hole for each seedling that's just slightly wider than the root ball. Gently remove the seedling from its container, loosen the roots if they're circling, and place it in the hole so the top of the root ball sits even with the soil surface. Press the soil lightly around the base to eliminate air pockets, but don't compact it too tightly.
Water Thoroughly to Establish Roots
After planting, water deeply to settle the soil and encourage root growth. Use 1-2 gallons of water per plant, applied slowly at the base to avoid wetting the leaves, which can promote disease. Watering deeply once or twice a week is better than frequent shallow watering, as it encourages roots to grow deeper into the soil.
Keep the soil consistently moist but not soggy for the first 2-3 weeks—this is critical for root establishment. You'll know the soil is at the right moisture level when the top 1-2 inches feel slightly damp to the touch. Mulch around the base of the plants with 2-3 inches of organic mulch to retain moisture, suppress weeds, and regulate soil temperature.
Provide Support and Monitor Growth
As kale grows, its sturdy stems may need support, especially in windy conditions or if you're growing taller varieties. Install 4-5 foot tall stakes or a cage-like trellis near the plants and loosely tie the stems to the support as they grow. This prevents the plants from toppling over and keeps the leaves off the ground, reducing the risk of rot.
Watch for signs of pests like cabbage worms or aphids, which are common on kale. If you spot them, remove them by hand or use an organic insecticidal soap. Kale is a heavy feeder, so side-dress with compost or a balanced organic fertilizer every 3-4 weeks to keep it producing well. You'll see new leaves forming within 2-3 weeks, and the plants will be ready for harvest in about 4-6 weeks depending on the variety.
Tips & tricks for planting kale seedlings
These practical insights will help you cultivate robust, thriving kale plants that yield abundant harvests within weeks.
Soil Preparation: Before planting, conduct a simple soil test to verify the pH level falls within the ideal range of 6.0 to 7.0. If your soil is particularly dense or lacks organic matter, consider amending it with an additional 1-2 inches of compost beyond the recommended 2-3 inches. This extra layer ensures your seedlings have the nutrients they need to establish strong root systems during the critical first two weeks.
Seedling Spacing Strategy: When planting in raised beds, maintain the recommended 12-inch spacing between seedlings, but be mindful of the bed's width. If your raised bed is narrower than 12 inches, consider staggering your seedlings in a checkerboard pattern to maximize space without compromising air circulation. This technique is particularly useful for smaller garden plots or container gardening.
Watering Technique: To prevent disease and encourage deep root growth, always water at the base of the plant rather than overhead. Use a watering can with a narrow spout or a drip irrigation system to direct water precisely where it's needed. This method reduces the risk of fungal infections while ensuring the roots receive adequate moisture. I've found that watering in the early morning allows the foliage to dry completely before evening, further minimizing disease risks.
Pest Prevention: Implement a preventative approach to pest control by introducing beneficial insects like ladybugs or lacewings to your garden. These natural predators feed on common kale pests such as cabbage worms and aphids. Additionally, consider planting companion crops like onions or garlic nearby, as their strong aromas deter many pests. Regularly inspect your plants for signs of pests, especially on the undersides of leaves, where they often hide.
Pro Tips for Planting Kale Seedlings
- These practical insights will help you cultivate robust, thriving kale plants that yield abundant harvests within weeks.
- Soil Preparation: Before planting, conduct a simple soil test to verify the pH level falls within the ideal range of 6.0 to 7.0.
- Seedling Spacing Strategy: When planting in raised beds, maintain the recommended 12-inch spacing between seedlings, but be mindful of the bed's width.
Frequently asked questions
Got questions about planting kale seedlings? You’re not alone!
Whether you're a first-timer or a seasoned gardener, these answers will help you grow thriving kale with ease.
When is the best time to plant kale seedlings outdoors?
Plant kale seedlings 4–6 weeks before your first expected frost in spring or 6–8 weeks before the first hard frost in fall. Kale thrives in cooler weather (50–70°F), so avoid planting during extreme heat. If your climate is mild year-round, you can even grow kale in winter with proper protection.
How long does it take for kale seedlings to mature after transplanting?
With proper care, kale seedlings typically take 3–5 weeks to establish after transplanting and 50–70 days total to reach harvest size. Baby leaves can be picked in as little as 3 weeks, while full-sized heads take longer. Check seed packet guidelines for exact timelines—some varieties mature faster than others!
What if my kale seedlings wilt or turn yellow after planting?
Wilting or yellowing can signal transplant shock, underwatering, or heat stress. First, ensure soil is moist (not soggy) and seedlings are shaded from harsh sun for a few days. If leaves yellow at the edges, it may be overwatering or nutrient deficiency—adjust care and consider a balanced fertilizer. Avoid planting in direct midday sun until seedlings acclimate.
Can I plant kale seedlings too close together?
Yes! Overcrowding leads to poor air circulation, disease, and stunted growth. Space seedlings 12–18 inches apart in rows 24–36 inches apart for optimal airflow and sunlight. If growing in containers, use at least one gallon of soil per plant. Thinning seedlings early prevents competition for nutrients.
What’s a good alternative if my kale seedlings fail to thrive?
If kale struggles in your climate, try collard greens, Swiss chard, or broccoli raab—they’re equally hardy and fast-growing. For a quick harvest, mustard greens or arugula are great cold-weather substitutes. Kale’s peppery flavor is unique, but these greens offer similar nutrients and ease of care!
Wrapping up and next steps
Planting kale seedlings is a rewarding way to grow a nutritious, fast-growing crop that thrives in cool weather. With the right preparation—well-drained soil, proper spacing, and consistent care—you’ll enjoy a bountiful harvest in just 3 weeks!
Whether you’re a beginner or a seasoned gardener, kale’s resilience makes it a perfect addition to your garden.
Now that you’re ready to plant, take the next step and mark your calendar for thinning or harvesting. Watch your seedlings grow into vibrant, leafy greens—you’ve got this! 🌱