Pruning
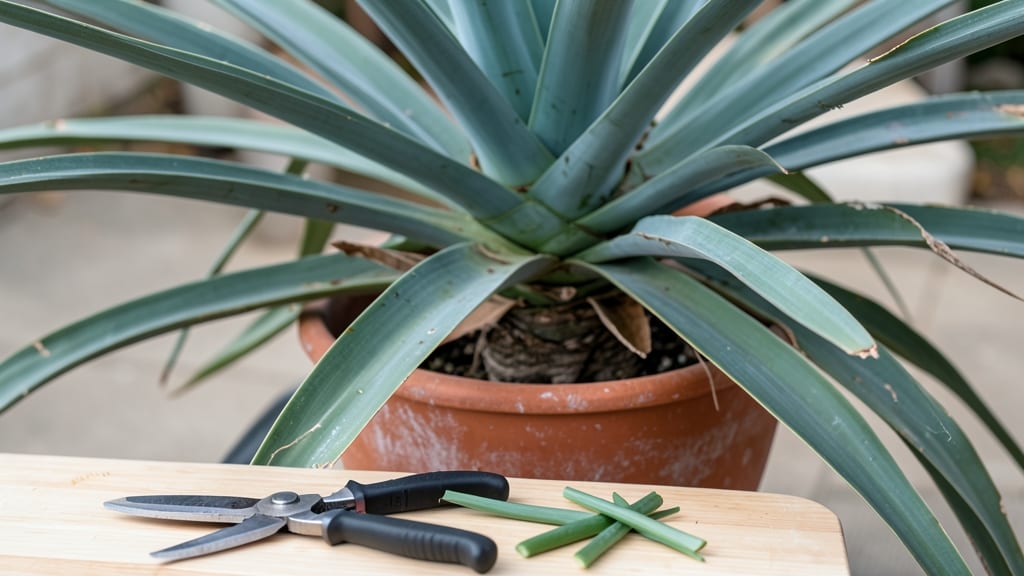
Yucca plant trimming transforms a scraggly mess into a showstopping architectural centerpiece—if you know the right cuts. 🌿 I’ve turned my own leggy yuccas from sad to stunning by focusing on just three strategic pruning spots, and the difference is night-and-day growth by summer.
The key? Timing in late winter or early spring when new shoots are about to burst from the base.
You’ll need sharp pruning shears, rubbing alcohol for sterilizing, and a bucket for clippings—no fancy tools, just precision. Cut 1-2 inches above a healthy leaf node for each of the three zones: dead leaves at the bottom, overgrown stems in the middle, and any leggy growth at the top.
The goal isn’t to make it bushy (yuccas don’t do that) but to encourage strong, upright growth from the base.
After trimming, your yucca will reward you with bold new shoots within weeks, and those old cuts will eventually heal into smooth, sturdy stems. Water lightly for the first week to help recovery, then let it dry out between waterings—overwatering is the #1 way to undo all your hard work.
The result? A plant that’s taller, denser, and ready to flower by next season.
Pro tip: Save those clippings! Yucca pups root easily in water or soil, giving you free plants for friends—or just more drama in your own garden. Just avoid trimming more than one-third of the plant at once, or you’ll shock it into dormancy instead of revival.
📚 In This Guide
- What you need
- Instructions
- Tips and common mistakes
- Wrapping up and next steps
What you need
- ● Pruning shears – Bypass pruners (sharp, clean, and sterilized to prevent disease; 5-7" blade size for medium-sized yuccas).
- ● Hand pruners – Bypass or anvil type (for smaller stems or detailed cuts; 4-6" blade).
- ● Horticultural saw – Only if needed for thick, woody stems (8-10" blade with fine teeth).
- ● Rubbing alcohol (70% or higher) – 1 small bottle (for sterilizing tools between cuts).
- ○ Disinfectant spray – Optional but recommended (e.g., 10% bleach solution or hydrogen peroxide; 1 spray bottle).
- ● Gloves – Heavy-duty gardening gloves (to protect from thorns and sap; nitrile or leather preferred).
- ○ Pruning sealant – Optional (for large cuts; latex-based or tree wound dressing).
- ● Newspaper or drop cloth – 1-2 sheets (to contain debris and protect surfaces).
- ● Choose the right time – Trim in early spring (before new growth starts) or late fall (after frost risk passes).
- ● Assess the plant – Identify dead, damaged, or overcrowded stems/leaves before cutting.
- ● Water the yucca – 24 hours prior to trimming (well-hydrated plants handle cuts better).
- ● Clear the workspace – Ensure good airflow and 6+ feet of clearance around the plant.
Step-by-Step instructions for reviving your yucca with precision trims
Here's the exact method I use to coax new growth from dormant yucca—no guesswork, just clean cuts and smart timing.
✂️ Step 1: Identify and Mark Dead or Dormant Growth
Examine your yucca for brown, dry fronds or leaves that snap when bent. These are dead and need removal. Healthy leaves should feel firm and slightly leathery. I like to work in natural light so I can see the subtle color shifts—dead fronds look straw-colored, while live ones have green veins.
Use a sharp pruning shear to make your first cut. Hold the frond at its base where it meets the main stem. You'll feel a slight resistance—this is where the leaf naturally detaches. Cut ½ inch above the base of the stem to avoid leaving stubs that can rot. Never cut into healthy green tissue, even if it looks weak.
✂️ Step 2: Trim Overcrowded or Weak Fronds
Next, look for fronds growing too close together or leaves that lean excessively toward the light. These compete for nutrients and block airflow. I target fronds that are at least 12 inches tall—smaller ones may still recover. Make your cut at the same ½-inch angle above the base, just like with dead fronds.
Here's the thing—yucca stores energy in its thick trunk. When you remove crowded growth, you're redirecting that energy to stronger, straighter leaves. After trimming, step back and observe the plant's shape. You want to see an open center where air circulates freely. If you're unsure, wait a week and reassess before making more cuts.
✂️ Step 3: Encourage New Growth With Strategic Cuts
For dormant yucca that hasn't grown in months, make a single horizontal cut around the trunk, about 2-3 inches below the top of the plant. This isn't about removing growth—it's about stimulating the plant's natural response. The cut should be clean and even, exposing a small ring of fresh tissue.
This technique works because yucca often goes dormant due to stress. The cut signals the plant to redirect energy downward, where new shoots will emerge. Water the plant deeply after cutting to help it recover. Place it in bright, indirect light for 2-3 weeks while it adjusts. You'll know it's working when you see tiny green buds forming at the base of the cut or along the trunk.
⏰ Step 4: Monitor and Maintain Post-Trim
After trimming, reduce watering to every 2-3 weeks unless the soil feels completely dry. Yucca stores water in its trunk, so overwatering now will rot the fresh cuts. Check the soil by sticking your finger 1 inch deep—if it's damp, wait before watering again.
In 4-6 weeks, you should see new growth emerging from the base or along the trunk. If no buds appear after 8 weeks, repeat the horizontal cut 1 inch lower on the trunk. This gives the plant another chance to respond. With patience, even a dormant yucca will bounce back—just give it time to heal and redirect its energy.
Tips & tricks for perfect yucca plant trimming
Reviving a dormant yucca isn't just about cutting—it's about reading your plant's signals and working with its natural rhythms.
The Tool Factor: Never use dull scissors or garden shears on yucca. A sharp pruning shear makes clean cuts that heal faster and reduces the risk of tearing the tough fibers. I've ruined two yucca trims with dull tools—trust me, the jagged edges invite rot. If your shears feel like they're fighting the plant, they're too dull. A quick test: try cutting a piece of paper—if it tears, your shears need sharpening.
Visual Cues Over Guesswork: In Step 1, when identifying dead fronds, focus on the color contrast between healthy green veins and the straw-colored dead tissue. I learned this the hard way by cutting into live tissue that just looked weak. Bend each frond gently—if it snaps like a dry twig, it's ready to go. For Step 3's strategic cut, look for the transition point where the trunk starts to widen—this is where new growth will emerge most reliably.
Timing Secret: The 2-3 week recovery period in bright, indirect light is critical. I've seen yucca owners rush this step by moving plants back to direct sun too soon, which stresses the fresh cuts. Think of it like giving your yucca a spa treatment—dim light helps it conserve energy for healing. If your home has limited natural light, supplement with a grow light for 6-8 hours daily during this period.
Post-Trim Rescue Strategy: If you accidentally nicked healthy tissue during cutting, don't panic. Apply a thin layer of cinnamon powder to the cut edges—it has natural antifungal properties and helps prevent rot. I keep a small jar of cinnamon in my gardening kit just for this purpose. Also, if you notice any yellowing around the base after trimming, that's normal for the first week as the plant adjusts its energy flow.
Pro Tips for Yucca Plant Trimming
- Reviving a dormant yucca isn't just about cutting—it's about reading your plant's signals and working with its natural rhythms.
- The Tool Factor: Never use dull scissors or garden shears on yucca.
- Visual Cues Over Guesswork: In Step 1, when identifying dead fronds, focus on the color contrast between healthy green veins and the straw-colored dead tissue.
Frequently asked questions
Got questions about trimming your yucca plant? You’re not alone!
Here are answers to the most common concerns—from timing to troubleshooting—so you can confidently revive your plant’s growth.
When is the best time to trim a yucca plant?
The ideal time to trim yucca is late winter or early spring (just before new growth begins). Avoid pruning in fall or winter, as this can stress the plant. If you spot dead or damaged foliage anytime, remove it promptly to prevent pests or disease.
Can I trim a yucca plant too much?
Yes! Over-trimming can shock your yucca, especially if you remove more than one-third of the plant at once. Focus on dead, yellowed, or brown leaves and avoid cutting into healthy green stems. If you’re unsure, start small and monitor for new growth.
What should I do with the cuttings after trimming?
Yucca cuttings can root easily! Let them dry for 1–2 days to callus over, then plant in well-draining soil. Keep them in bright, indirect light and water sparingly until roots form (usually 4–6 weeks). Propagating is a great way to expand your yucca collection!
Why is my yucca plant turning brown after trimming?
Brown tips or leaves after pruning usually mean underwatering or overwatering. Yuccas thrive on drought-like conditions—water deeply but infrequently (every 2–3 weeks). If the soil stays soggy, reduce watering and ensure the pot has drainage holes.
Do I need to sterilize my pruning tools for yucca trimming?
Absolutely!
Sterilizing tools (with rubbing alcohol or a 10% bleach solution) prevents bacterial or fungal infections that can harm your plant. Wipe blades before and after each use, especially if your yucca has signs of disease. A little prep goes a long way for healthy growth!
Wrapping up and next steps
Trimming your yucca plant isn’t just about aesthetics—it’s a game-changer for its health and growth! 🌱 By mastering the three precision cuts (dead leaves, leggy stems, and overcrowded pups), you’ll encourage vibrant blooms and a stronger structure.
Remember, timing and sharp tools are your best friends, so don’t hesitate to grab those pruners and get to work.
Ready to transform your yucca? Start with one section at a time—confidence grows with practice. Snap a photo of your progress and share it with fellow plant parents for extra motivation! 🌟