Pruning
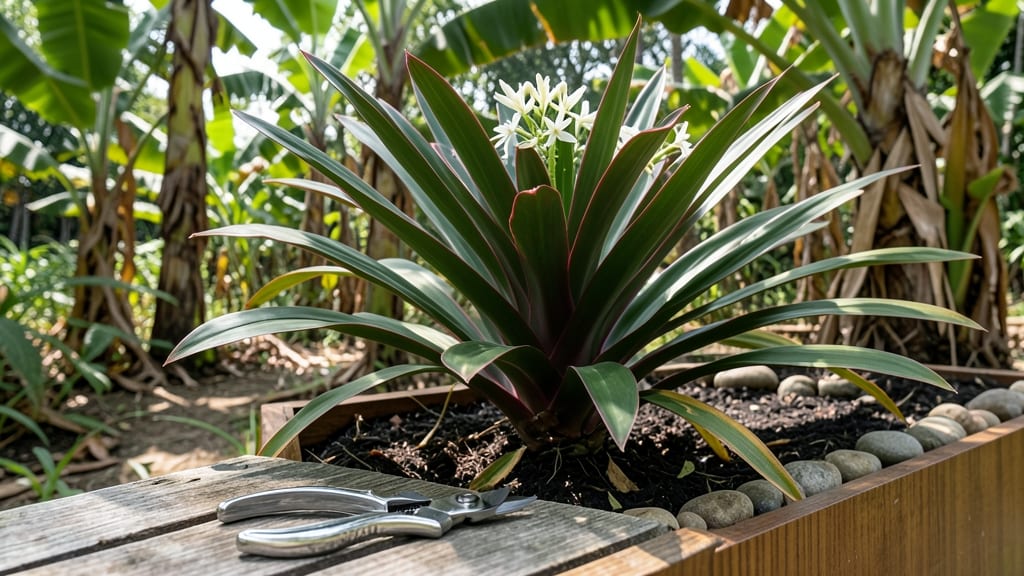
Trimming Cordyline plants keeps them vibrant and full of life all year long. ✨ I learned the hard way that skipping this step leads to leggy, sparse growth—until I discovered the right timing and technique.
The key is cutting back by about one-third in late winter or early spring, right after flowering, to encourage fresh, dense growth.
You only need a few tools: sharp pruning shears for clean cuts, a pair of gloves to protect your hands, and a bucket to collect clippings. Focus on removing any dead or damaged leaves first, then trim back the longest stems to maintain a balanced shape.
Avoid cutting into the thick, woody stems—just focus on the leafy tops for the best results.
After trimming, your Cordyline will reward you with bold new foliage within weeks. The plants stay compact, colorful, and pest-resistant, plus they flower more reliably. Just avoid over-trimming, which can stress the plant and slow down regrowth. With the right approach, you'll have a lush, year-round focal point.
This method works for both indoor and outdoor Cordylines, though outdoor plants may need a second light trim in early summer. The goal is to keep the plant healthy, not perfect—so don’t stress over every leaf. Your patience will pay off in vibrant, thriving growth.
📚 In This Guide
- What you need
- Instructions
- Tips and common mistakes
- Wrapping up and next steps
What you need
- ● Sharp pruning shears or bypass pruners – Choose 6-8 inch blades for clean cuts (avoid dull tools—they crush stems!).
- ● Clean, disinfected pruning tools – Rubbing alcohol or a 10% bleach solution to sterilize between cuts and prevent disease.
- ○ Gloves – Heavy-duty gardening gloves (optional but recommended for thorny varieties like Cordyline fruticosa).
- ● Disposable pruning bags or bucket – For collecting trimmings (helps keep your workspace tidy!).
- ● Rag or paper towels – To wipe away sap or excess moisture from cuts.
- ● Sharpie or permanent marker – For labeling cuttings if you plan to propagate.
- ● Hand pruners with a bypass blade – For smaller stems (more precise than shears).
- ● Loppers (for thick stems) – 8-10 inch bypass loppers if your Cordyline has woody, mature growth.
- ● Rooting hormone – If propagating cuttings (speeds up root development!).
- ● Hose with a gentle spray nozzle – To rinse off sap or dust before trimming.
- ● Pruning sealant (like tree wound dressing) – Only for large cuts to prevent sap bleeding (controversial but useful in some cases).
Step-by-Step instructions for trimming Cordyline plants
Here’s how I keep my cordylines vibrant and healthy with sharp, intentional cuts that boost growth.
✂️ Step 1: Gather Your Tools and Assess the Plant
Start with a clean, sharp pair of bypass pruners or hand pruners—dull blades tear stems and invite disease. I also grab a small bucket for clippings and a spray bottle with 70% isopropyl alcohol to sterilize tools between cuts. Examine your cordyline for dead, yellowed, or brown leaves—these need removal first, followed by any leaves that block sunlight from reaching lower growth.
Run your hand along the stem to check for soft, mushy spots—a sign of rot. If you find any, mark those areas for deeper investigation later. Healthy leaves should feel firm and slightly leathery. This step ensures you’re only cutting what’s necessary, not sacrificing healthy growth.
✂️ Step 2: Remove Damaged or Diseased Foliage
Snip off dead or brown leaves at the base of the stem, cutting just above a leaf node (the small bump where leaves grow). Avoid leaving stubs—clean cuts heal faster and look tidier. If a leaf is yellow but still firm (not mushy), hold off on cutting it unless it’s blocking light. Yellow leaves often indicate overwatering or nutrient issues, not necessarily death.
For diseased leaves (black spots, mold, or unusual discoloration), bag them immediately and dispose of them in the trash—not the compost. Sterilize your pruners with the alcohol wipe between each diseased cut to prevent spreading pathogens to healthy parts of the plant. This is where most mistakes happen: skipping sterilization or leaving diseased leaves behind.
✂️ Step 3: Shape the Plant for Balance and Airflow
Step back and assess the plant’s shape. Cordylines grow in a clumping habit, so I aim for a rounded, full silhouette rather than a lopsided look. Trim long, leggy stems back to just above a leaf node, cutting at a 45-degree angle to encourage new growth from the side. Avoid cutting into the woody stem—focus on the softer, leafy growth at the top.
Remove any crossing or rubbing branches that create friction—this prevents wounds where pests or disease can enter. If your cordyline is in a container, prioritize trimming the outermost leaves first to maintain airflow and reduce humidity buildup. This step is all about light penetration and circulation, which keeps the plant thriving year-round.
✂️ Step 4: Encourage New Growth with Strategic Cuts
To promote bushier growth, cut back the tallest stems by about one-third of their height. This may seem drastic, but cordylines respond well to pruning and will send out new shoots from lower nodes. Avoid cutting into the thick, woody base—this won’t regrow and can harm the plant. If you’re unsure, err on the side of shorter cuts and observe the plant’s response over a few weeks.
After trimming, give the plant a light misting with water to reduce stress. Place it in a bright, indirect light spot for a few days to recover. You’ll notice new leaves emerging from the sides within 4-6 weeks, signaling successful regrowth. This is the moment that matters: patience here pays off with a fuller, more vibrant plant.
⏰ Step 5: Clean Up and Monitor for Recovery
Dispose of all clippings in the trash (not compost) unless they’re completely healthy. Wipe down your tools with the alcohol solution and store them in a dry place. Water the plant deeply but thoroughly—cordylines prefer slightly dry soil between waterings, so avoid overdoing it. Real talk: I’ve killed more plants by overwatering after pruning than by cutting too much.
Watch for new growth in the following weeks. If you see yellowing leaves after trimming, it’s usually a sign of overwatering or shock—adjust your watering schedule and ensure the soil drains well. With proper care, your cordyline will bounce back stronger, with richer color and denser foliage by the next season.
Tips & tricks for perfect Cordyline trimming
Don’t let hesitation keep you from giving your cordylines the fresh start they deserve—these precision tips will help you trim with confidence and care.
Tool Prep is Non-Negotiable: Sterilizing your pruners between cuts in Step 1 isn't just about hygiene—it's about preventing disease spread. I learned this the hard way after my cordyline developed black spots from contaminated tools. Keep that 70% isopropyl alcohol handy and wipe between every diseased leaf. Pro tip: Use a small brush to scrub away sap buildup on blades after trimming sticky leaves.
Leaf Node Location Matters: When cutting in Step 2 or Step 3, those tiny leaf nodes are your GPS for regrowth. Look for the small bump where leaves attach—this is where new shoots will emerge. If you accidentally cut into the woody stem instead, don't panic: cordylines are resilient, but you won't get new growth from that spot. For stubborn leaves, gently twist while cutting to avoid tearing the stem.
Timing for New Growth: The 4-6 week window mentioned in Step 4 is when magic happens. During this time, resist the urge to trim again—let the plant focus its energy on recovery. I've found that plants trimmed in early spring (just before active growth) show the most dramatic regrowth. If you notice new shoots appearing but old leaves still clinging, wait until they're fully formed before removing any more foliage.
Watering Wisdom: After trimming, that "deeply but thoroughly" watering in Step 5 is crucial—but timing matters too. Water immediately after trimming to reduce stress, then wait until the top inch of soil is dry before watering again. Overwatering now is the #1 mistake I see after pruning, and it leads to those dreaded yellow leaves. Think of it as giving your plant a refreshing drink, not a swamp bath.
Pro Tips for Trimming Cordyline Plants
- Don’t let hesitation keep you from giving your cordylines the fresh start they deserve—these precision tips will help you trim with confidence and care.
- Tool Prep is Non-Negotiable: Sterilizing your pruners between cuts in Step 1 isn't just about hygiene—it's about preventing disease spread.
- Leaf Node Location Matters: When cutting in Step 2 or Step 3, those tiny leaf nodes are your GPS for regrowth.
Frequently asked questions
Got questions about keeping your Cordyline plants looking their best? Here are some common concerns—and their answers—to help you trim with confidence!
When is the best time to trim Cordyline plants?
Trim your Cordyline anytime it looks overgrown or leggy, but spring or early summer is ideal for a major shape-up. Light pruning can happen year-round to maintain neatness. Avoid heavy cuts in late fall or winter, as growth slows down, and the plant may struggle to recover.
How much can I cut back without harming my Cordyline?
You can safely trim up to one-third of the plant’s height in one session. For dramatic reshaping, cut back to 1/3 to 1/2 of the desired height, leaving a few inches of growth above the base. Avoid cutting into old, woody stems—focus on the flexible, newer growth for cleaner cuts and faster regrowth.
What should I do with the cuttings after trimming?
Turn your trimmings into new plants! Dip the cuttings in rooting hormone, then place them in moist potting mix or water. Keep them in bright, indirect light and maintain humidity. Roots should form in 4–8 weeks. Alternatively, compost the cuttings for your garden—just avoid woody stems, which decompose slowly.
Why is my Cordyline turning brown or crispy after trimming?
Brown or crispy edges often mean over-trimming, stress, or improper aftercare. If you cut too close to the base or into old wood, the plant may react poorly. Ensure you’re using clean, sharp tools and water thoroughly post-prune. If browning persists, check for underwatering or sunburn—move the plant to partial shade temporarily.
Can I trim Cordyline for color instead of just size?
To enhance vibrant foliage, trim back leggy stems to encourage new, colorful growth at the tips. Focus on removing old, faded leaves and stems to redirect energy to fresh, lively foliage. Pruning also helps Cordyline maintain its compact, bushy shape, which highlights its striking variegation.
Wrapping up and next steps
Trimming your Cordyline plants doesn’t have to be intimidating—it’s all about timing, technique, and a little confidence! 🌿 With the right tools, a steady hand, and the tips you’ve learned, you’ll keep your plants vibrant, healthy, and full of year-round color.
Whether you’re pruning for shape, health, or blooms, every cut brings your garden one step closer to perfection.
Ready to take the next step? Grab your shears, put on some gloves, and give your Cordylines the care they deserve! 🌟 For even more inspiration, explore seasonal pruning guides or share your progress with fellow plant lovers—your garden (and plants) will thank you!