Planting
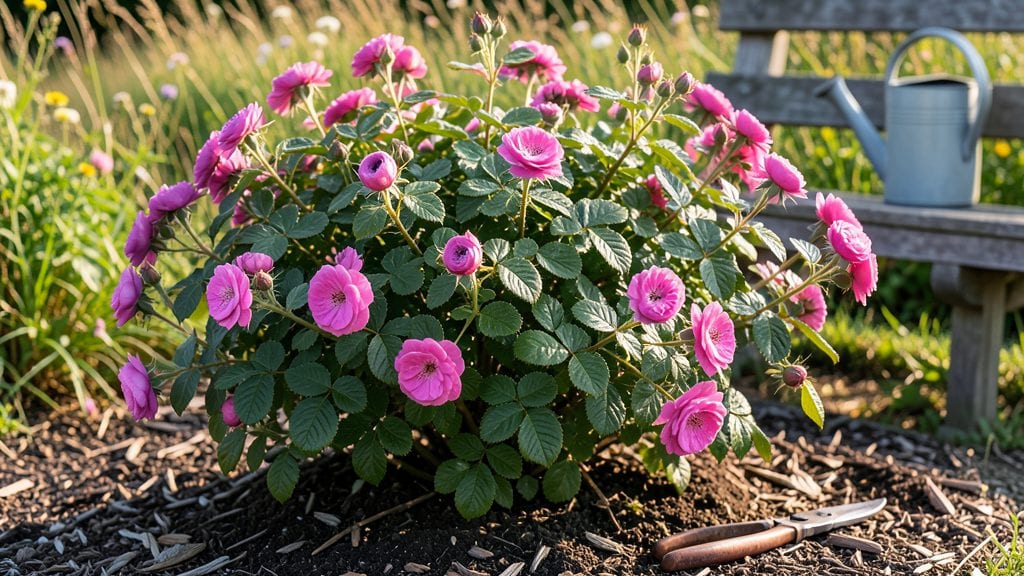
Thorny bushes transform your property into an impenetrable fortress—nature's version of a high-tech security system. 🌿 I planted mine along the fence line after years of dealing with nosy neighbors and wandering pets, and the difference is night-and-day.
These plants don't just grow; they deter—with sharp spines that make trespassing feel like a bad idea.
The right thorny bush depends on your climate and how much maintenance you're willing to handle. Barberries thrive in cooler zones with their glossy leaves and bright red berries, while pyracantha handles heat and humidity like a champ.
Roses add beauty but need more care—think of them as the luxury SUV of thorny plants. All of them share one thing: they grow fast and fill in gaps better than any fence.
You'll end up with a living barrier that's both functional and stunning—imagine lush green walls in summer and berries for birds in winter. The thorns keep critters out, but they won't ruin your yard's curb appeal.
With proper pruning, you'll keep them dense and healthy, turning your property line into a natural fortress that actually looks good doing it.
Works for urban yards, rural homesteads, or anywhere you need privacy without sacrificing aesthetics. Let's get you started with the right plants for your space and climate—no more peeking neighbors or wandering pets! Here's what you need to know before you dig in.
📚 In This Guide
- What you need
- Instructions
- Tips and common mistakes
- Wrapping up and next steps
What you need
- ● Thorny bush plant cuttings or seedlings: 5–10 healthy plants (species like Pyracantha, Berberis, or Gleditsia work well). Check local nurseries for disease-resistant varieties.
- ● Well-draining soil: 5–10 bags (2–3 cubic feet each) of a mix of garden soil, compost, and perlite (ratio: 60% soil, 30% compost, 10% perlite).
- ● Fertilizer: 1 bag of balanced, slow-release fertilizer (10-10-10 or similar) or organic options like bone meal or worm castings.
- ● Mulch: 2–3 bags of wood chips or straw to retain moisture and suppress weeds.
- ● Garden trowel or spade: 1 medium-sized shovel for digging.
- ● Pruning shears: 1 pair for trimming and shaping.
- ● Measuring tape: 1 (to space plants 3–6 feet apart, depending on mature size).
- ● Garden hose or watering can: With a spray nozzle for gentle watering.
- ● Gloves (thorn-proof!): 1 pair to protect your hands.
- ○ Stakes or trellis (optional): For support if growing climbing varieties like Gleditsia triacanthos.
- ● Sunlight: A location with full sun (6+ hours/day) for optimal growth.
- ● Space: Minimum 3–6 feet between plants (check your species’ mature width).
- ● Water source: Access to water for the first 2–3 weeks (plants need consistent moisture).
- ● Local climate check: Ensure your hardiness zone matches your chosen thorny bush (e.g., Pyracantha thrives in zones 5–9).
Step-by-Step instructions for planting a thorny bush privacy screen
Here’s how to create a natural, impenetrable barrier that thrives year-round with minimal upkeep.
🪴 Step 1: Choose the Right Thorny Bush Variety and Site
Select a fast-growing, thorny shrub like hawthorn, pyracantha, or barberry—these handle pruning well and deter intruders. The best spots get full sun to partial shade (at least 6 hours of sunlight daily) and have well-draining soil. Avoid low-lying areas where water pools, as soggy roots invite rot.
I always test soil drainage first by digging a 12-inch hole, filling it with water, and watching how fast it drains. If it takes longer than 30 minutes, amend with 2 inches of coarse sand or compost before planting. Thorny bushes need 6-8 feet of space between plants for proper airflow and growth.
🌱 Step 2: Prepare the Soil and Plant Bare-Root or Container-Grown Shrubs
Dig holes twice as wide and just as deep as the root ball. Loosen the soil at the bottom with a fork to encourage root spread. For bare-root plants, soak roots in lukewarm water for 1 hour before planting to revive them. Container-grown shrubs can go straight in.
Place the plant in the hole so the top of the root ball sits level with the surrounding soil—burying too deep suffocates stems, while planting too high stresses roots. Backfill with native soil, pressing gently to eliminate air pockets. Water deeply until moisture reaches 6 inches down, then let the soil settle for 24 hours before mulching.
💧 Step 3: Water and Mulch for Retention and Weed Control
Water once a week for the first month, giving 1-2 gallons per plant each time. After that, water only when the top 2 inches of soil feel dry—thorny bushes hate soggy feet but also can’t handle drought. I use a 3-inch layer of wood chips or shredded bark around the base (keep mulch 3 inches away from the stem to prevent rot).
This mulch layer locks in moisture, regulates soil temperature, and smothers weeds—critical for young plants competing with invasive grasses. Replenish mulch yearly as it breaks down. Avoid synthetic mulches; they trap too much heat and can burn roots.
✂️ Step 4: Prune for Shape and Thorn Density
Prune once in late winter (before new growth starts) to shape the bush and encourage dense, thorny growth. Remove dead, crossing, or weak branches first, then cut back overgrown stems by ⅓ to stimulate bushier regrowth. Use clean, sharp pruners and make cuts at a 45-degree angle just above a leaf node.
For extra thorns, I lightly pinch back new growth in early summer—this triggers more lateral branching. Avoid heavy pruning after mid-summer; new growth won’t harden off before winter. Wear gloves and long sleeves—those thorns are serious!
☀️ Step 5: Monitor and Maintain Year-Round
Check plants monthly for pests like spider mites or scale, which love thorny bushes. Spray with neem oil at the first sign of webbing or sticky residue. Fertilize once in early spring with a balanced 10-10-10 formula—too much nitrogen makes plants soft and less thorny.
In winter, rake away fallen leaves to prevent fungal diseases. If your area gets below 0°F, wrap young plants in burlap for the first two winters. Mature bushes handle cold well, but extra protection gives them a head start. With this care, your privacy screen will thicken and strengthen every year.
Tips & tricks for perfect thorny bush privacy screens
Planting a thorny bush privacy screen is a game-changer for your outdoor space—here's how to avoid common pitfalls and maximize growth.
Soil Drainage is Non-Negotiable: In Step 1, that 30-minute drainage test is critical. If water pools in your 12-inch hole, you're setting up root rot before you even plant. I've seen thorny bushes fail within weeks because of poor drainage—trust me, it's worth the extra 10 minutes to test. For heavy clay soil, mix in that 2 inches of coarse sand right in the hole, not just around the edges. The roots need immediate relief from waterlogging.
Planting Depth Matters More Than You Think: When placing your bush in Step 2, use a stake or level to ensure the top of the root ball sits exactly level with the surrounding soil. I learned this the hard way—burying too deep suffocates stems, while planting too high stresses roots. After backfilling, press gently but firmly to eliminate air pockets, then water until moisture reaches 6 inches down. This ensures the roots make immediate contact with moist soil.
Mulch Like a Pro: That 3-inch layer of wood chips in Step 3 isn't just decoration—it's your moisture retention superhero. Keep it 3 inches away from the stem to prevent rot, and replenish it yearly as it breaks down. I've seen mulch act like insulation in winter, protecting roots from temperature swings that can stress young plants. For extra protection in cold climates, add a 2-inch layer of straw on top of the wood chips during winter months.
Pruning Timing is Everything: The late winter pruning in Step 4 is your chance to shape the bush while it's dormant. When you cut back overgrown stems by ⅓, you're not just tidying up—you're encouraging bushier regrowth. That early summer pinch-back creates more lateral branches, which means more thorns. But here's the secret: always prune on a dry day when the plants aren't stressed from recent rain or drought.
Pro Tips for Thorny Bush Plant
- Planting a thorny bush privacy screen is a game-changer for your outdoor space—here's how to avoid common pitfalls and maximize growth.
- Soil Drainage is Non-Negotiable: In Step 1, that 30-minute drainage test is critical.
- Planting Depth Matters More Than You Think: When placing your bush in Step 2, use a stake or level to ensure the top of the root ball sits exactly level with the surrounding soil.
Frequently asked questions
Got questions about growing a thorny bush plant as a privacy screen? You’re not alone! Here are some of the most common queries—plus straightforward answers to help you thrive.
What’s the best thorny bush plant for a fast-growing privacy hedge?
If you want quick results, go for Osage orange (growth up to 6 feet/year!) or Russian olive. For milder climates, Honey Locust or Glossy Abelia (less aggressive but still thorny) are great picks. Just check your hardiness zone—some varieties need full sun, others tolerate shade.
How do I protect myself from thorns when planting or pruning?
Thorns are a feature, not a bug—but they can be a hassle! Wear long sleeves, thick gloves (like gardening or welder’s gloves), and safety goggles. For pruning, use long-handled loppers or a pole saw. A light spray of talcum powder on exposed skin can also help reduce irritation.
When is the best time to plant a thorny bush for year-round privacy?
Plant in early spring or fall when temperatures are mild (50–70°F). This gives roots time to establish before extreme heat or cold. If you’re in a hot climate, late summer (after monsoon season) can work too. Avoid planting in peak winter—frost can stress young plants.
Are there thorny bushes that don’t spread aggressively like Osage orange?
Yes! If you want containment without chaos, try:
- Glossy Abelia (semi-evergreen, mild thorns, 3–5 ft tall)
- Pyracantha (firethorn, dense, berry-producing, 6–12 ft)
- Hawthorn (ornamental, wildlife-friendly, 15–25 ft)
Why are my thorny bushes losing leaves or looking sick?
Common culprits:
- Overwatering (check soil—it should be damp but not soggy)
- Pests (aphids, spider mites, or scale insects—spray with neem oil)
- Fungal issues (like powdery mildew—improve airflow and avoid wetting foliage)
- Nutrient deficiency (yellow leaves? Try a balanced fertilizer in spring)
Wrapping up and next steps
Growing a thorny bush plant as a natural privacy screen is a rewarding project that blends beauty with functionality! Whether you’re drawn to its year-round greenery, deterrent properties, or low-maintenance appeal, these plants deliver both privacy and peace of mind. 🌿✨
Ready to take the next step? Start by selecting the right variety for your climate, then gather your tools and soil amendments. With patience and care, your lush, thorny barrier will flourish—offering both safety and serenity for years to come. Happy planting! 🌱