Pruning
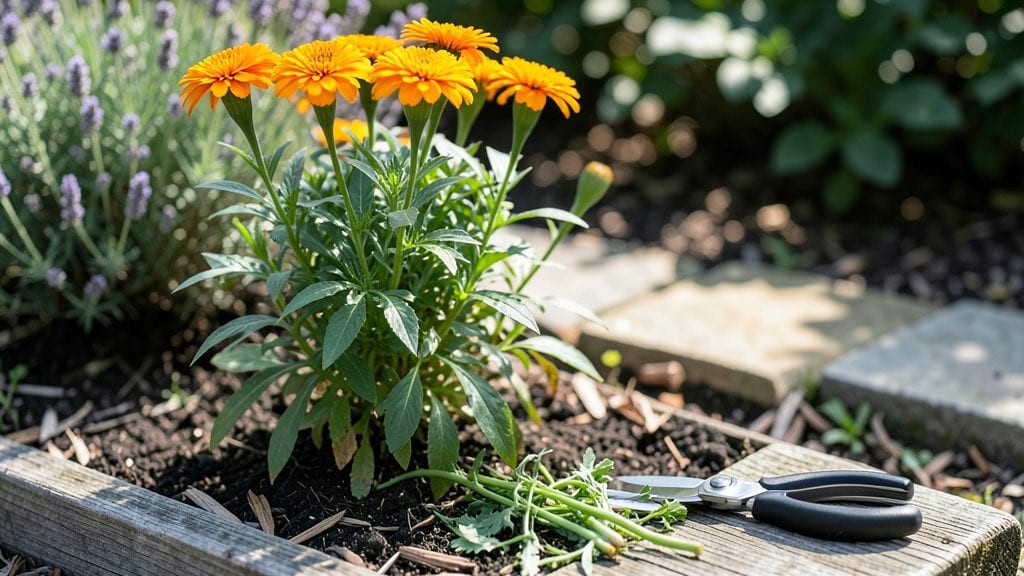
Pruning marigold plants is the secret weapon for nonstop blooms—two strategic cuts can turn a single plant into a flowering powerhouse. 🌼 I used to let mine grow wild, then wonder why they petered out by midsummer.
Turns out, marigolds reward precision over neglect, and the right timing makes all the difference.
The key is cutting back just above a leaf node when blooms fade, then giving the plant a second trim after new growth appears. You’ll see fresh shoots within days, and those second flushes of flowers arrive with half the effort.
Most gardeners skip this second cut—that’s when you get leggy stems and sparse blooms.
By the end of summer, your marigolds will look fuller, bloom longer, and even repel pests better than unpruned plants. The secret’s in the timing: deadhead spent blooms in the morning, shape the plant after rain, and you’ll avoid stressing the roots. Ready to transform those scraggly stems?
This works for French, African, and signet marigolds alike—just adjust the timing based on your climate. In warm zones, you might get three flushes of blooms; in cooler areas, two is plenty. The goal isn’t perfection, but consistent color all season.
📚 In This Guide
- What you need
- Instructions
- Tips and common mistakes
- Wrapping up and next steps
What you need
- ● Pruning shears: Bypass pruners (sharp, clean, and 5-7 inches long) – 1 pair (sterilize with rubbing alcohol between plants!).
- ○ Hand pruners: Small, ergonomic (for delicate cuts) – 1 pair (optional but handy for tight spaces).
- ● Garden gloves: Nitrile-coated (for grip and protection) – 1 pair (thick enough to shield against thorns).
- ● Disinfectant: Rubbing alcohol (70%+) or hydrogen peroxide (3%) – small bottle (to prevent disease spread).
- ● Trash bag or bucket: Lined – 1 medium-sized (for clippings and debris).
- ● Watering can or hose: With a gentle spray nozzle – 1 (for post-pruning hydration).
- ● Compost bin: For repurposing marigold clippings (rich in nitrogen!).
- ● Plant food: Balanced liquid fertilizer (10-10-10) – small bottle (apply 1-2 weeks post-pruning for a boost).
- ● Mulch: Straw or shredded leaves – 1-2 inches (to retain moisture and deter weeds).
- ● Sunscreen & hat: For sunny-day pruning sessions (trust us, your back will thank you!).
Pruning marigold plants: year-round blooms with 2 simple cuts
Here's how to keep your marigolds flowering nonstop—no fancy tools or complicated steps.
✂️ Step 1: Deadhead Spent Blooms Regularly
Pinch or snip off dead flowers at the base where they meet the stem. This is the most important cut for continuous blooms—I do this every 2-3 days during peak flowering seasons. The goal is to remove the faded bloom but leave the green foliage intact.
Use clean, sharp pruners or just your fingers. You'll know you're doing it right when you see new buds forming at the base of the plant within 5-7 days. If you skip this, marigolds will put energy into seed production instead of more flowers.
✂️ Step 2: Trim Leggy Stems Mid-Season
When stems grow taller than 12 inches and look leggy (thin and stretched), cut them back by one-third at the base. This encourages bushier growth and more flowers. I do this once in early summer and again in late summer if growth gets too tall.
Make your cut just above a set of leaves or a side branch. You'll notice new side shoots forming within 10-14 days—these will produce more flowers. Never cut into woody stems; focus only on the green growth.
☀️ Step 3: Lighten Up in Fall and Winter
As days shorten in fall, reduce pruning to just deadheading. Cut back any stems that look damaged or diseased completely to the base. In winter, give your marigolds a light haircut—trim back all stems by half to encourage fresh spring growth.
This is the moment that matters: after your winter pruning, keep the soil moist but not soggy. You'll see fresh green shoots emerging within 3-4 weeks, signaling the plant is ready for spring's longer days.
🌱 Step 4: Clean Up After Flowering Season
When flowering slows in late fall, cut back all stems to 2-3 inches above the soil. This prevents disease buildup in old growth and makes cleanup easier. I rake up all debris and compost it—never leave old plant material in the garden.
This final cut ensures your marigolds start fresh in spring. You'll have stronger plants with more vibrant blooms next season if you give them this clean start. Just water occasionally through winter to keep roots alive.
Tips & tricks for perfect marigold pruning
Marigolds are low-maintenance, but these simple tricks will help you extend their blooming season effortlessly.
Timing Tip: In Step 1, those 2-3 days between deadheadings might feel frequent, but it's the secret to continuous blooms. I set a phone reminder for my morning coffee time—it takes just 2 minutes and prevents that "all at once" flowering crash. Watch for buds that look droopy or brown at the edges; those are your cues to act.
Tool Tip: Don't have pruners? Your fingers work perfectly for deadheading—just pinch the stem between your thumb and forefinger right at the base. For leggy stems in Step 2, grab a pair of clean scissors or even kitchen shears in a pinch. The key is clean cuts, not fancy tools.
Seasonal Strategy: When you're doing your winter pruning in Step 3, mark the location of your marigolds with small flags or twine. This prevents accidental digging in spring when new shoots appear. I use colorful clothespins tied to stakes—it's a visual reminder that says "keep this spot sacred!"
Health Check: If you notice yellowing leaves during any season, that's your signal to inspect for pests or disease before pruning. For Step 4's cleanup, remove any yellowed or browned foliage completely—this prevents fungal issues from carrying over to next year's growth.
Pro Tips for Pruning Marigold Plants
- Marigolds are low-maintenance, but these simple tricks will help you extend their blooming season effortlessly.
- Timing Tip: In Step 1, those 2-3 days between deadheadings might feel frequent, but it's the secret to continuous blooms.
- Tool Tip: Don't have pruners?
Frequently asked questions
Got questions about keeping your marigolds thriving with pruning? Here are answers to the most common ones—so you can enjoy those bright blooms all season long!
When is the best time to prune marigolds?
Prune marigolds after they bloom (usually late spring to early summer) to encourage more flowers. For fall-blooming varieties, prune in late summer. Avoid heavy pruning in winter unless you’re in a mild climate—focus on removing dead or diseased stems year-round.
How much should I cut back marigolds?
For most marigolds, trim 1/3 of the plant’s height (about 3–6 inches) just above a leaf node or bud. This promotes bushier growth and more blooms. Over-pruning can stress the plant, so avoid cutting back more than one-third at a time.
What should I do if my marigolds stop blooming after pruning?
If blooms taper off, check for these fixes:
- Ensure they get 6–8 hours of sunlight daily.
- Fertilize lightly with a balanced bloom booster (10-10-10) after pruning.
- Deadhead spent blooms regularly to redirect energy to new flowers.
Can I prune marigolds in containers?
Yes! Container-grown marigolds benefit from pruning too—just follow the same rules. Use sterilized scissors to avoid spreading disease, and repot if roots outgrow the container. Dwarf varieties may need lighter trims to maintain shape.
Is there a difference between pruning French and African marigolds?
Both types respond well to pruning, but French marigolds (like ‘Bonanza’) may need more frequent deadheading to encourage continuous blooms. African marigolds (e.g., ‘Crackerjack’) are hardier and can handle slightly heavier pruning. Always trim above a leaf node for best results!
Wrapping up and next steps
Pruning your marigolds isn’t just about tidying up—it’s your secret weapon for vibrant, long-lasting blooms all year round! 🌼 With just two simple cuts, you’ll encourage bushier growth, healthier plants, and a never-ending display of those cheerful flowers.
Whether you’re a seasoned gardener or just starting out, these techniques are easy to master and make a huge difference.
Now that you’re armed with the know-how, grab those shears and give your marigolds the TLC they deserve. Watch them thrive! Ready for more? Try experimenting with deadheading other flowers in your garden—you’ll be amazed at the results! 🌱