Pruning
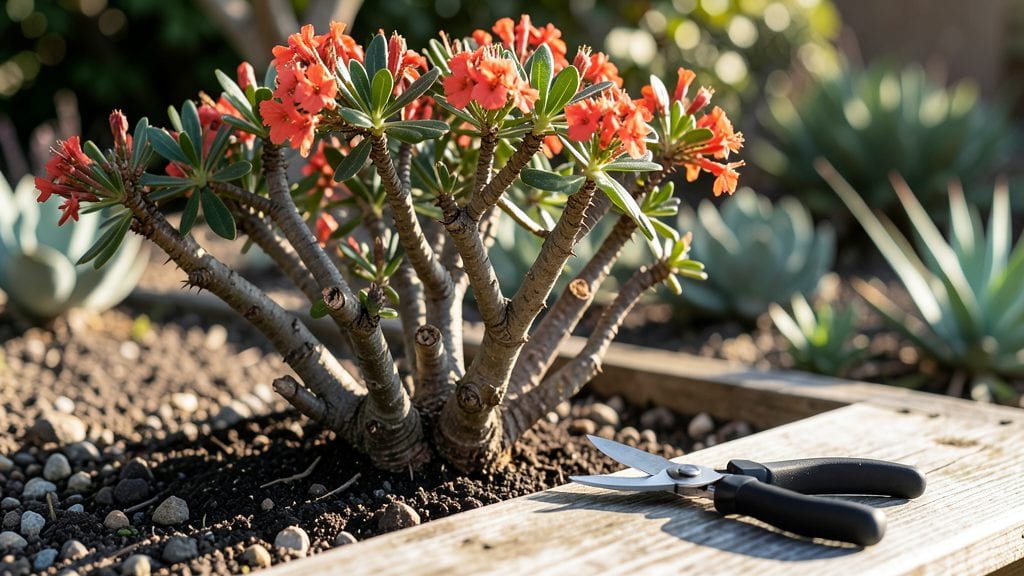
Pruning euphorbia plants keeps them thriving without turning your hands into a sticky mess. 🌱 I’ve learned the hard way—skipping gloves and cutting too close to the stem means wrestling with that infamous milky sap for hours.
The key is timing, technique, and treating those sharp leaves like they’re loaded with invisible landmines.
You’ll need sharp pruners (sterilized with rubbing alcohol), thick gardening gloves, and a bucket of soapy water to catch sap drips. Prune in late winter or early spring when new growth starts, but avoid cutting into the thick, fleshy stems—focus on dead or leggy branches.
For succulent types like Euphorbia tirucalli, a light trim encourages bushiness, while shrub varieties like Euphorbia characias can handle harder cuts to rejuvenate.
Done right, pruning turns your euphorbia into a denser, more vibrant plant with fewer bare spots. The sap stops oozing everywhere, and you’ll even get propagation material for free—just let cuttings dry for a few days before planting.
Just don’t crush those stems or you’ll regret it (trust me, the cleanup is worse than the pruning).
Works for all euphorbia varieties, from spiky Euphorbia milii to trailing Euphorbia cyparissias. The only rule? Always cut at a 45-degree angle above a leaf node, and never prune when the plant’s stressed. Now grab those gloves—your hands (and your plant) will thank you.
📚 In This Guide
- What you need
- Instructions
- Tips and common mistakes
- Wrapping up and next steps
What you need
- ● Garden gloves – Nitrile or rubber gloves (2 pairs: one for handling plants, one for tools). Thick, long-cuffed gloves (e.g., Mechanix Wear or similar) are ideal to protect against sap.
- ● Pruning shears – Bypass pruners (sharp, clean, and sterilized with rubbing alcohol). Avoid anvil pruners to prevent crushing stems.
- ● Hand pruners or loppers – For thicker stems (½-inch diameter or larger). Choose bypass-style tools for clean cuts.
- ● Disposable gloves or paper towels – For cleaning sap off tools and hands.
- ● Rubbing alcohol (70% or higher) – 1 small bottle (for sterilizing tools between cuts).
- ● Trash bag or bucket with lid – For disposing of pruned stems (do not compost Euphorbia clippings).
- ● Hose or water source – To rinse tools and hands after pruning.
- ● Safety goggles – If working with large plants or dusty conditions.
- ● Gardening apron – To protect clothing from sap stains.
- ● Sharpie or marker – For labeling new growth if propagating cuttings.
- ● Rooting hormone – If you plan to propagate stems from prunings.
- ● Plant food or fertilizer – To nourish your Euphorbia post-pruning (e.g., balanced 10-10-10 or cactus-specific fertilizer).
Step-by-Step guide to pruning Euphorbia safely
Here’s how to trim these striking plants without triggering their irritating sap or stunting their growth.
✂️ Step 1: Gather Tools and Protect Yourself
Euphorbia’s milky latex is a skin irritant, so I always wear nitrile gloves and a long-sleeved shirt. Use sharp, sterilized pruning shears—dull blades crush stems and encourage rot. A small spray bottle with 70% isopropyl alcohol is essential for wiping blades between cuts to prevent sap transfer. Avoid pruning on windy days; airborne sap can drift onto your skin or clothes.
Work outdoors or in a well-ventilated area. If you must prune indoors, open windows and keep a damp cloth handy to wipe up accidental spills. I keep a small container of baking soda paste (baking soda + water) nearby to neutralize sap if it touches skin—rinse immediately after use.
✂️ Step 2: Identify and Remove Dead or Damaged Growth
Start by inspecting the plant for yellowed, mushy, or blackened stems—these are dead and should be cut away first. Use your shears to make a clean cut at a 45-degree angle, about ¼ inch above a healthy leaf node or lateral branch. Avoid leaving stubs, which invite disease. Euphorbia stems ooze sap aggressively when cut, so I angle the cut downward to let the latex flow away from the plant’s center.
If a branch is hollow or oozing excessive sap, it’s likely diseased. Snip it off at the base and dispose of it in a sealed plastic bag. Never compost Euphorbia clippings—the sap can irritate compost piles and contaminate other plants.
✂️ Step 3: Shape the Plant for Bushier Growth
To encourage branching, I target the topmost sets of leaves on the main stems and make a cut just above a leaf node. This signals the plant to produce lateral shoots. For variegated Euphorbia, avoid cutting into the green-and-white patterned sections—those are the most desirable growth points. Step back occasionally to check your work; the goal is a balanced silhouette with no bare spots.
If your Euphorbia has become leggy, prune back the longest stems by one-third to stimulate denser foliage. Focus on the upper portions first, as lower cuts can stress the plant. Water the plant thoroughly 24 hours before pruning—well-hydrated stems bleed less sap and heal faster.
💧 Step 4: Clean Up and Monitor for Stress
After pruning, wipe down the plant’s remaining stems with a damp cloth to remove any residual sap. I avoid watering immediately, as wet sap can cling to cuts and slow healing. Instead, I wait 3-5 days before resuming regular watering. During this time, keep the plant in bright, indirect light—direct sun can stress newly pruned areas.
Watch for signs of over-pruning: if the plant drops more than one-third of its foliage at once, it may go dormant or produce fewer flowers. Euphorbia is resilient but not indestructible. If you’ve cut too aggressively, reduce watering slightly and provide extra shade until new growth appears, which typically takes 4-6 weeks.
⏰ Step 5: Schedule Pruning for Optimal Timing
Prune in early spring just as new growth begins, or in late summer after flowering. Avoid heavy pruning during winter dormancy or in extreme heat—both stress the plant. I prune mine in April to shape them before their spring growth spurt. If you’re growing Euphorbia for its colorful bracts, time pruning to avoid cutting into the flowering stems.
For container-grown Euphorbia, pruning stimulates compact growth, so I trim them more frequently—every 6-8 weeks during the growing season. Always use fresh shears for each plant to prevent cross-contamination of sap-borne diseases like bacterial blight.
Tips & tricks for pruning Euphorbia plants safely
These precision techniques will help you prune Euphorbia like a seasoned gardener while protecting yourself and your plants.
Safety First: The 24-hour hydration tip in Step 3 is non-negotiable. Well-watered stems bleed less sap, but don't overdo it—soggy soil can cause rot. I also recommend keeping a small bottle of dish soap nearby. If sap touches your skin, wash immediately with soap and water to prevent irritation. The baking soda paste mentioned in Step 1 works wonders, but soap is faster for emergency cleanup.
Cutting Technique: That 45-degree angle in Step 2 isn't just for looks—it prevents water pooling at the cut site, which can lead to rot. For thicker stems, I make a small horizontal cut first to release pressure before completing the angled cut. This reduces sap splatter and makes cleanup easier. Always wipe your shears with isopropyl alcohol between cuts to prevent cross-contamination of sap-borne diseases.
Stress Management: The 3-5 day watering hiatus after pruning (Step 4) gives cuts time to callus over. During this period, I place my pruned Euphorbia in a shaded area with indirect light—even bright indirect light can be too intense for freshly cut plants. If you notice yellowing leaves during this time, it's normal stress response, not necessarily a problem. New growth should appear within 4-6 weeks if you've followed the timing correctly.
Seasonal Timing: April isn't just a suggestion—it's the perfect window for spring pruning. The plant is waking up from dormancy but hasn't yet committed to its main growth cycle. For container-grown Euphorbia, the 6-8 week interval between prunings keeps them compact without overstressing. I mark my calendar because these plants grow quickly once they start branching. If you're growing Euphorbia for their colorful bracts, time your pruning to avoid cutting into the flowering stems—this ensures you get those vibrant displays next season.
Pro Tips for Pruning Euphorbia Plants
- These precision techniques will help you prune Euphorbia like a seasoned gardener while protecting yourself and your plants.
- Safety First: The 24-hour hydration tip in Step 3 is non-negotiable.
- Cutting Technique: That 45-degree angle in Step 2 isn't just for looks—it prevents water pooling at the cut site, which can lead to rot.
Frequently asked questions
Got questions about pruning your euphorbia plants? You’re not alone! Here are answers to the most common concerns—from safety tips to timing tricks—to keep your plants thriving without the stress.
When is the best time to prune euphorbia plants?
The ideal time to prune is late winter or early spring, just as new growth begins. Avoid pruning in summer heat or winter dormancy—both can stress the plant. If you spot leggy growth or dead branches anytime, trim them immediately to prevent sap buildup or pests.
How do I handle the toxic sap safely?
Euphorbia sap is irritating and toxic—always wear gloves and long sleeves! Wear safety goggles if you’re sensitive to sap. After pruning, wash tools with soap and water and dispose of clippings in sealed bags. Keep pets and kids away from pruned areas until sap dries.
Can I propagate euphorbia from cuttings?
After pruning, let cuttings dry for 1–2 days to seal the sap. Plant in well-draining soil and keep in bright, indirect light until roots form (4–6 weeks). Use a rooting hormone for faster success. Just avoid overwatering—euphorbias hate soggy soil!
What if my euphorbia looks overpruned?
If you’ve trimmed too much, don’t panic! Euphorbias are resilient. Reduce watering slightly and place the plant in bright, indirect light to recover. Avoid fertilizing until new growth appears (usually 4–6 weeks). If branches die back, they’ll regrow from the base—just be patient!
Do I need to sterilize my pruning tools?
Yes! Sterilizing tools prevents disease spread between plants. Use rubbing alcohol (70% or higher) or a bleach solution (1 part bleach to 9 parts water) to wipe blades before and after pruning. Clean tools after every use—especially if you’re pruning multiple plants.
Wrapping up and next steps
Pruning your euphorbia plants doesn’t have to be intimidating—with the right tools, timing, and techniques, you can safely shape their growth while protecting their milky sap. Remember to always wear gloves, work in well-ventilated areas, and reward your plants with a little TLC after each trim.
Whether you’re encouraging bushier foliage or maintaining their natural elegance, every snip brings you closer to a thriving, healthy plant.
Ready to take the next step? Grab your pruning shears and schedule your first session—your euphorbia will thank you with vibrant, lush growth! 🌿✨