Pruning
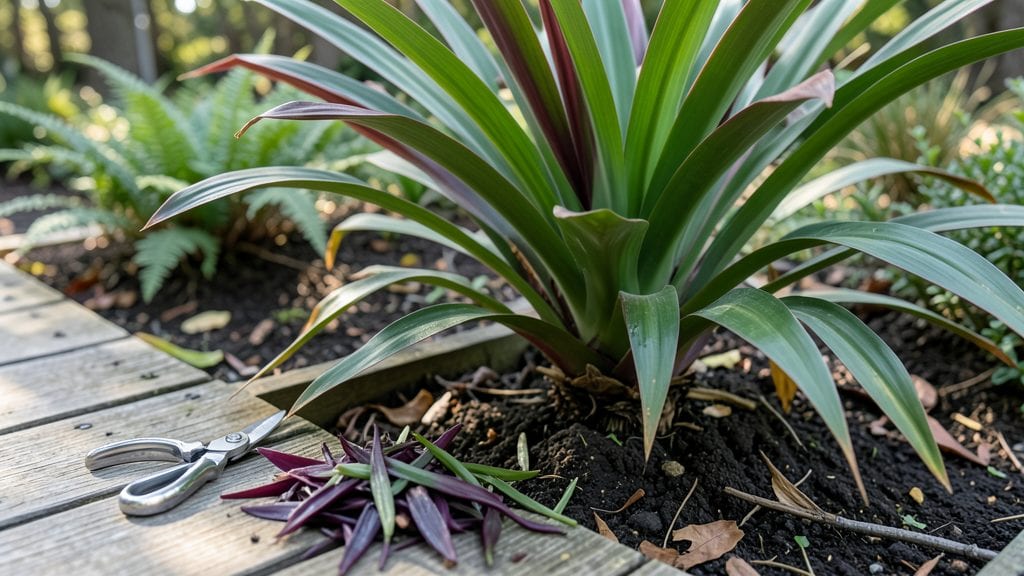
Pruning Cordyline plants keeps them lush and vibrant year after year—if you do it right. I’ve learned the hard way that skipping this step leads to leggy, sparse growth, but mastering three seasonal trims transforms my plants into dense, striking focal points.
The key is timing: early spring for shaping, summer to control height, and a light touch in late fall to prep for winter.
You’ll need just three tools: sharp bypass pruners for clean cuts, rubbing alcohol to sterilize them between cuts, and a bucket for clippings. My favorite trick? Prune just above a leaf node—this encourages new branches to sprout, giving your Cordyline that bushy, tropical look.
Avoid cutting into old, woody stems; they won’t regrow, and you’ll end up with bare spots.
After pruning, your plant will bounce back faster if you water deeply and hold off on heavy fertilizer for a few weeks. The new growth that appears within weeks is shockingly lush, with deeper green leaves and tighter spacing.
By late summer, your Cordyline will look fuller than ever, and you’ll have enough clippings to propagate new plants for free.
This method works for both indoor and outdoor Cordylines, whether you’re dealing with a towering 6-foot specimen or a compact patio plant. The same principles apply—just adjust the scale. Ready to give your plants the care they deserve? Let’s get started with the first trim in spring.
📚 In This Guide
- What you need
- Instructions
- Tips and common mistakes
- Wrapping up and next steps
What you need
- ● Sharp pruning shears – Bypass pruners (4–6” blade) for clean cuts on stems up to ½” thick.
- ● Pruning saw – For thicker stems (½”+); opt for a curved blade for precision.
- ● Disinfectant (70% isopropyl alcohol or bleach solution) – 1 part bleach to 9 parts water to sterilize tools between cuts.
- ● Garden gloves – Nitrile or leather (thick enough to protect against thorns/sap).
- ● Rubbing alcohol or hydrogen peroxide (3%) – For wiping cuts to prevent infection.
- ● Plastic bags or bucket – To collect pruned stems (compost or dispose of later).
- ● Rooting hormone – Speeds up propagation if you’re saving cuttings.
- ● Small trowel or knife – For trimming stubborn, low-hanging leaves.
- ● Plant food (balanced fertilizer, 10-10-10) – Feed after pruning to boost recovery.
- ● Mulch or compost – To replenish soil nutrients post-prune.
- ● Ladder or step stool – For tall Cordylines (safety first! 🚧).
- ● Choose a dry, sunny day to minimize stress on the plant.
- ● Wait until new growth appears (spring/early summer) for best results.
- ● Have a clear plan—sketch your desired shape or note areas to trim.
Instructions for pruning cordyline plants: seasonal care for year-round growth
Here’s my go-to approach for keeping cordylines lush and healthy through three key pruning sessions.
Early Spring Pruning to Stimulate New Growth
Start your first trim in early spring—just as new shoots begin to emerge. This is when cordylines wake up from dormancy and need a fresh start. Look for brown, crispy leaf tips or leaves that have lost their vibrant color—these are your first targets. Using sharp, sterilized pruning shears, make clean cuts just above a leaf node or bud. This ensures the plant directs energy into new growth rather than maintaining dead tissue.
I like to remove about one-third of the oldest, least attractive foliage in this first trim. If you’re dealing with a mature plant, focus on the lower leaves first—they’ll eventually turn brown and die back anyway. After pruning, wipe down the shears with rubbing alcohol to prevent spreading any potential diseases between cuts.
Mid-Summer Maintenance to Control Shape and Size
By mid-summer, your cordyline will likely have filled out, and some branches may be getting leggy or overcrowded. This is the time for a lighter trim to encourage bushiness and prevent the plant from becoming top-heavy. Look for crossing branches or leaves that are rubbing against each other—these should go first, as friction can damage the plant over time.
For taller stems, you can also pinch back the tips of new growth to promote branching. Use your fingers or small pruners to snip just above a set of leaves. Avoid cutting into the woody stem—stick to the softer, leafy parts. After trimming, give the plant a light watering to help it recover, especially if the weather has been dry.
Late Fall Cleanup to Prepare for Winter
The final trim of the year happens in late fall, just before the first frost. This is your chance to remove any remaining damaged, diseased, or unsightly leaves before the plant enters dormancy. Focus on yellowing leaves, broken stems, or anything that looks weak. Cut back to a healthy node or bud, just like in spring, but be more aggressive—this trim is about tidying up rather than encouraging growth.
If your cordyline is in a container, you can also reduce the size of the plant slightly by trimming back some of the longer stems. This helps prevent wind damage during winter storms. After pruning, reduce watering—cordylines in dormancy need less moisture. If you’re in a cold climate, consider moving potted plants to a sheltered spot or wrapping them in burlap for extra protection.
Year-Round Checks for Ongoing Health
Between the seasonal trims, keep an eye out for new growth that needs shaping or leaves that are turning brown unexpectedly. If you notice pests like spider mites or fungal spots, prune those areas immediately and treat with neem oil or insecticidal soap as needed. A little regular maintenance goes a long way in keeping your cordyline thriving.
I also like to rotate my potted cordylines every few months so all sides get equal sunlight. This prevents the plant from leaning and ensures even growth. If you see new shoots growing at the base, you can either leave them to create a fuller plant or transplant them to propagate new cordylines.
Tips & tricks for pruning cordyline plants
Mastering the art of cordyline pruning takes practice, but these key insights will help you keep your plants thriving year after year.
Timing is Everything: The seasonal timing in the instructions is crucial because cordylines respond differently based on their growth cycle. Early spring pruning stimulates new growth when the plant naturally wakes up, while late fall cleanup prepares it for dormancy. If you miss these windows, you risk stressing the plant—spring pruning too late can encourage weak growth, and fall pruning too early might stimulate new shoots that won't survive winter. Pay attention to your local climate and adjust slightly if needed.
Tool Preparation Matters: Sterilizing your pruning shears between cuts is more important than you might think. I've seen entire plants decline after using contaminated tools that spread fungal infections. Always wipe down your shears with rubbing alcohol between cuts, especially when dealing with diseased foliage. For larger pruning jobs, consider using a small spray bottle with diluted rubbing alcohol for quick sterilization between branches.
Understanding Plant Structure: When pruning, always cut just above a leaf node or bud. This small detail makes a huge difference in how quickly your cordyline recovers. The node contains dormant growth points that will sprout new leaves, while cutting into woody stems can leave unsightly scars. If you're unsure where the nodes are located, look for the small bump where leaves attach to the stem—this is your target spot.
Post-Pruning Care: After each pruning session, your cordyline needs proper recovery care. In mid-summer, that light watering helps the plant bounce back from shaping. In late fall, reducing water is just as important as pruning—too much moisture can encourage rot in dormant plants. For container-grown cordylines, give them a good drink after each trim, but be mindful of how much water they actually need during different seasons.
Pro Tips for Pruning Cordyline Plants
- Mastering the art of cordyline pruning takes practice, but these key insights will help you keep your plants thriving year after year.
- Timing is Everything: The seasonal timing in the instructions is crucial because cordylines respond differently based on their growth cycle.
- Tool Preparation Matters: Sterilizing your pruning shears between cuts is more important than you might think.
Frequently asked questions
Got questions about pruning your Cordyline plants? You’re not alone! Here are some of the most common concerns—and straightforward answers to keep your plants thriving.
When is the best time to prune Cordyline plants?
Prune Cordyline plants in early spring, late summer, or early fall for optimal results. Avoid heavy pruning in winter (unless removing dead growth) or during extreme heat. Pro tip: Trim just after flowering to redirect energy to foliage growth.
How much can I cut back without harming the plant?
You can safely remove up to 1/3 of the plant’s height in one session, but avoid over-pruning. For leggy stems, cut back to a healthy leaf node (about 6–12 inches from the base). Warning: Never prune more than 1/3 of the plant in a single season.
What if my Cordyline looks sad after pruning?
Don’t panic! Cordyline plants often rebound quickly with fresh growth in 4–6 weeks. If it’s slow to recover, check for:
- Light: Ensure it gets bright, indirect light (no harsh sun).
- Water: Keep soil evenly moist but not soggy.
- Fertilizer: Use a balanced liquid fertilizer 2 weeks post-prune.
Can I propagate my Cordyline cuttings?
Stem cuttings (3–6 inches long) root easily in water or moist potting mix. Dip the cut end in rooting hormone for faster success. Place in bright, indirect light and keep humidity high. Fun fact: Some varieties (like Cordyline fruticosa) root in just 2–3 weeks!
What should I never do when pruning Cordyline?
Avoid these pruning no-nos:
- Pruning in frost or extreme cold—wait until temps stabilize.
- Using dull or dirty tools—always sterilize with rubbing alcohol.
- Over-trimming healthy foliage—save some leaves for photosynthesis.
- Ignoring pests/disease—prune out yellow or mushy leaves immediately.
Wrapping up and next steps
Pruning your Cordyline plants doesn’t have to be daunting—with just three seasonal trims, you’ll keep them thriving year-round! 🌿 Whether you’re shaping for aesthetics, encouraging bushier growth, or reviving leggy stems, the key is consistency and confidence.
Now that you’re armed with the right tools, techniques, and timing, it’s time to roll up your sleeves and give your plants the TLC they deserve.
Ready to take the next step? Start small: Pick one season to prune first, observe how your Cordyline responds, and gradually build your green-thumb skills. Before you know it, your plants will be the envy of the neighborhood—and you’ll be the proud gardener behind them! 🌟