Pruning
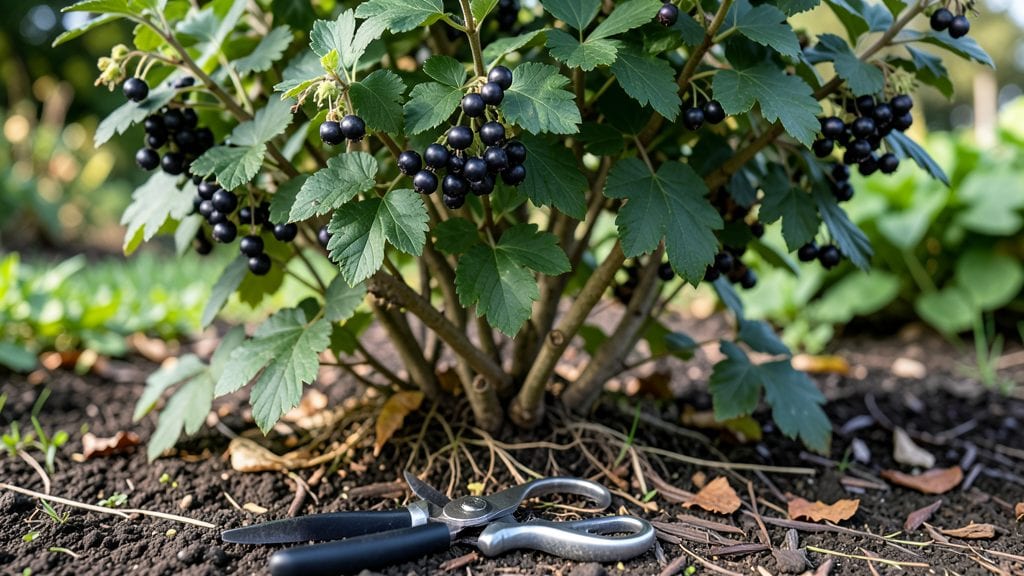
Pruning blackcurrant plants isn’t just about shaping—it’s the secret to year-round vigor and the sweetest berries you’ll ever taste. 🌱 I’ve watched my bushes go from scraggly to productive just by cutting at the right times, and the difference in fruit size is shocking.
Most gardeners wait until spring, but blackcurrants thrive when you prune three times a year—each cut serving a different purpose.
The key is timing: a late winter cleanup to remove dead wood, a summer trim to shape and encourage new growth, and a post-harvest prune to prepare for next year’s crop. You’ll need sharp pruners, gloves (those thorns don’t joke around), and about 30 minutes of focused work per bush.
The payoff? Thicker canes, more berries, and plants that look like they’ve been professionally landscaped instead of neglected.
By summer’s end, you’ll see the results: lush green foliage that blocks sunlight from the ground (no weeds here), and branches heavy with fruit. The berries themselves stay larger and sweeter because the plant isn’t wasting energy on overgrowth.
Even if you’ve avoided pruning before, blackcurrants are forgiving—just follow the three-season rhythm, and they’ll reward you for years.
This method works for both Ribes nigrum (European blackcurrants) and Ribes americanum (American varieties), though the latter needs slightly less aggressive pruning. Whether you’re in Zone 4 or 8, the seasonal approach adapts—just adjust timing by a week or two for early or late frosts.
Ready to transform those tangled bushes into productive powerhouses?
📚 In This Guide
- What you need
- Instructions
- Tips and common mistakes
- Wrapping up and next steps
What you need
- ● Pruning shears: Bypass pruners (for clean cuts on small stems) or anvil pruners (for thicker branches). Choose sharp, stainless steel blades (4–6" length) to avoid crushing stems.
- ● Loppers: Bypass-type loppers (20–24" length) for branches ½–1.5 inches thick. Look for ratcheting or bypass designs for precision.
- ● Pruning saw: Curved-tooth pruning saw (for branches >1.5" thick). Opt for a compact, foldable design for portability.
- ● Disinfectant: 70% isopropyl alcohol or a 10% bleach solution (1 part bleach to 9 parts water) to sterilize tools between cuts and prevent disease spread.
- ● Garden gloves: Heavy-duty, cut-resistant gloves (e.g., nitrile-coated) to protect hands from thorns and sap.
- ● Rubbing alcohol or hand sanitizer: For cleaning hands after handling sap (which can irritate skin).
- ● Trash bags or bucket: For collecting pruned branches and debris (a 5-gallon bucket works well).
- ● Sealing wax: Tree wound sealant (e.g., Tanglefoot Tree Wound Pruning Seal) to coat large cuts and reduce disease risk (controversial but useful for some gardeners).
- ● Marking spray: Water-soluble spray paint (e.g., white or pink) to mark branches for future reference.
- ● Knee pads: For comfort if you’re working on the ground for extended periods.
- ● Safety glasses: To shield eyes from debris, especially when using a pruning saw.
- ● Notebook or app: To log pruning dates, weather conditions, and plant responses (e.g., Gardenate or a simple notebook).
Instructions for pruning blackcurrant plants
Here’s the seasonal approach I’ve used to keep my blackcurrant bushes productive and disease-free for over a decade.
✂️ Step 1: Late Winter Pruning (Before Bud Break)
Start in late winter—when the ground is still frozen but the first buds are swelling—using clean, sharp pruners. This is the most critical cut because it sets up the plant’s structure for the entire year. Remove any dead, diseased, or crossing branches first; these are easy to spot as they’re brown, brittle, or growing inward.
Next, cut back last year’s growth to a strong outward-facing bud. I aim to leave 3-4 buds on each branch, as this encourages vigorous new shoots while maintaining airflow. Blackcurrants respond well to this aggressive pruning, so don’t hesitate—thinner branches produce larger, sweeter berries. Afterward, rake up and dispose of all clippings to prevent fungal spores from overwintering.
✂️ Step 2: Summer Light Pruning (After Harvest)
Once the berries are picked—typically mid to late summer—focus on light maintenance cuts to keep the plant tidy and encourage next year’s fruit. Remove any suckers (vigorous shoots growing from the base or along the stem) and weak, spindly growth that’s competing with stronger branches. These cuts are less about shaping and more about redirecting the plant’s energy toward healthy, berry-producing wood.
I also thin out overcrowded branches to improve sunlight penetration. Blackcurrants need at least 6 hours of direct sun for optimal fruit set, so prune to open up the center of the bush. Use your fingers to gently twist off smaller branches rather than cutting them—this reduces the risk of spreading disease through open wounds.
✂️ Step 3: Autumn Cleanup (After Leaf Fall)
In autumn, after the leaves have fallen but before the first hard frost, do a final sanitation prune. Remove all dead or yellowing leaves and any branches that look stunted or diseased. This step is less about shaping and more about preventing winter pests and fungal infections. Blackcurrants are prone to mildew, so keeping the area clean reduces next year’s risk.
I also trim back any overly vigorous new growth that sprouted after the summer prune. These shoots won’t harden off properly by winter and can die back, leaving unsightly stubs. Cut them back to a healthy bud or the main stem. Avoid heavy pruning now—you want the plant to enter dormancy with a balanced structure.
⏰ Step 4: Post-Pruning Care (Year-Round)
After each pruning session, water deeply to help the plant recover, especially if the cuts were heavy. Blackcurrants have shallow roots, so 1-2 inches of water per week (either from rain or irrigation) keeps them thriving. In late winter, apply a 2-3 inch layer of organic mulch (like shredded bark or straw) around the base to insulate the roots and retain moisture.
Finally, sterilize your pruners between cuts by wiping them with rubbing alcohol or dipping them in a 10% bleach solution. This prevents the spread of bacterial or fungal diseases from one branch to another. I also like to sharpen my pruners after each use—clean, sharp cuts heal faster and look neater, which matters when you’re dealing with a plant as delicate as blackcurrants.
Tips & tricks for pruning blackcurrant plants
These seasoned strategies will help you maintain healthy blackcurrant bushes that thrive year after year—without the common pitfalls that lead to disease or poor fruit production.
The Timing Factor: Late winter pruning is all about that precise window between frozen ground and bud swell. If you prune too early, you risk damaging dormant buds; too late, and you'll encourage new growth that won't harden off before spring. I always check for the first visible bud swelling while the ground remains frozen—this gives me the perfect 2-3 week window before active growth begins.
Bud Selection Strategy: When cutting back last year's growth to 3-4 buds, focus on outward-facing buds for optimal sunlight exposure and air circulation. I make a habit of standing back from the bush and visualizing how sunlight will hit each branch after my cuts. The goal is to create an open, umbrella-like shape that catches maximum light while preventing fungal issues from poor airflow.
Disease Prevention: The 10% bleach solution for sterilizing pruners isn't just a suggestion—it's non-negotiable for blackcurrant health. I keep a small spray bottle with diluted bleach (1 part bleach to 9 parts water) right by my pruning station. After each cut, especially when moving between branches, I give my pruners a quick wipe. This simple step has eliminated fungal issues in my bushes completely over the years.
Sunlight Optimization: Blackcurrants need at least 6 hours of direct sun for proper fruit development, but most gardeners underestimate how much pruning affects this. In Step 2, when thinning crowded branches, I aim to create a "sun funnel"—opening the center of the bush while preserving the outer canopy. This ensures light penetrates to the inner branches where fruit forms, while still maintaining some shade for the outer berries to prevent sunburn.
Pro Tips for Pruning Blackcurrant Plants
- These seasoned strategies will help you maintain healthy blackcurrant bushes that thrive year after year—without the common pitfalls that lead to disease or poor fruit production.
- The Timing Factor: Late winter pruning is all about that precise window between frozen ground and bud swell.
- Bud Selection Strategy: When cutting back last year's growth to 3-4 buds, focus on outward-facing buds for optimal sunlight exposure and air circulation.
Frequently asked questions
Got questions about keeping your blackcurrants thriving with the right cuts? Here are answers to the most common concerns—no pruning stress here!
When is the best time to prune blackcurrants?
Prune blackcurrants in three key seasons: late winter (before buds swell), early summer (after harvest), and late summer (to shape and remove weak growth). Avoid pruning in fall—it invites disease. Each cut serves a purpose: renewal, fruiting, and maintenance.
How often should I prune blackcurrant bushes?
Prune annually for best results, but focus on the three seasonal cuts mentioned above. Skip yearly pruning only if your plant is young (under 2 years) or already well-shaped. Over-pruning weakens growth—aim for 1/3 of the plant’s oldest wood per year to keep it balanced.
What if I accidentally prune at the wrong time?
Don’t panic! A one-time mistake (like pruning in fall) won’t kill your plant, but it may reduce next year’s fruit. Just sterilize your tools, prune lightly to remove dead wood, and focus on the correct seasonal cuts moving forward. Blackcurrants are resilient!
Can I prune blackcurrants too hard?
Yes—aggressive pruning (cutting back more than 1/3 of the plant) can stress the bush, reduce fruiting, and invite pests. Stick to selective removal of old, crossing, or diseased branches. Think of it like a haircut: trim, don’t shave!
What’s the difference between pruning red and black currants?
Both follow the same three-cut system, but red currants are more disease-prone, so prune them more aggressively in late winter to improve airflow. Black currants tolerate heavier cuts but benefit from late-summer shaping to boost next year’s fruit. Always sterilize tools between varieties!
Wrapping up and next steps
Pruning your blackcurrant plants doesn’t have to be intimidating—with the right timing and technique, you can keep them thriving for years! 🌿 Whether you’re shaping for airflow, boosting fruit production, or managing growth, seasonal cuts ensure your bushes stay healthy and productive. Now’s the perfect time to grab your pruners and give your blackcurrants the TLC they deserve!
Ready to take the next step? Start small:
- Review your plants’ growth patterns after this season’s cuts.
- Mark next year’s pruning calendar based on what worked (or didn’t!).
- Consider investing in a sharp pair of pruners or a small saw for cleaner cuts.