Propagation
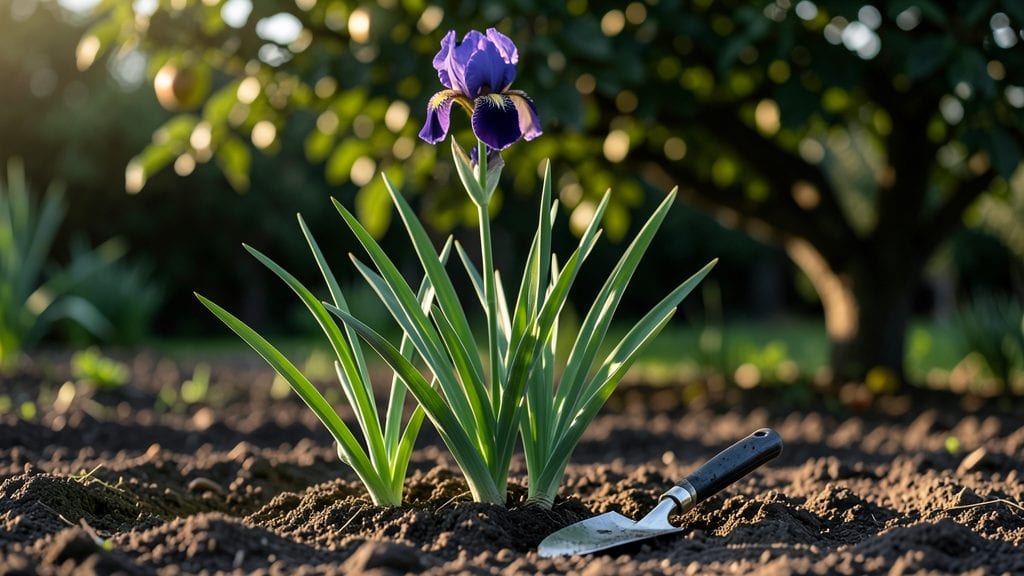
Dividing iris rhizomes in early spring turns one clump into three thriving plants with those bold striped blooms you love. 🌿 I’ve propagated dozens this way, and the key is timing—do it when the shoots are 2-3 inches tall but before the foliage yellows.
That window lasts just a few weeks, so don’t wait until the blooms fade.
The process is simpler than it sounds: dig up the clump, separate the rhizomes by hand (they pull apart easily), and trim any rotted or mushy parts. You’ll end up with 3-5 healthy divisions per original plant, each ready to bloom next season if given the right care.
Just plant them 12 inches apart in well-draining soil, and keep the crowns exposed to sunlight.
By summer, you’ll see fresh green fans pushing through the soil, and by next spring, those signature purple, yellow, or white blooms will return—often more abundant than before. The best part? You can share divisions with neighbors, turning one plant into a garden full of irises without spending a dime.
Works for bearded, Siberian, and even Japanese irises, though timing shifts slightly by type. Here’s how to do it right the first time—no guesswork, just reliable results.
📚 In This Guide
- What you need
- Instructions
- Tips and common mistakes
- Wrapping up and next steps
What you need
- ● Mature iris rhizomes: Healthy, established rhizomes (at least 1–2 years old) with fan-like leaves and visible roots.
- ● Sharp, sterilized knife or pruners: A clean, disinfected (rubbing alcohol or bleach solution) knife or pruning shears to make precise cuts.
- ● Garden gloves: Heavy-duty gloves to protect hands from thorns and soil.
- ● Well-draining potting mix or garden soil: A blend of 50% native soil and 50% compost or perlite (for pots) to prevent rot.
- ○ Containers (optional for potted propagation): 6–8" deep pots with drainage holes (for small divisions).
- ● Grow bags or nursery flats (for larger batches).
- ○ Fungicide (optional but recommended): Copper-based or sulfur-based fungicide to prevent rot during the healing process.
- ● Mulch or straw: Organic mulch to retain moisture and protect new growth.
- ● Watering can or hose with a gentle spray nozzle: For hydrating without disturbing divisions.
- ○ Stakes or labels (optional): To mark newly planted divisions and track growth.
- ● Timing: Late summer to early fall (after foliage yellows) or early spring (before new growth starts).
- ● Sunlight: Full sun (6+ hours daily) for established plants; partial shade while divisions root.
- ● Temperature: Mild weather (50–75°F / 10–24°C) for optimal healing.
Step-by-step instructions for propagating iris plants
Here's how to multiply your irises effortlessly—no fancy tools or expensive supplies needed.
🌱 Step 1: Choose Mature Iris Clumps for Division
Select healthy iris clumps with at least 3-5 fans (the fan-shaped leaf clusters) per section. Look for established plants that have been growing for 2-3 years—these will have strong rhizomes (thick, horizontal roots) ready for splitting. Avoid dividing young plants or those that have just finished blooming, as they won’t have enough energy to recover.
Gently dig around the base of the clump using a shovel or spade, lifting the entire plant from the soil. Shake off excess dirt to expose the rhizomes. You’ll see distinct sections where new fans have formed—these are your future plants. I like to work on a clean tarp or old sheet to keep things organized and make cleanup easier.
✂️ Step 2: Separate Rhizomes Carefully
Use a sharp knife or clean pruners to divide the clump into sections, ensuring each piece has at least 1-2 fans of leaves and 1-2 healthy rhizomes. Cut between the fans, making sure each division has a portion of the rhizome attached. The rhizome should look firm and plump, not shriveled or mushy—this ensures the new plant will establish well.
Discard any damaged or diseased sections immediately. Healthy rhizomes should feel firm to the touch and have a light tan or beige color. If you see blackened or soft spots, those parts won’t survive. I always keep a small spray bottle of rubbing alcohol handy to wipe down my tools between cuts—this prevents spreading any potential infections.
💧 Step 3: Prepare and Plant the New Divisions
Dig new holes for the divisions, spacing them 12-18 inches apart in well-draining soil. Irises hate soggy roots, so if your soil is heavy clay, mix in a handful of sand or perlite to improve drainage. Place each division so that the top of the rhizome is just above the soil line—never bury it too deep. The rhizome should sit slightly exposed to sunlight and air.
Water the newly planted divisions lightly right after planting to settle the soil around the roots. Avoid overwatering, as this can cause the rhizomes to rot. I like to use a hose with a gentle spray nozzle to avoid disturbing the soil too much. Mulch around the base with 2-3 inches of organic mulch (like shredded bark) to help retain moisture and suppress weeds, but keep the mulch away from the rhizomes themselves.
☀️ Step 4: Provide Care for Strong Establishment
Keep the newly divided irises in a sunny spot with full sun to partial shade (at least 6 hours of sunlight daily). Irises are tough plants, but they’ll establish faster with consistent care. Water them deeply once a week during the first 4-6 weeks, allowing the soil to dry out between waterings. After that, reduce watering to once every 2 weeks unless your area experiences extreme heat or drought.
Fertilize lightly in early spring with a balanced, low-nitrogen fertilizer (like a 10-10-10 mix) to encourage strong root growth. Avoid high-nitrogen fertilizers, which can lead to lush foliage but fewer blooms. You’ll know your divisions are thriving when you see new fans of leaves emerging by late spring or early summer. By next season, your new irises should be blooming just like their parents!
Tips & tricks for perfect iris plant propagation
These simple tricks will help you avoid common pitfalls and get your iris divisions thriving like a pro.
The Right Time Matters: The best time to divide irises is in early spring or late summer—right after blooming or before new growth begins. This gives the plants enough time to establish roots before winter. I've learned the hard way that dividing in fall can leave them vulnerable to cold weather stress. Look for established clumps with 3-5 fans that have been growing for 2-3 years—these are ready for division.
Clean Tools Prevent Infection: Always sanitize your knife or pruners between cuts using rubbing alcohol. I keep a small spray bottle handy to wipe down tools after each section—this simple step prevents spreading fungal infections that could kill your new divisions. Healthy rhizomes should feel firm and have a light tan or beige color; discard any with blackened or soft spots immediately.
Planting Depth is Critical: When planting your iris divisions, position the rhizomes so the top is just above the soil line. Burying them too deep can cause rot, while leaving them too exposed may dry them out. Think of it like planting potatoes—they need to be partially visible. After planting, water lightly to settle the soil, then reduce watering to once every 2 weeks once the initial 4-6 week establishment period is over.
Sunlight and Soil Work Together: Irises thrive in full sun to partial shade with at least 6 hours of direct sunlight daily. If your soil is heavy clay, mix in a handful of sand or perlite to improve drainage—they absolutely hate soggy roots. The key is well-draining soil that allows air to reach the rhizomes. I've found that spacing divisions 12-18 inches apart gives them room to grow without competing for nutrients.
Pro Tips for Propagating Iris Plants
- These simple tricks will help you avoid common pitfalls and get your iris divisions thriving like a pro.
- The Right Time Matters: The best time to divide irises is in early spring or late summer—right after blooming or before new growth begins.
- Clean Tools Prevent Infection: Always sanitize your knife or pruners between cuts using rubbing alcohol.
Frequently asked questions
Got questions about propagating irises? You’re not alone—this classic method can feel tricky at first! Here are answers to the most common queries to help you grow bold, striped blooms with confidence.
When is the best time to divide and propagate iris plants?
The ideal window is late summer to early fall (after blooming, before winter dormancy). This gives roots time to establish before cold weather. Avoid spring—new growth is vulnerable to frost damage. For warmer climates, fall or winter works too!
How do I know if my iris rhizomes are healthy enough to divide?
Healthy rhizomes are plump, firm, and tan-colored with visible roots and fan-like leaves. Discard shriveled, mushy, or hollow ones—they won’t regrow. Look for at least 2–3 healthy fans per rhizome to ensure strong regrowth.
Why aren’t my divided iris rhizomes sprouting after planting?
Patience! Rhizomes may take 2–4 weeks to show signs of life. Check for:
- Proper depth: Top should peek above soil (never buried).
- Well-draining soil: Waterlogged rhizomes rot.
- Warmth: Wait until soil temps hit 50°F+.
Can I propagate iris from seeds instead of divisions?
Yes, but expect years of waiting! Seed-grown irises take 3–5 years to bloom vs. 1–2 years for divisions. Seeds also rarely produce true-to-parent blooms. Divisions are the fastest, most reliable method for vibrant, striped varieties.
How do I store iris rhizomes if I can’t plant them right away?
Keep them cool, dry, and shaded in a breathable bag (like a paper towel-lined container). Store in a garage or basement (40–50°F). Avoid plastic—it traps moisture and causes rot. Plant within 2–3 months for best results.
Wrapping up and next steps
Propagating iris plants is a rewarding way to expand your garden with those bold, striped blooms you love—without spending a dime! Whether you’re dividing rhizomes, splitting clumps, or experimenting with seed propagation, the process is simpler than you think.
With the right tools, patience, and a little green thumb, you’ll soon be sharing (or enjoying!) dozens of new irises in no time.
Ready to dive in? Start with one healthy plant this season, follow the steps, and watch your iris collection grow—literally! 🌱✨