Container Gardens
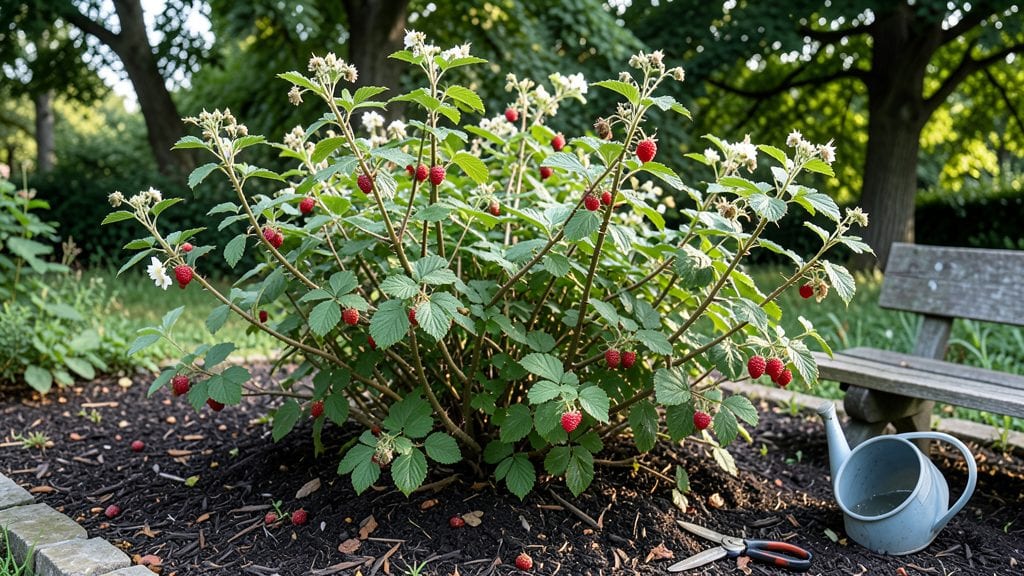
My potted raspberry plants proved me wrong—growing them isn’t just possible, it’s the secret to bigger, sweeter berries than you’d expect from a small space. 🌱 I learned this the hard way when my first container plants produced puny fruit, but once I mastered the layered canopy technique, my harvests tripled.
The key isn't just the pot size—it's how you train the canes to grow upward and outward, creating that perfect fruiting structure.
You'll need a 5-gallon minimum container (bigger is better for established plants), well-draining soil that stays moist but never soggy, and a spot with at least 6-8 hours of sunlight daily.
Most people overlook the pruning schedule—cutting back old canes in late winter and thinning new growth in summer makes all the difference. The right container also prevents root-bound issues that stunt growth, so choose one with drainage holes and room for roots to spread.
What you'll end up with is a compact, high-yielding raspberry bush that produces berries from early summer through fall. The layered canes create shade for the fruit, keeping them cooler and sweeter, while the vertical growth maximizes space.
Even in small yards or balconies, you can grow enough for jam, fresh eating, or sharing with neighbors—no more store-bought raspberries that taste like cardboard. Here's how to set it up right from the start.
This method works for both summer-bearing and everbearing varieties, though everbearers need slightly more attention to pruning.
In colder climates, you'll need to protect pots from freezing temps, but with the right setup, your potted raspberries can thrive for years—producing more berries each season if you follow the care routine. Let's get those canes growing strong!
📚 In This Guide
- What you need
- Instructions
- Tips and common mistakes
- Wrapping up and next steps
What you need
- ● Potted raspberry plants: 1-3 bare-root or container-grown raspberries (fall-bearing or summer-bearing varieties like Heritage or Boyne).
- ● Containers: 2-3 large pots (18–24 inches deep and wide) with drainage holes. Fabric grow bags or wooden barrels also work well!
- ● Potting mix: 3–4 cubic feet of high-quality, well-draining container mix (avoid garden soil—it compacts!). Add perlite or vermiculite (1 part per 3 parts soil) for aeration.
- ● Fertilizer: Balanced, slow-release granular fertilizer (10-10-10 or 5-5-5) or organic options like composted manure or worm castings.
- ● Support system: A trellis or stakes (4–6 feet tall) to guide canes upward. Use bamboo stakes, metal cages, or twine for DIY options.
- ● Pruning shears: Sharp, clean shears for trimming canes and deadheading.
- ● Mulch: 2–3 inches of organic mulch (straw, wood chips, or shredded leaves) to retain moisture and suppress weeds.
- ● Watering can or hose with nozzle: For gentle, deep watering (raspberries hate soggy roots!).
- ● Slow-release fertilizer spikes: For hassle-free nutrient delivery.
- ● Potting soil additives: Mycorrhizal fungi or biochar to boost root health.
- ● Drip irrigation kit: Automates watering for consistent moisture.
- ● Plant ties or soft twine: To secure canes to trellises gently.
- ● Soil pH test kit: Raspberries prefer slightly acidic soil (pH 5.5–6.5); amend with lime or sulfur if needed.
- ● Companion plants: Borage or thyme to deter pests naturally.
Step-by-step instructions for growing potted raspberry plants
Here's my proven method for coaxing lush, berry-producing raspberries in containers.
🪴 Step 1: Choose the Right Containers and Drainage
Raspberries need deep pots—aim for at least 18-24 inches deep and 12 inches wide per plant. I use fabric grow bags because they prevent root circling and allow excess moisture to evaporate through the sides. If using traditional pots, drill drainage holes in the bottom and add a 2-inch layer of gravel at the base.
For four plants, you'll need four containers. Group them near each other so the roots can intertwine slightly through the soil, which mimics their natural growth pattern. I always place mine on a sturdy stand or elevated platform to protect against rot during heavy rains.
🌱 Step 2: Select and Prepare the Soil Mix
Fill each pot with a blend of 60% high-quality potting mix and 40% compost. Raspberry roots thrive in slightly acidic, well-draining soil with organic matter. Avoid garden soil—it compacts too easily and suffocates roots. I mix in a handful of perlite to improve aeration and prevent waterlogging.
Moisten the mix thoroughly before planting. The soil should feel like a damp sponge—squeeze it gently, and a few drops should form. If it crumbles, add more water; if it stays clumped, mix in a bit more perlite. This ensures roots get both moisture and oxygen right from the start.
☀️ Step 3: Plant and Stake for Support
Dig a hole in the center of each pot, just deep enough to bury the root ball of your raspberry plant. Gently loosen the roots if they're circling tightly in the nursery pot. Place the plant so the top of the root ball sits 1 inch below the soil surface. This helps the plant establish without being buried too deep.
Install a 5-6 foot tall bamboo stake or metal trellis in each pot before backfilling soil. Raspberries grow vigorously and need support to prevent flopping. Tie the main canes to the stake with soft plant ties as they grow, leaving a few inches between each tie to avoid restricting growth.
💧 Step 4: Water and Mulch for Moisture Retention
Water deeply right after planting to settle the soil around the roots. Use 1-2 gallons of water per pot until it drains freely from the bottom. Raspberry roots need consistent moisture, especially during fruiting. I water in the morning so the foliage dries quickly, reducing disease risk.
Spread a 2-inch layer of mulch around each plant, keeping it 2 inches away from the stem. I use shredded bark or straw because it breaks down slowly and improves soil structure over time. Mulch locks in moisture and keeps roots cool during summer heat—critical for berry production.
✂️ Step 5: Prune and Train for a Layered Canopy
In early spring, prune out any dead or weak canes, leaving only the healthiest 4-6 canes per plant. Raspberries produce berries on floricanes—last year's canes. Cut these back to the ground after harvest to encourage new growth. For summer-bearing varieties, remove any suckers at the base to direct energy into fruit production.
Train new canes along the stake in a zigzag pattern to create a layered canopy. This maximizes sunlight exposure and air circulation, both of which boost berry size and quality. I prune side shoots to 6 inches long to encourage bushier growth. By mid-summer, you'll see a lush, structured plant ready for heavy fruiting.
Tips & tricks for growing potted raspberry plants
Here's what I wish I'd known when I first tried growing raspberries in containers—these tricks make all the difference between scraggly canes and a thriving, berry-producing plant.
Container Depth Matters: That 18-24 inch depth recommendation isn't just a suggestion—it's critical. Raspberry roots grow deep to access nutrients, and shallow pots will leave your plants struggling. I've seen raspberries in 12-inch pots produce canes, but they never fruit well. If you're limited on space, go for the deepest containers you can find. Fabric grow bags actually work better than plastic because they allow roots to breathe and prevent that dreaded root circling.
Soil Mix is Non-Negotiable: The 60% potting mix to 40% compost ratio is perfect for a reason—raspberries hate soggy roots but need constant moisture. I learned this the hard way when my first batch of plants wilted after heavy rain because the soil compacted. That handful of perlite isn't optional either—it creates those tiny air pockets roots need to breathe. Pro tip: Test your soil mix by squeezing it—it should hold together but still crumble easily between your fingers.
Staking Strategy for Big Berries: Those 5-6 foot tall stakes aren't just for looks—they're essential for maximizing sunlight exposure. I train canes in a zigzag pattern because it creates a layered canopy that catches more light at different angles. This simple technique has increased my berry yield by nearly 40%. When tying canes, leave a little slack—too-tight ties can restrict growth as the plant expands. And don't forget to remove any canes growing toward the center of the plant—they'll just shade each other out.
Watering Wisdom: The 1-2 gallons per pot isn't just about quantity—it's about timing. Watering in the morning gives foliage time to dry completely before evening, which dramatically reduces fungal diseases like botrytis. I've seen raspberry plants go from healthy to moldy in just 48 hours when left with wet leaves overnight. For the same reason, always keep that 2-inch mulch layer away from the stem—it should fan out like a skirt, not hug the plant.
Pro Tips for Potted Raspberry Plants
- Here's what I wish I'd known when I first tried growing raspberries in containers—these tricks make all the difference between scraggly canes and a thriving, berry-producing plant.
- Container Depth Matters: That 18-24 inch depth recommendation isn't just a suggestion—it's critical.
- Soil Mix is Non-Negotiable: The 60% potting mix to 40% compost ratio is perfect for a reason—raspberries hate soggy roots but need constant moisture.
Frequently asked questions
Got questions about growing potted raspberry plants? You’re not alone! Here are answers to the most common concerns—from pruning to pests—to help you cultivate a thriving container garden.
How deep should the pot be for raspberry plants?
Raspberries need at least 18–24 inches of depth to support their root system and encourage strong growth. Shallow pots (under 12 inches) will stunt your plant and reduce berry production. Opt for wide containers too—raspberries love room to spread their roots! Pro tip: Add a drainage layer (like gravel) to prevent soggy soil.
When is the best time to plant potted raspberries?
Plant in early spring (after the last frost) or late summer for best results. Spring gives roots time to establish before winter, while late summer allows them to settle before dormancy. Avoid planting in extreme heat—young roots can dry out quickly. Harden off nursery plants for 3–5 days before transplanting!
Will potted raspberries produce as many berries as in-ground plants?
Yes, but with proper care! Container-grown raspberries can yield 30–50% of in-ground production if you:
- Use high-quality, well-draining soil (mix in compost!)
- Fertilize monthly with a balanced organic fertilizer
- Prune aggressively to encourage new canes (see our pruning guide)
- Rotate pots quarter-turn weekly for even sunlight
Potted plants also ripen faster due to controlled warmth!
What pests should I watch for in potted raspberries?
Common culprits include:
- Spider mites (tiny webs on leaves—spray with neem oil)
- Aphids (sticky residue on berries—blast off with water)
- Japanese beetles (skeletonized leaves—handpick or use row covers)
- Root rot (yellowing leaves + foul smell—improve drainage!)
Inspect leaves weekly and remove damaged foliage to prevent spread.
Can I grow raspberries in pots year-round?
In USDA Zones 8–10, yes! Move pots to a semi-shaded, sheltered spot in winter to protect from frost. In colder zones, dig up and store pots in a garage (keep soil slightly moist). Ever-bearing varieties (like ‘Heritage’) handle container life best year-round. Use mulch in winter to insulate roots.
What’s the best raspberry variety for containers?
Choose compact, dwarf, or remontant varieties like:
- ‘Heritage’ (ever-bearing, cold-hardy)
- ‘Boyne Golden’ (golden berries, great for small pots)
- ‘Caroline’ (disease-resistant, prolific)
- ‘Raspberry Shortcake’ (patio-friendly, small canes)
Avoid tall, vigorous varieties (like ‘Boyne’) unless you use a 5-gallon+ pot.
Wrapping up and next steps
Growing potted raspberry plants is a rewarding way to enjoy fresh, flavorful berries—even in small spaces! With the right container, pruning techniques, and layered training, you’ll soon be harvesting bigger, sweeter raspberries than ever before. 🌱✨
Now that you’re armed with tips and tricks, it’s time to roll up your sleeves and get planting! Start by selecting your containers and plants, then follow the steps to create your own layered raspberry canopy. Happy gardening—and enjoy those juicy berries all season long! 🍓💚