Vegetables
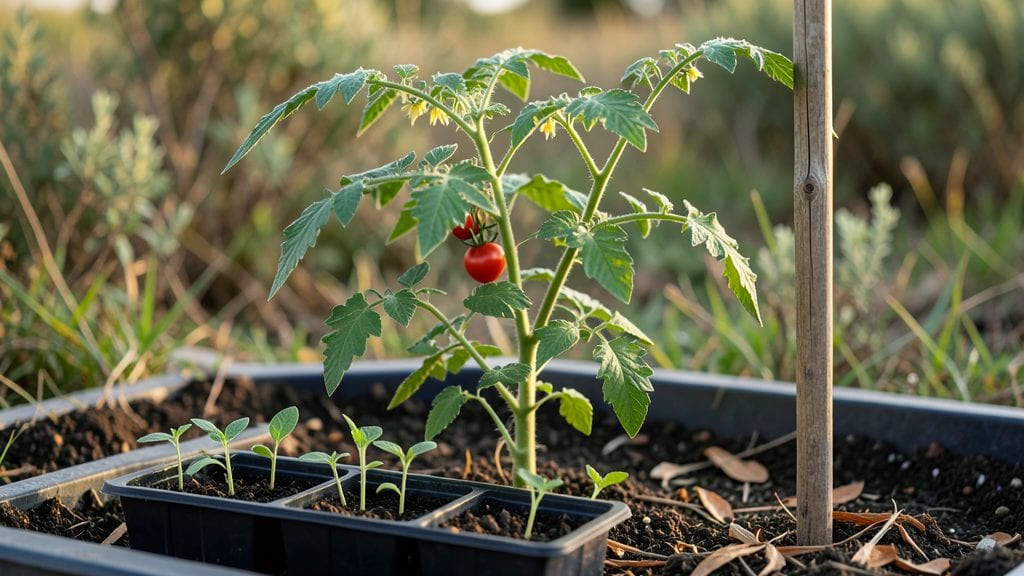
Planting tomatoes outdoors transforms a simple seedling into a vine loaded with sun-ripened fruit—if you follow these six steps.
I learned the hard way that skipping soil prep or crowding plants leads to blight and bitter fruit, but once you get the basics right, tomatoes reward you with pounds of homegrown goodness all summer long.
The secret starts with soil that drains well but holds moisture—think crumbly, not compact. Amend heavy clay with compost or aged manure, and avoid fresh manure (it burns roots).
Space plants 18-24 inches apart for airflow, and bury them deeper than the pot they came in: up to the first leaves. This encourages strong root systems, and my plants now grow 3-4 feet tall instead of flopping over.
After planting, keep soil consistently moist but not soggy—aim for 1-2 inches of water per week, more during fruit set. A morning watering routine prevents fungal issues, and mulching with straw keeps moisture in while suppressing weeds.
Within weeks, you’ll see vigorous new growth, and by midsummer, you’ll be harvesting tomatoes that taste nothing like store-bought.
This works in most climates, though adjust timing for early frosts—wait until nighttime temps stay above 50°F. Whether you’re in a small backyard or raised beds, these steps keep tomatoes thriving from transplant to harvest. Let’s get those plants in the ground!
📚 In This Guide
- What you need
- Instructions
- Tips and common mistakes
- Wrapping up and next steps
What you need
- ● Tomato plants: 3–6 healthy seedlings or transplants (choose disease-resistant varieties like 'Celebrity,' 'Better Boy,' or 'Sungold').
- ● Well-draining soil: 1–2 cubic yards of organic-rich potting mix or garden soil (amend with compost for fertility).
- ● Fertilizer: Balanced 10-10-10 or 5-10-10 granular fertilizer (1–2 lbs per 10 sq ft).
- ○ Slow-release tomato fertilizer (optional but recommended for heavy feeders).
- ● Support structures: Cages (5–6 ft tall, 1–2 per plant).
- ● OR stakes (6–8 ft bamboo or metal, 1–2 per plant).
- ● OR trellis (for indeterminate varieties).
- ● Mulch: Straw or black plastic (1–2 inches thick to retain moisture and suppress weeds).
- ● Watering can or hose: With a gentle spray nozzle (1–2 gallons per plant during dry spells).
- ● Gloves & pruners: For handling plants and trimming suckers.
- ● Epsom salt (1 tbsp per plant monthly for magnesium boost).
- ● Copper tape or fungicide (to prevent blight or pests).
- ● Drip irrigation kit (for automated watering).
- ● Shade cloth (if transplanting in scorching heat).
- ● Plant markers (to track varieties).
Instructions for planting tomatoes outdoors
Here's how to get your tomato plants thriving in the garden with minimal fuss.
Choose the Right Location and Timing
Tomatoes need full sun, so pick a spot that gets at least 6-8 hours of direct sunlight daily. Avoid areas where water pools after rain—tomatoes hate soggy roots. I always check the soil temperature with a thermometer; it should be at least 60°F before planting. If you're in a cooler climate, wait until after your last frost date and use black plastic mulch to warm the soil faster.
This is the moment that matters: Planting too early when soil is cold stresses seedlings and delays fruit production. If your forecast shows a late frost, have row covers ready to protect young plants. I like to plant mine 2-3 weeks after the last frost when nighttime temperatures stay above 50°F consistently.
Prepare the Soil for Healthy Growth
Loosen the soil to a depth of 12-15 inches with a shovel or tiller. Tomatoes need room to spread their roots, so break up any compacted layers. Mix in 2-3 inches of compost from your list into the top 6 inches of soil—this improves drainage and provides nutrients without burning tender roots. I always rake the area smooth afterward to create a level planting surface.
If your soil is heavy clay, add a 5-gallon bucket of sand per planting hole to improve drainage. Tomatoes in poorly drained soil develop root rot quickly. You'll see healthier plants with fewer diseases when the soil is loose and fertile. Test the soil pH before planting; tomatoes prefer a slightly acidic range of 6.0-6.8. If your soil is too alkaline, add sulfur or peat moss to adjust it.
Dig Holes and Plant Deeply
Dig holes twice as wide as the root ball but only as deep as the container's root base. Tomatoes can grow new roots along their buried stems, so I always plant them deeper than they were in their pots—up to one-third of the stem can be buried. Gently remove the plant from its container, loosen the roots if they're circling, and place it in the hole.
Fill the hole with soil, pressing lightly around the base to eliminate air pockets. Water deeply right after planting to settle the soil and encourage root contact. I like to add a handful of bone meal to the bottom of each hole for extra phosphorus, which helps root development. This ensures your plants start growing strong from day one.
Space Plants Properly for Airflow
Space your tomato plants 18-24 inches apart in rows that are 3-4 feet apart. This gives them room to grow and improves airflow, which prevents fungal diseases like early blight. I always stake or cage each plant immediately after transplanting—waiting until they're top-heavy makes the job harder. Use 5-6 foot stakes for indeterminate varieties that grow tall, or cages for bushier determinate types.
Real talk: Skipping proper spacing leads to crowded plants that compete for sunlight and nutrients. You'll see fewer blossoms and smaller fruit when plants are too close. If you're short on space, consider growing bush varieties or using vertical trellises. Water the base of each plant 1 inch per week after transplanting, keeping the soil consistently moist but not soggy.
Mulch and Water for Consistent Moisture
Spread 2-3 inches of organic mulch around each plant, leaving a 2-inch gap near the stem to prevent rot. I use straw or shredded leaves because they break down slowly and improve soil structure over time. Mulching keeps soil temperatures stable and reduces water evaporation, so you'll spend less time watering. This is especially important in hot climates where soil can dry out quickly.
Water deeply 2-3 times per week, aiming for 1-1.5 inches of water total. You'll know you're doing it right when the top 2 inches of soil feel moist but not waterlogged. Avoid wetting the leaves when possible—watering at the base reduces the risk of fungal diseases. If your plants wilt during the day but perk up in the morning, they're thirsty and need more frequent watering.
Monitor and Support as Plants Grow
Check your plants weekly for pests like hornworms or aphids. I always do a quick inspection in the morning when insects are least active. Remove any damaged leaves or fruit immediately to prevent the spread of disease. Prune suckers—the little shoots that grow in the crotch between the stem and branches—regularly to encourage stronger growth and better airflow.
As plants grow, tie them to stakes or weave them through cages every 2-3 weeks to prevent breakage. You'll see more fruit and fewer problems when plants are properly supported. Harvest tomatoes when they're fully colored and slightly soft to the touch. This encourages more production and keeps plants focused on growing new fruit instead of maintaining old ones.
Tips & tricks for planting tomatoes outdoors
A few simple tricks will help you avoid common pitfalls and get your tomato plants off to the strongest start possible.
Soil Temperature is Non-Negotiable: That 60°F minimum soil temperature in Step 1 isn't just a suggestion—it's critical. Cold soil slows root growth and stresses seedlings. I've seen plants wilt dramatically when transplanted into soil below 60°F, even when air temperatures seemed warm. If your soil runs cold, consider using black plastic mulch a week before planting to warm it up naturally. You'll notice healthier plants that establish roots faster when soil temps are ideal.
Deep Planting Creates Stronger Roots: When you plant deeper than the pot in Step 3, you're not just following instructions—you're giving your tomatoes a growth advantage. Those buried stems develop additional roots that support the plant better as it matures. I've measured plants with buried stems growing roots along the entire length of the buried portion. This extra root system means more water and nutrient uptake, leading to bigger, healthier fruit.
Mulching is a Game-Changer: The 2-3 inches of organic mulch in Step 5 does more than just conserve moisture—it regulates soil temperature and suppresses weeds. I've seen soil temperatures fluctuate by 20°F between day and night without mulch, but with mulch, the temperature stays remarkably stable. This consistency helps prevent blossom end rot, a common problem caused by uneven moisture and temperature swings. Straw mulch also breaks down slowly, adding organic matter to your soil over time.
Watering Technique Matters: Those 1-1.5 inches of water per week in Step 5 should go right at the base, not on the leaves. I've seen fungal diseases like early blight spread rapidly when water splashes onto foliage. Use a soaker hose or drip irrigation to deliver water directly to the roots. You'll notice fewer yellow leaves and healthier plants when you keep the foliage dry. And if your plants wilt during the day but recover in the morning, that's your cue to water more frequently—they're thirsty!
Pro Tips for Planting Tomatoes Outdoors
- A few simple tricks will help you avoid common pitfalls and get your tomato plants off to the strongest start possible.
- Soil Temperature is Non-Negotiable: That 60°F minimum soil temperature in Step 1 isn't just a suggestion—it's critical.
- Deep Planting Creates Stronger Roots: When you plant deeper than the pot in Step 3, you're not just following instructions—you're giving your tomatoes a growth advantage.
Frequently asked questions
Got questions about planting tomatoes outdoors? You’re not alone! Here are answers to the most common concerns—so you can grow like a pro.
When is the best time to plant tomatoes outdoors?
The ideal time depends on your climate. Wait until after the last frost date (usually late spring) when soil temps reach at least 60°F (15°C). Tomatoes thrive in warmth, so avoid planting too early—cold soil can stunt growth. Check your local frost dates or use a soil thermometer for accuracy!
Can I plant tomatoes directly in the ground, or should I start indoors first?
Both work! For short-season climates, start seeds indoors 6–8 weeks before the last frost, then transplant seedlings outdoors. In warm regions, direct sowing is fine—just plant seeds ½ inch deep after soil warms up. Seedlings give you a head start, but direct sowing saves time and effort.
How do I protect my tomato plants from pests and diseases?
Prevention is key! Use row covers early on to deter pests like aphids and hornworms. Space plants 18–24 inches apart for airflow to prevent fungal diseases (e.g., blight). Remove diseased leaves immediately, and rotate crops yearly. Companion planting with basil or marigolds can also help repel pests naturally.
Do tomatoes need full sun, and what if my yard doesn’t get enough?
Tomatoes love 6–8+ hours of direct sunlight daily. If your yard is shady, try cherry tomatoes (they tolerate partial shade better) or place plants in the sunniest spot possible. A reflective surface (like white walls or mulch) can help maximize light. If all else fails, consider container gardening near a sunny window or balcony.
How long does it take for tomato plants to produce fruit after planting?
Patience pays off! After transplanting, expect 60–85 days for fruiting (varies by variety). Cherry tomatoes often ripen faster (50–60 days), while heirlooms can take longer. Keep soil moist, fertilize lightly (every 2–3 weeks), and watch for flower clusters—fruit should appear within weeks!
What should I do if my tomato plants wilt suddenly?
Sudden wilting often signals underwatering, overwatering, or disease. Check soil moisture first—tomatoes need 1–2 inches of water weekly. If roots look mushy (overwatering) or dry (underwatering), adjust care. Fusarium wilt (a fungal disease) causes wilting too—remove affected plants and disinfect tools to prevent spread.
Wrapping up and next steps
Planting tomatoes outdoors is a rewarding journey that brings fresh, flavorful produce right to your doorstep—literally! 🌱 With the right soil, sunlight, and care, you’ll soon be harvesting juicy, ripe tomatoes for salads, sauces, or sandwiches. Don’t let hesitation hold you back—grab those seeds, get your hands dirty, and enjoy the satisfaction of growing your own food!
Ready to take the next step? Start by marking your calendar for transplanting (or planting seeds) this spring—and soon, you’ll be savoring the taste of homegrown success! 🍅✨