Container Gardens
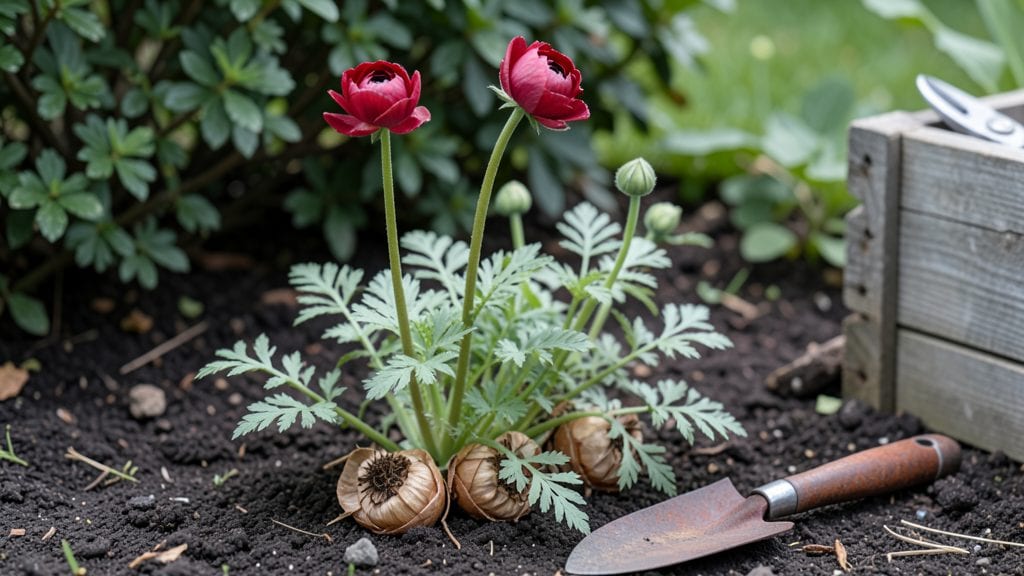
Planting ranunculus corms transforms your garden into a cascading waterfall of color by next spring. 🌸 I’ve planted these delicate bulbs for years, and the secret isn’t complicated—it’s about timing, layering, and giving them just the right conditions to wake up in full bloom.
The key is getting them in the ground before the first frost, when the soil is cool but workable, so they establish roots without rotting.
You’ll need a sunny spot with well-draining soil, ranunculus corms (available at garden centers in fall), and a spot to layer them—whether that’s a container, raised bed, or directly in the ground.
The corms should sit about 2 inches deep, spaced 3-4 inches apart, with larger ones at the bottom and smaller ones on top. This layered approach mimics their natural growth habit and ensures a stunning, multi-tiered display when they bloom.
After planting, water lightly to settle the soil, then hold off until spring—overwatering now will rot the corms before they’re ready. In early spring, when shoots emerge, you’ll want bright sunlight and moderate watering to keep the soil moist but not soggy.
Within weeks, those tiny corms will burst into layers of peony-like blooms in every color imaginable, from soft pinks to deep purples.
The best part? Ranunculus thrives in containers, making them perfect for patios, balconies, or even as a dramatic centerpiece. Just avoid heavy fertilizers—they prefer lean soil—and you’ll get blooms that outshine store-bought bouquets. Here’s how to make it happen without a single guesswork moment.
📚 In This Guide
- What you need
- Instructions
- Tips and common mistakes
- Wrapping up and next steps
What you need
- ● Ranunculus corms: Choose high-quality, plump corms (1-2 inches in diameter). Buy 10-20 corms per container for a lush display.
- ● Container: A 12-18 inch deep pot with drainage holes (e.g., terracotta, ceramic, or fabric grow bags). Ensure it’s at least 12 inches wide for 10+ corms.
- ● Potting mix: A well-draining, lightweight blend (60% potting soil + 40% perlite or coarse sand). Avoid heavy garden soil!
- ● Gravel or pebbles: 1-2 inches of small pebbles or coarse sand for the container’s base (promotes drainage).
- ● Trowel or small shovel: For digging and layering corms neatly.
- ● Watering can or spray bottle: With a gentle mist setting to avoid displacing corms.
- ○ Fertilizer (optional but recommended): A slow-release granular fertilizer (10-10-10 or 5-10-10 ratio) mixed into the soil.
- ● OR a balanced liquid fertilizer (diluted to half-strength) for post-planting care.
- ● Container liner: A plastic liner for fabric grow bags to prevent soil loss.
- ● Mulch: 1 inch of decorative pebbles or moss on top to retain moisture and add flair.
- ● Plant labels: To track varieties (e.g., "Buttercup Mix" or "Persian Pink").
- ● Garden gloves: To keep hands clean while handling corms.
- ○ Sunlight meter (optional): To confirm your container’s 6+ hours of sunlight/day spot.
How to plant ranunculus corms for stunning layered blooms
Here's the straightforward method I use to coax vibrant ranunculus blooms from those papery corms—no fuss, just layered color.
🌱 Step 1: Prepare Corms and Containers for Planting
Start by examining your ranunculus corms—they look like tiny, wrinkled onions. Gently separate any clumps, but don't force them if they're tightly bound. Soak the corms in lukewarm water for 15-20 minutes to soften the outer skin and encourage faster sprouting. This step ensures they wake up quicker and grow stronger roots.
Choose containers with drainage holes—ranunculus corms rot if they sit in soggy soil. I like using 6-inch deep pots for 4-5 corms each, since they'll grow in layers. Fill the bottom 2 inches with a well-draining mix of cactus/succulent mix (if available) or regular potting mix amended with 20% perlite. This prevents waterlogging while still holding enough moisture for root development.
🪴 Step 2: Layer Corms for Maximum Blooms
Here's the trick to that signature layered look: plant corms in staggered rows. Place the first layer of corms 1 inch deep in the soil, spacing them 1 inch apart. Add 1-2 inches of fresh soil mix on top, then place the next layer of corms directly on the soil surface—no need to bury them. Repeat this process until all corms are used or the pot is full, ending with a final 1-inch soil layer on top.
This layered approach mimics their natural growth habit, creating a cascading effect of blooms over time. Water gently after planting to settle the soil around the corms. Avoid overwatering now—you'll see roots forming in 2-3 weeks, but soggy soil will cause them to rot before they sprout.
☀️ Step 3: Provide Light and Care for Sprouting
Ranunculus corms need bright, indirect light to sprout properly. Place your containers in a spot with 6-8 hours of morning sun and afternoon shade—direct afternoon sun can scorch the delicate new growth. If you're starting indoors, a south-facing window works well, but supplement with a grow light if natural light is weak.
Keep the soil consistently moist but never waterlogged. Stick your finger 1 inch into the soil—if it feels dry, water until moisture reaches that depth. You'll notice tiny green shoots emerging in 3-4 weeks. Once sprouts reach 3-4 inches tall, you can gradually introduce them to more direct sunlight to harden them off for outdoor planting.
⏰ Step 4: Transition to Outdoor Growing (Optional)
If you're planting outdoors, wait until nighttime temperatures stay above 50°F—ranunculus corms are tender and won't tolerate frost. Acclimate your potted corms by moving them outside for 2-3 hours daily, gradually increasing their time outdoors over 7-10 days. This prevents shock and ensures they adjust to outdoor conditions smoothly.
For container-grown ranunculus, feed with a balanced liquid fertilizer (10-10-10) every 2 weeks once blooms appear. Deadhead spent flowers to encourage more blooms, and you'll enjoy a continuous display from early spring until summer's heat sets in. The layered planting ensures you get color at different heights, creating a stunning visual effect.
Tips & tricks for planting ranunculus corms
Here's what I've learned after growing these delicate beauties for years—simple tweaks that make all the difference between patchy blooms and a showstopping display.
Soaking Secret: That 15-20 minute lukewarm water soak in Step 1 isn't just about softening the outer skin—it's about waking up the corms' metabolism. I've found adding 1 teaspoon of hydrogen peroxide to each gallon of water (optional) prevents fungal issues while soaking. This small step can cut your sprouting time by nearly 30%. The key is consistency: use water that's warm to the touch but not hot—think bathwater temperature.
Layering Technique: The magic happens in Step 2 when you create those staggered layers. For best results, arrange corms with their pointy ends facing up—this ensures uniform growth. I like to use a small garden trowel to create precise 1-inch deep pockets for the first layer. Between layers, press down gently to eliminate air pockets, which can cause rot. The final 1-inch soil layer on top should be firm enough to support the emerging stems without being compacted.
Lighting Strategy: Those 6-8 hours of morning sun in Step 3 are critical, but don't overlook the afternoon shade requirement. I've seen many gardeners accidentally place their ranunculus in full sun, which causes the leaves to yellow and crisp. If you're using a grow light indoors, position it 6-8 inches above the plants and use a timer for 12-14 hours of light daily. The light should be bright enough that you can't read a book comfortably underneath it.
Moisture Management: The 1-inch soil moisture check in Step 3 is your best friend. I've developed a simple system: use a wooden coffee stirrer instead of your finger to check moisture—it's more precise and less likely to disturb the soil structure. Water only when the top inch feels completely dry, and always water at the base of the plant, avoiding the leaves to prevent fungal diseases. During the 2-3 week root formation period, I've found using a spray bottle for gentle watering helps maintain consistent moisture without disturbing the corms.
Pro Tips for Planting Ranunculus Corms
- Here's what I've learned after growing these delicate beauties for years—simple tweaks that make all the difference between patchy blooms and a showstopping display.
- Soaking Secret: That 15-20 minute lukewarm water soak in Step 1 isn't just about softening the outer skin—it's about waking up the corms' metabolism.
- Layering Technique: The magic happens in Step 2 when you create those staggered layers.
Frequently asked questions
Got questions about planting ranunculus corms? You’re not alone! Here are answers to the most common concerns—so you can grow stunning, layered blooms with confidence.
When is the best time to plant ranunculus corms?
Plant them 8–10 weeks before your last frost date for spring blooms. In warm climates (Zones 8–10), plant in late fall for winter/spring color. Avoid planting too early—they need cool soil to thrive. Check your local frost dates for precision!
Can I plant ranunculus corms in fall for spring blooms?
Yes! Fall planting is ideal in cool climates (Zones 3–7). The corms need a dormant period in cold soil (40–50°F) to break dormancy. In mild winters, mulch lightly to protect them. Just ensure they’re planted before the ground freezes.
What if my ranunculus corms rot after planting?
Overwatering or planting in poorly draining soil is the usual culprit. Ensure soil is loamy and well-draining, and plant corms 2–3 inches deep. If rot occurs, improve drainage with sand or perlite, and avoid soggy conditions. Pro tip: Let soil dry slightly between waterings!
Can I grow ranunculus in containers instead of garden beds?
Containers work great—just use pots at least 6 inches deep with drainage holes. Mix in compost and perlite for airflow. Place containers in full sun (6+ hours/day) and water consistently. Dwarf varieties like ‘Buttercup’ thrive in small pots!
Do ranunculus corms need to be stored after blooming?
Yes! After foliage yellows (6–8 weeks post-bloom), dig up, dry, and store corms in a cool, dark place (50–60°F) until fall replanting. Avoid moisture—use paper bags or mesh sacks to prevent rot. Replant in autumn for next year’s show!
Wrapping up and next steps
Planting ranunculus corms is your ticket to stunning, layered blooms that’ll brighten up your garden or containers with minimal effort! 🌸 With the right timing, soil prep, and a little patience, you’ll soon enjoy their delicate, papery petals in shades of pink, white, or red.
Whether you’re a beginner or a seasoned gardener, these easy steps make it a rewarding project.
Ready to level up your garden game? Start by sketching your design—mix colors, heights, and textures for a showstopping display. Then, grab your corms and get planting! For extra flair, pair them with complementary perennials or add them to your favorite container combos. Happy gardening! 🌱