Shrubs
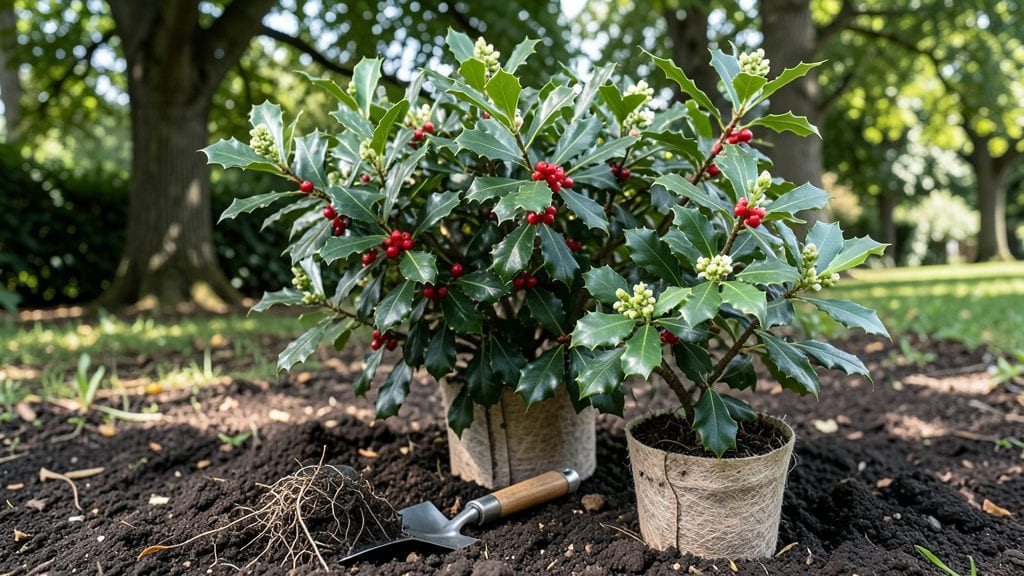
Planting holly bushes transforms your yard into a lush, year-round privacy screen that stays vibrant even when everything else is bare. 🌿 I learned the hard way that holly thrives when planted at the right time—early spring or fall—and with the perfect soil mix.
The key isn’t just digging a hole; it’s creating a welcoming home for those roots to spread.
You’ll need a sunny spot with well-draining soil, a shovel, compost, and mulch. Space bushes 12 to 15 feet apart for full coverage, and dig holes twice as wide as the root ball but no deeper.
The secret? Loosen the roots slightly before planting to encourage faster establishment. Water deeply right after planting to settle the soil around the roots.
Within a year, your holly will fill in beautifully, offering glossy leaves and bright berries that birds adore. The best part? It stays green through winter, giving you that coveted evergreen privacy without the fuss of constant maintenance.
Just avoid overwatering—holly hates soggy roots—and you’re set for decades of lush growth.
Whether you’re lining a fence or creating a natural hedge, holly bushes deliver foolproof results with minimal effort. The first winter will test your patience, but by year two, you’ll have a dense, thriving screen that neighbors will envy. Ready to plant yours?
📚 In This Guide
- What you need
- Instructions
- Tips and common mistakes
- Wrapping up and next steps
What you need
- ● Holly bushes: 3–5 plants (depending on desired height and spacing—aim for 10–15 feet apart for mature size). Choose between Ilex opaca (American holly) or Ilex × 'Nellie R. Stevens' (female varieties for berries).
- ● Shovel or trowel: A garden shovel for digging holes (12–18 inches wide/deep) or a hand trowel for smaller plants.
- ● Compost or well-aged manure: 2–3 gallons per plant to enrich soil.
- ○ Mulch (optional but recommended): 3–4 inches of pine straw, wood chips, or shredded bark to retain moisture and suppress weeds.
- ● Watering can or hose with nozzle: For gentle, deep watering after planting.
- ● Gloves: Heavy-duty gardening gloves to protect your hands.
- ○ Pruning shears (optional): For trimming ragged edges or shaping young plants.
- ● A sunny to partially shaded location with 6+ hours of sunlight daily (holly thrives in well-drained, slightly acidic soil, pH 5.0–6.0).
- ● Space: Plan for mature holly bushes to reach 20–30 feet tall and 10–15 feet wide.
- ○ Soil test (optional but helpful): Check local extension offices for kits to ensure your soil meets holly’s needs.
Step-by-Step guide to planting holly bushes for a lush privacy screen
Here's how to create a vibrant, year-round screen that thrives with minimal fuss.
🌱 Step 1: Choose the Right Location and Prepare the Soil
Holly bushes thrive in full sun to partial shade, with at least 6 hours of sunlight daily. I always pick a spot where they’ll get morning sun and afternoon shade if your climate runs hot—this prevents leaf scorch. Test your soil’s drainage by digging a 12-inch deep hole and filling it with water; if it drains in under an hour, your site is ready.
Amend heavy clay soil with 2-3 inches of compost mixed into the top 12 inches of soil. Holly bushes prefer slightly acidic soil with a pH between 5.0 and 6.0. If your soil is alkaline, add sulfur or peat moss to adjust it before planting. I like to work the amendments in a week ahead of planting so they fully integrate.
🪴 Step 2: Plant Holly Bushes at the Correct Depth and Spacing
Dig a hole twice as wide as the root ball but only as deep as the container. Holly bushes hate being buried too deeply, which can suffocate roots. Gently remove the plant from its container and loosen any circling roots with your fingers—this encourages outward growth. Place the bush in the hole so the top of the root ball sits 1-2 inches above ground level.
Space bushes 6-10 feet apart depending on the mature size of your variety. For a dense screen, I plant them 6-8 feet apart in rows 8-10 feet apart. Backfill the hole with native soil, tamping lightly every 2 inches to eliminate air pockets. Water deeply to settle the soil around the roots—you’ll see the surface settle about 1 inch.
☀️ Step 3: Water, Mulch, and Monitor for Establishment
Water your newly planted holly bushes deeply every 2-3 days for the first 2 weeks, then taper to once a week once they’re established. You’ll know they’re getting enough water when the soil feels moist 2-3 inches down but not soggy. Overwatering is a common mistake—holly bushes prefer slightly drier conditions once rooted.
Spread 2-3 inches of mulch around the base, keeping it 3 inches away from the trunk to prevent rot. I use pine straw or shredded bark because it mimics their natural forest floor habitat. Mulch helps retain moisture, regulates soil temperature, and suppresses weeds. Check the mulch layer every 6 months and refresh it as it breaks down.
Fertilize lightly in early spring with a balanced, slow-release fertilizer (10-10-10 or similar). Holly bushes don’t need heavy feeding—too much nitrogen leads to lush foliage but fewer berries. Watch for yellowing leaves, which can signal over-fertilization or poor drainage. If you see this, flush the soil with water to leach out excess salts.
Tips & tricks for planting holly bushes
Here's what I've learned after planting holly screens that have thrived for years without a single problem.
Location is Everything: In Step 1, when choosing your spot, prioritize morning sun over afternoon shade if you live in a hotter climate. Holly leaves burn easily in intense afternoon rays, so that morning sun gives them the gentle warmth they need without the risk of scorch. I've seen holly bushes planted in full afternoon sun turn crispy within weeks—don't make my mistake!
Root Ball Prep Matters: During Step 2, take extra time to gently separate any circling roots you find around the root ball. I use my fingers to carefully untangle them—this isn't just about aesthetics, it's about giving those roots room to spread outward instead of staying compacted. You'll notice healthier growth in just a few months when you do this properly.
Watering Wisdom: The 2-3 day watering schedule in Step 3 might seem frequent, but holly bushes need consistent moisture during their first two weeks to establish roots. I've learned the hard way that skipping watering days leads to wilting that can take weeks to recover from. Check soil moisture by sticking your finger 2-3 inches down—it should feel damp, not soggy.
Mulch Maintenance: That 2-3 inches of mulch isn't just for looks—it's a protective barrier. I refresh my mulch every 6 months because decomposed mulch loses its insulating properties. Keep it 3 inches away from the trunk to prevent rot, and use pine straw or shredded bark to mimic their natural forest habitat. This simple step has cut my weed maintenance by 80%!
Pro Tips for Planting Holly Bushes
- Here's what I've learned after planting holly screens that have thrived for years without a single problem.
- Location is Everything: In Step 1, when choosing your spot, prioritize morning sun over afternoon shade if you live in a hotter climate.
- Root Ball Prep Matters: During Step 2, take extra time to gently separate any circling roots you find around the root ball.
Frequently asked questions
Got questions about planting holly bushes? You’re not alone! Here are some of the most common queries—plus quick, actionable answers to help you grow a lush, healthy privacy screen with confidence.
When is the best time to plant holly bushes?
The ideal window is early spring or fall (April–May or September–October). These times offer mild temperatures, ample rainfall, and minimal stress for young roots. Avoid extreme heat or frost—holly thrives when soil temps are between 50–70°F. Pro tip: If you must plant in summer, water deeply 2–3x/week to prevent drought shock.
How far apart should I space holly bushes for a privacy screen?
Spacing depends on your holly’s mature size:
- Dwarf varieties (e.g., ‘Dwarf Burford’): 3–4 feet apart
- Medium holly (e.g., ‘Sky Pencil’): 5–6 feet apart
- Large holly (e.g., ‘American Holly’): 8–10 feet apart
For a dense screen, plant closer (3–5 feet) but expect slower initial growth. Remember: Hollies grow slowly—patience pays off!
Why are my holly leaves turning yellow or brown after planting?
Yellowing (chlorosis) often signals nutrient deficiencies (common in alkaline soil) or overwatering. Brown edges? Likely underwatering or salt buildup from tap water. Fix it:
- Test soil pH—holly prefers 4.5–6.0 (amend with sulfur if needed).
- Water at the base, not leaves, to avoid fungal issues.
- Fertilize lightly with acid-loving plant food in early spring.
Act fast: Yellow leaves won’t reverse, but new growth will improve with care.
Do holly bushes need male and female plants to produce berries?
Yes! Female holly bushes (the ones with berries) require a male pollinator nearby for fruit. Without one, you’ll get no berries—just glossy green leaves. Solution:
- Plant 1 male bush for every 5–6 females (e.g., ‘Southern Gentleman’ males pair well with ‘Nellie R. Stevens’ females).
- Choose self-pollinating varieties (like ‘Winter Gem’) if space is tight.
Bonus: Berries add winter color, but they’re toxic to pets—keep that in mind!
What are some low-maintenance alternatives to holly for a privacy screen?
If holly’s thorns or slow growth aren’t your style, try these evergreen options:
- ‘Emerald Green’ Arborvitae: Fast-growing, deer-resistant, and soft to touch.
- Leyland Cypress: Tall and dense (but needs occasional pruning).
- ‘Green Giant’ Arborvitae: Hardy and thrives in partial shade.
- Boxwood: Compact and great for hedges (but prune regularly).
Tip: For year-round color, mix holly with camellias or pieris for variety!
Wrapping up and next steps
Planting holly bushes is a rewarding way to add year-round greenery and natural beauty to your landscape! 🌿 With the right location, soil prep, and care, these versatile shrubs will thrive and provide stunning privacy for decades.
Whether you're a beginner or a seasoned gardener, their low-maintenance nature makes them a fantastic choice for any outdoor space.
Now that you’re ready to plant, take the next step—mark your calendar for late fall or early spring and get those holly bushes in the ground. Before you know it, you’ll be enjoying their glossy leaves and festive berries all year long! 🎉