Propagation
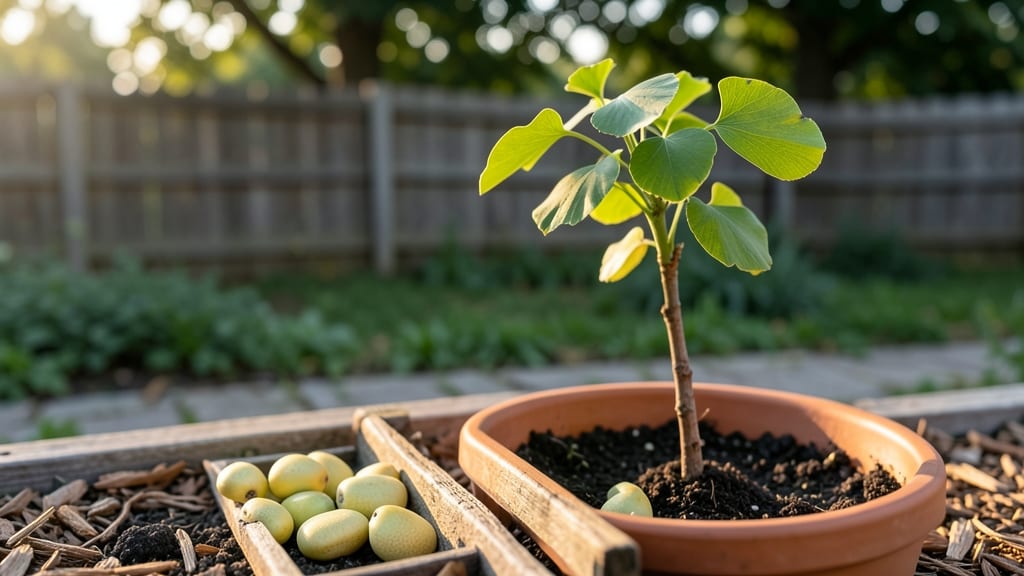
Planting ginkgo seeds is a long-term project that rewards patience with a tree that lives for centuries. 🌱 I’ve tried the cold stratification trick twice now—once with immediate results, once with a two-year wait—and both times, the payoff made it worth the gamble.
The secret isn’t just burying seeds; it’s mimicking the natural freeze-thaw cycle that finally breaks their stubborn dormancy.
You’ll need fresh seeds (green and soft when ripe), a mix of sandy loam with good drainage, and a spot where they won’t be disturbed. Most beginners overlook the stratification step, thinking it’s optional—it’s not.
After three months in the fridge, wrapped in damp peat moss, you’ll plant them 1 inch deep in well-draining soil, then wait. That’s the hardest part.
The first signs of life might not come for months, but when they do, you’ll see tiny shoots pushing through the soil like they’re racing the clock. By year two, you’ll have 2-3 foot seedlings if you’ve kept the soil consistently moist but never soggy.
The real magic? These trees grow into living monuments—some of the oldest on Earth.
Fair warning: Ginkgos are slow to mature, but the lesson here is patience. If you’ve ever wanted a tree that outlives you, this is how you start. The trick isn’t forcing speed—it’s learning to wait for nature’s timing. Now, let’s get those seeds stratified.
📚 In This Guide
- What you need
- Instructions
- Tips and common mistakes
- Wrapping up and next steps
What you need
- ● Ginkgo seeds: 3–5 fresh, plump seeds (harvested from ripe ginkgo fruits in fall). Cold stratification setup: Small paper towels or dampened peat moss (enough to wrap seeds). Plastic bag with zip-lock or airtight container (to hold moisture). Refrigerator (set to 34–40°F (1–4°C)) for 60–90 days.
Step-by-Step instructions for planting ginkgo seeds
Here's how to break the ginkgo's stubborn germination barrier using proven cold stratification techniques.
🌱 Step 1: Harvest and Prepare the Seeds
Collect fresh ginkgo seeds when they turn bright yellow and open naturally on the tree. Remove the fleshy outer layer immediately—it contains butyric acid that can damage the seed. Rinse the clean seeds thoroughly under running water to remove any remaining residue. I like to soak them for 24 hours in lukewarm water to soften the hard outer shell slightly.
After soaking, pat the seeds dry with a paper towel. Store them in a sealed container with slightly damp sand or vermiculite (about 1 part seed to 3 parts sand) to prevent drying. This initial prep prevents the seeds from shrinking and losing viability during stratification. The goal is to mimic natural winter conditions that trigger germination.
⏰ Step 2: Cold Stratify for 3-6 Months
Place the container of seeds in your refrigerator's crisping drawer (around 35-40°F) for 3-6 months. This cold period breaks the seed's dormancy by simulating winter. Check the moisture level monthly—it should feel like a damp sponge, not dripping wet. If the sand feels dry, lightly mist it with water and stir gently to redistribute.
Real talk: This is the most critical step. Skipping or rushing stratification will leave you waiting years for germination. I mark my calendar when I start stratification so I don't forget to check on them later. After the cold period, you'll see the outer shell start to crack slightly—that's your signal the seed is ready for planting.
🌿 Step 3: Plant Stratified Seeds in Containers
Fill 4-inch diameter pots with a mix of 50% potting soil and 50% perlite for excellent drainage. Ginkgo seeds hate soggy roots, so this blend prevents rot. Plant each seed about 1 inch deep, spacing them 2 inches apart in the pot. I use separate pots for each seed because ginkgos grow slowly and don't like competition.
Water gently until the soil surface looks slightly damp but not wet. Place the pots in a warm location (around 70-75°F) with indirect light. You'll see the first signs of germination in 2-4 weeks—tiny white roots will push through the soil surface. This is the moment that matters: Don't move the pots or disturb the seedlings once they start growing.
☀️ Step 4: Provide Light and Care for Young Seedlings
Once the seedlings emerge, move them to a location with bright, indirect light. Ginkgos tolerate shade as juveniles but will grow slowly. I use a grow light for 12-14 hours daily if natural light is insufficient. Keep the soil evenly moist—water when the top ½ inch feels dry—but never let it sit in water.
You'll notice the first true leaves appear in 4-6 weeks. These will look different from the initial seed leaves and will be more elongated. At this stage, fertilize lightly with a balanced liquid fertilizer (half-strength) to encourage steady growth. Patience is key here—ginkgo seedlings grow slowly but steadily.
🪴 Step 5: Transplant to Larger Containers After 1 Year
After 12 months, when the seedlings are about 6-8 inches tall, transplant them to 1-gallon containers with fresh potting mix. Handle the roots gently—they're delicate and prone to breakage. Bury the stem slightly deeper than before to provide stability as the plant grows taller.
Continue with the same care routine: water when the top inch of soil dries out and provide bright light. Outdoor planting can begin after another year when the seedlings are 2-3 feet tall and can handle cooler temperatures. Choose a location with full sun to partial shade and well-draining soil for long-term success.
Tips & tricks for planting ginkgo seeds
These little-known tricks will help you break through ginkgo seeds' stubborn germination barrier and give your seedlings the best possible start.
The Soak Secret: That 24-hour lukewarm water soak in Step 1 isn't just about softening the shell—it also helps flush out any remaining butyric acid from the fleshy outer layer. I like to change the water halfway through to maximize this cleaning process. After soaking, gently tap the seeds against a hard surface to crack the shell slightly without damaging the seed inside. This gives roots an easier path out during germination.
Stratification Strategy: The 3-6 month cold period at 35-40°F is non-negotiable, but here's the pro move: place a small thermometer inside your seed container during stratification. Ginkgo seeds are sensitive to temperature fluctuations—keep it consistently between 35-40°F. If your fridge runs hotter, consider using a seedling fridge (around $50) for more precise control. Also, I mark my calendar with the exact start date and set a reminder for the 3-month check-in point.
Planting Precision: When you're planting those 1-inch deep seeds in Step 3, use a pencil to make a small hole first—it prevents crushing the seed. The 50/50 soil-perlite mix is crucial, but don't compact it when planting. Gently press the seed into place so the soil remains loose and airy. After planting, place the pots in a clear plastic bag for the first 24 hours to create a humid microclimate that encourages root emergence.
Lighting Up Success: That 12-14 hours of grow light in Step 4 makes all the difference for seedlings. I position the light just 6 inches above the pots and adjust the height as the seedlings grow. For natural light, place seedlings near an east-facing window where they'll get gentle morning sun. Avoid south-facing windows—the intense afternoon sun can scorch delicate ginkgo leaves. Watch for the first true leaves at 4-6 weeks; they'll look more elongated than the initial seed leaves and signal your seedlings are thriving.
Pro Tips for Planting Ginkgo Seeds
- These little-known tricks will help you break through ginkgo seeds' stubborn germination barrier and give your seedlings the best possible start.
- The Soak Secret: That 24-hour lukewarm water soak in Step 1 isn't just about softening the shell—it also helps flush out any remaining butyric acid from the fleshy outer layer.
- Stratification Strategy: The 3-6 month cold period at 35-40°F is non-negotiable, but here's the pro move: place a small thermometer inside your seed container during stratification.
Frequently asked questions
Got questions about planting ginkgo seeds? You’re not alone—this slow-germinating process can feel tricky! Below, we’ve answered the most common questions to help you troubleshoot and succeed.
How long does it take for ginkgo seeds to germinate?
Ginkgo seeds are notorious for their long germination time—often 6 months to 2 years! Cold stratification (the trick we covered earlier) speeds this up, but patience is key. Some seeds may sprout sooner if conditions are ideal, but don’t rush it. Consistency with moisture and warmth is your best friend.
Can I plant ginkgo seeds directly in the ground?
While possible, direct outdoor planting isn’t recommended for fresh ginkgo seeds. The soil may not provide the consistent moisture and warmth they need during stratification. Start indoors in pots with well-draining soil, then transplant seedlings outdoors after they’ve sprouted. This gives them a fighting chance against frost and pests.
What if my ginkgo seed doesn’t sprout after stratification?
Don’t give up yet! Seeds can be finicky—try these fixes:
- Check moisture: Keep soil damp (not soggy) but never dry.
- Adjust warmth: Move the pot to a warmer spot (70–80°F is ideal).
- Test viability: Slice open a seed—if it’s mushy or moldy, it’s likely dead.
- Try soaking: Soak the seed in water for 24 hours before replanting.
Are there faster-growing alternatives to ginkgo seeds?
If you’re eager for greenery, consider ginkgo cuttings or young saplings from nurseries. These grow faster (though they’re pricier) and skip the germination wait. For seeds, male ginkgo trees (like ‘Autumn Gold’) often sprout more reliably than females. Pro tip: Buy seeds from reputable suppliers to avoid low-quality stock.
Do ginkgo seeds need light during stratification?
Nope! During the cold stratification phase (the fridge part), seeds need darkness and chill—no light required. Once you transfer them to a warm spot to germinate, place the pot in bright, indirect light (like a sunny windowsill). Too much direct sun can dry out the soil. Think “cool dark” first, then “warm and bright.”
Wrapping up and next steps
Growing ginkgo seeds is a rewarding journey that blends patience with the joy of nurturing life. 🌱 With the right tools—like cold stratification—and a little care, you can unlock the beauty of these ancient trees.
Whether you’re a seasoned gardener or a beginner, the key is consistency and trust in the process.
Ready to take the next step? Start by gathering your supplies and follow the steps outlined above. Before you know it, you’ll be watching those first tender sprouts break through the soil—proof that your hard work is paying off! Happy planting! 🌿