Shrubs
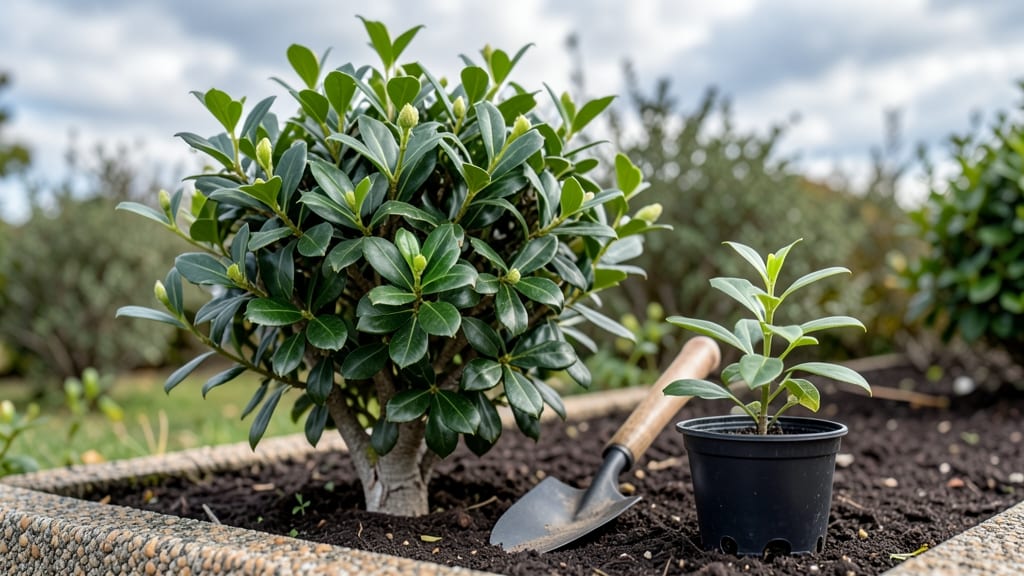
Planting evergreen bushes transforms bare spaces into lush, low-maintenance privacy screens that stay green all year. 🌿 I planted my first row of arborvitae five years ago, and now I never worry about summer sun or winter wind again—they just stand there, doing their job.
The secret is in the prep: soil, spacing, and watering set them up for decades of effortless growth.
Start with healthy plants—look for firm stems, vibrant green needles, and roots that aren’t circling tightly. Dig holes twice as wide as the root ball but only as deep, then mix in compost for better drainage.
Space them 18-24 inches apart for tight hedges or 3-5 feet for natural, airy looks. Most evergreens thrive in full sun to partial shade, but check your specific variety—some, like rhododendrons, prefer filtered light.
After planting, water deeply to settle the soil, then mulch around the base to keep roots cool and moist. The first year is critical—water weekly if rain is scarce, but never let them sit in soggy soil.
By spring, you’ll see new growth, and within a few years, your privacy screen will be thick, wind-resistant, and completely hands-off.
Regional tweaks matter: Southern gardeners might need afternoon shade, while northern climates can handle full sun. Avoid common mistakes like planting too deep (the root flare should stay visible) or crowding plants too closely.
With the right setup, these bushes will outlast your mailbox—and require almost no work to do it.
📚 In This Guide
- What you need
- Instructions
- Tips and common mistakes
- Wrapping up and next steps
What you need
- ● Evergreen bushes: Choose 3–5 mature plants (depending on desired coverage). Opt for varieties like Holly, Boxwood, or Arborvitae (check local climate suitability).
- ● High-quality potting soil: 2–3 bags (1–2 cubic feet each) of well-draining, peat-based mix (e.g., Miracle-Gro or Proven Winners).
- ● Organic mulch: 1–2 bags (2–3 cubic feet) of pine straw, wood chips, or shredded bark (3–4 inches deep).
- ● Fertilizer: Slow-release 10-10-10 or 20-20-20 NPK fertilizer (1–2 lbs per bush).
- ● Watering can or hose: With adjustable nozzle for gentle watering.
- ● Garden gloves: Heavy-duty (e.g., Fellex or Dr. Earth) to protect hands.
- ● Shovel or spade: Round-point shovel (12–18 inches wide) for digging.
- ● Pruning shears: Bypass pruners (sharp, 6–8 inches) for trimming.
- ● Measuring tape: For spacing plants 3–6 feet apart (depends on bush size).
- ○ Stakes or garden twine: (Optional) For temporary support if planting in windy areas.
- ● Soil pH tester: To check acidity (evergreens prefer pH 5.0–7.0).
- ● Slow-release fertilizer spikes: For hassle-free feeding.
- ● Drip irrigation kit: For automated watering (great for large plantings!).
- ● Epsom salt: (1 tbsp per bush) for magnesium boost in clay soil.
- ● Plant tags: To label varieties and care notes.
Step-by-Step instructions for planting evergreen bushes
Here's how to plant evergreens for lush, low-maintenance privacy that stays green year-round.
🌱 Step 1: Choose the Right Location and Dig Holes
Pick a spot with 6+ hours of sunlight daily—most evergreens thrive in full sun but tolerate partial shade. Mark your planting spots 6-10 feet apart (check your bush's mature width on the tag). Use the shovel to dig holes twice as wide and just as deep as the root ball. I like to loosen the sides of the hole with the shovel to encourage roots to spread outward.
If your soil is heavy clay, mix in a handful of compost to improve drainage. Evergreens hate soggy roots, so avoid low spots where water pools. Digging now ensures you won’t rush later—this is the foundation for years of growth.
🪴 Step 2: Prepare the Bush and Plant It Properly
Remove the bush from its container and gently tease the roots outward if they’re circling. This prevents root-bound stress. Place the bush in the hole so the top of the root ball sits 1 inch above ground level—evergreens often settle over time, so planting slightly high prevents waterlogging.
Fill the hole with soil, pressing lightly around the edges to remove air pockets. Don’t compact too hard—you want roots to grow freely. Water deeply right away to settle the soil and eliminate gaps. The goal is for the soil to feel firm but not rock-hard around the roots.
☀️ Step 3: Mulch and Water for Establishment
Spread 2-3 inches of mulch around the base, keeping it 6 inches away from the trunk to prevent rot. I use shredded bark mulch because it breaks down slowly and improves soil over time. Water again until the soil 6 inches deep feels evenly moist—this encourages roots to grow deeper right away.
Evergreens need consistent moisture during their first year, but avoid overwatering. You’ll know it’s time to water again when the top 2 inches of soil feel dry to the touch. Too much water can suffocate roots, while too little causes browning needles—balance is key.
⏰ Step 4: Prune and Monitor for Long-Term Health
Wait 4-6 weeks before pruning to let the bush establish. Then, trim any broken or crossing branches with clean pruners. I always cut just above a leaf node to encourage new growth. Avoid heavy pruning in the first year—focus on shaping lightly to maintain natural form.
Check your bushes monthly for signs of stress like yellowing needles or wilting. If you see browning, it’s usually a sign of underwatering or poor drainage. Evergreens are tough once established, but they need patience during their first growing season.
Tips & tricks for perfect evergreen bush planting
A few key strategies will help your evergreens thrive and create that lush, private green wall you're dreaming of.
Location is Everything: Evergreens need that 6+ hours of sunlight daily, but don't assume your yard meets this. Test your spot by observing sunlight patterns for a few days before planting. Morning sun is ideal—it helps prevent afternoon drying. If your yard only gets partial shade, choose evergreens labeled "partial shade tolerant" like rhododendrons or pieris.
Root Ball Preparation: When you remove the bush from its container in Step 2, don't just drop it in the hole! Gently tease those circling roots outward with your fingers. I've seen people skip this step and end up with bushes that struggle for years because their roots can't spread properly. This simple 30-second step makes all the difference in long-term health. The goal is to encourage outward root growth—not just dropping it in like a rock.
Mulching Secrets: That 2-3 inches of mulch in Step 3 isn't just decoration—it's insulation. Keep it 6 inches away from the trunk to prevent rot, but don't skimp on coverage. I've found that adding a thin layer of compost under the mulch gives an extra boost to soil health. And here's a pro tip: refresh your mulch every spring to maintain that protective layer.
Watering Wisdom: The key to evergreen success is that balance in Step 3—water when the top 2 inches of soil feel dry, but don't let it get soggy. I've learned this the hard way with my first planting where I overwatered and lost two bushes to root rot. Use your finger to check moisture rather than relying on a schedule. In hot summers, you might need to water every 2-3 days, while cooler months might only need weekly watering.
Pro Tips for Planting Evergreen Bushes
- A few key strategies will help your evergreens thrive and create that lush, private green wall you're dreaming of.
- Location is Everything: Evergreens need that 6+ hours of sunlight daily, but don't assume your yard meets this.
- Root Ball Preparation: When you remove the bush from its container in Step 2, don't just drop it in the hole!
Frequently asked questions
Got questions about planting evergreen bushes? You’re not alone! Here are some of the most common concerns—plus quick, actionable answers to help you get started with confidence.
When is the best time to plant evergreen bushes?
Plant evergreens in early spring or fall (4–6 weeks before your first frost) for the best root establishment. Avoid extreme heat or cold—roots struggle to adapt in summer droughts or winter freezes. If you’re planting in containers, spring is ideal since they’re easier to handle when soil is workable.
How long does it take for evergreen bushes to grow thick enough for privacy?
Most evergreens grow 6–12 inches per year, so a 3-foot-tall hedge may take 3–5 years to fill out. For faster results, plant bushes closer together (check the mature spacing on the tag) or choose fast-growing varieties like Emerald Green Arborvitae or Leyland Cypress. Patience pays off—thicker growth comes with age!
Do evergreen bushes need special care after planting?
Yes! Water deeply 2–3 times per week for the first month (or until roots establish), then taper to 1–2 times weekly in dry spells. Mulch around the base (2–3 inches of organic mulch) to retain moisture and suppress weeds. Avoid overwatering—evergreens hate soggy roots. Fertilize lightly in spring with a slow-release, acid-loving plant formula if your soil is poor.
Can I plant evergreen bushes in containers instead of the ground?
Many evergreens thrive in large containers (at least 18–24 inches deep) with drainage holes. Use a well-draining potting mix (like a 50/50 blend of peat moss and perlite) and upgrade to a bigger pot every 2–3 years. Just remember: container-grown bushes need more frequent watering and may require winter protection (like burlap wraps) in cold climates.
Why are my evergreen bushes turning brown or losing needles?
Brown needles or needle drop usually mean overwatering, underwatering, or pest issues. Check the soil—if it’s waterlogged, improve drainage. If dry, water deeply. For pests (like spider mites or bagworms), hose off webs or use neem oil. Winter burn (dry, crispy tips) happens in windy areas—water in late fall to help roots absorb moisture before dormancy.
What’s the best evergreen bush for low-maintenance privacy?
Top picks for minimal upkeep include:
- Thuja (Arborvitae) – Disease-resistant, deer-resistant, and slow-growing.
- Juniper (e.g., ‘Green Carpet’) – Drought-tolerant and great for ground cover.
- Picea (Colorado Blue Spruce) – Cold-hardy and naturally conical for year-round interest.
Wrapping up and next steps
Planting evergreen bushes is a game-changer for year-round privacy and curb appeal—with minimal effort! 🌲 Whether you’re a seasoned gardener or a beginner, these hardy plants deliver lush, low-maintenance greenery that thrives in almost any climate.
The key? Choosing the right variety, prepping your soil, and giving them space to grow.
Now that you’re armed with the know-how, roll up your sleeves and get planting! Start small—pick one or two bushes to test your new skills—and watch your outdoor space transform. Need inspiration? Sketch a simple layout first, or browse local nurseries for the perfect match. Happy gardening! 🌿