Picking
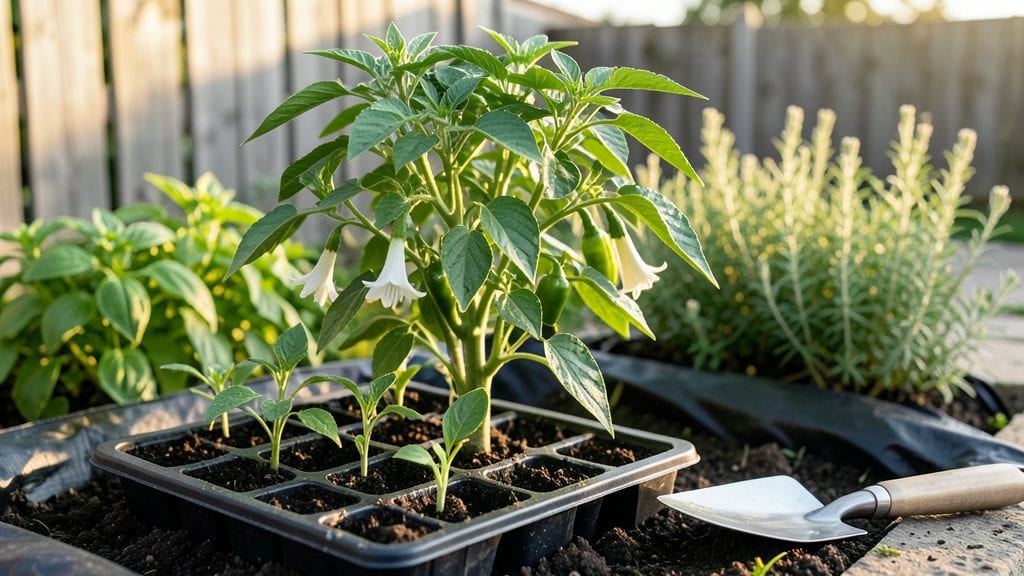
Planting Anaheim peppers in your sunny garden spot could mean a summer of mild, versatile peppers perfect for stuffing, salsas, or roasting. 🌱 I’ve grown them for years, and the key to their success lies in the right soil, spacing, and a little patience—especially in hotter climates where they can bolt if rushed.
These peppers thrive when treated like the tender perennials they are, even though we grow them as annuals.
The secret starts with well-draining, fertile soil rich in organic matter—think compost mixed in before planting. Anaheims need full sun (6+ hours daily) and consistent moisture, but they hate soggy roots, so raised beds or mounded soil work wonders.
You can start from seeds indoors 8-10 weeks before your last frost or transplant mature seedlings, but give them space: 18-24 inches apart in rows 2-3 feet apart. Plant seeds ½ inch deep or transplants slightly deeper than their container.
Once planted, keep the soil evenly moist but not waterlogged, and watch for early signs of stress—yellowing leaves or wilting means adjust your watering. Within 6-8 weeks, you’ll see those telltale white flowers, and by mid-summer, you’ll be harvesting glossy green peppers that turn red when fully ripe.
The flavor? Sweet, mild heat that builds as they mature, perfect for fresh eating or preserving.
Pair them with basil, onions, or lettuce to deter pests naturally, and avoid planting near fennel or dill, which can stunt their growth. If you’re in a short-season area, opt for early-maturing varieties or extend the season with row covers.
Before you know it, you’ll have jars of homemade salsa or roasted peppers ready for winter—all from a few well-placed plants in your sunny spot.
📚 In This Guide
- What you need
- Instructions
- Tips and common mistakes
- Wrapping up and next steps
What you need
- ● Seeds or seedlings: 3–5 Anaheim pepper plants (or 10–15 seeds if starting from scratch). Look for Capsicum annuum varieties labeled "Anaheim" or "Green Chile."
- ● Containers or garden bed: Containers: 5–10 gallon pots (1 per plant) with drainage holes, or
- ● Garden bed: Full-sun spot (6+ hours/day) with well-draining soil (pH 6.0–7.0).
- ● Potting mix: 1–2 bags of high-quality, organic seed-starting mix (sterilized, peat-free preferred).
- ● Fertilizer: Balanced 10-10-10 or 5-5-5 fertilizer for seedlings.
- ● Low-nitrogen 3-4-6 or compost once plants are established (to boost fruit production).
- ● Watering can or hose: With a gentle spray nozzle (avoid soaking soil).
- ○ Grow lights (optional for indoor starts): 12–16 hours/day, 6–8 inches above seedlings.
- ● Mulch: Straw or shredded leaves to retain moisture and suppress weeds.
- ● Cage or stakes: 3–4 ft tall to support heavy pepper plants.
- ● Epsom salt: 1 tbsp/month in water (magnesium boost for green peppers).
- ● Row covers: Lightweight fabric to protect from early pests or frost.
- ● pH test kit: To monitor soil acidity (ideal: 6.0–7.0).
Step-by-step instructions for planting Anaheim peppers
Here’s how I grow Anaheims—juicy, mild, and prolific—using simple techniques that work in any sunny garden bed.
🌱 Step 1: Prepare the Planting Site for Warm Soil
Anaheims thrive in well-draining soil that warms up quickly after the last frost. I test soil temperature with a thermometer—wait until it hits 60°F or higher before planting. If your spring is cool, use black plastic mulch laid down 2-3 weeks before planting to speed up warming.
Work in a 2-inch layer of compost mixed into the top 6 inches of soil. Anaheims are heavy feeders, so I avoid fresh manure—it burns tender roots. Loosen the soil to 12 inches deep with a garden fork to prevent root binding later. This step ensures strong root growth and fewer blossom-end rot issues.
🪴 Step 2: Plant Transplants at the Right Depth
Dig holes 18 inches apart in rows spaced 24 inches apart—this gives peppers room to sprawl without crowding. Set each transplant so the top of the root ball sits ½ inch below soil level. Press soil firmly around the base to eliminate air pockets, then water deeply to settle everything.
I always pinch off the lower leaves that would touch the soil—this prevents disease. If your transplants look leggy, bury them deeper up to the first set of leaves. The goal is to encourage a sturdy, compact plant that won’t flop under fruit weight.
☀️ Step 3: Provide Consistent Sun and Water
Anaheims need full sun (6-8 hours daily), but they tolerate light shade in hot climates. I water at the base 1-1.5 inches per week, letting the top inch of soil dry between waterings. Drip irrigation works best—it keeps leaves dry and prevents fungal diseases like powdery mildew.
Here’s the thing—anaheims hate wet feet. If your soil drains poorly, mound soil around the base to create a slight berm. You’ll see healthier plants and fewer cracked peppers. Mulch with 2 inches of straw to retain moisture and suppress weeds, but keep it 2 inches away from stems to prevent rot.
✂️ Step 4: Prune and Support for Heavy Harvests
Once plants reach 18 inches tall, I prune suckers (the small shoots in leaf axils) to direct energy into fruit production. Anaheims don’t need heavy pruning—just remove dead or diseased leaves regularly. I also tie tall stems to stakes or use cages to prevent breakage as peppers grow.
Watch for blossom-end rot (dark spots on fruit) early in the season. It’s caused by calcium deficiency, so I side-dress with 1 tablespoon of crushed eggshells around each plant. Harvest peppers when they reach 6-8 inches long for the best flavor—green or red, they’re delicious either way!
Tips & tricks for planting Anaheim peppers
Took me a while to figure these out, so here are the secrets that make all the difference with your Anaheim peppers.
The Heat Factor: That 60°F soil temperature is non-negotiable for Anaheims. I learned this the hard way after planting too early—cold soil slows root growth and stresses plants. If your spring is chilly, lay down black plastic mulch 2-3 weeks before planting to warm the soil faster. Trust me, your peppers will thank you with bigger harvests.
Planting Depth Secret: When you're planting those 18-inch-apart transplants, bury them just ½ inch deeper than the root ball. This encourages stronger root systems and prevents flopping later. For leggy seedlings, bury up to the first set of leaves—it sounds counterintuitive, but it works like magic for sturdy growth.
Watering Wisdom: The 1-1.5 inches per week guideline is perfect, but timing matters just as much. Water in the morning so leaves have all day to dry—this prevents fungal diseases like powdery mildew that love damp foliage. And that 2-inch straw mulch? Keep it 2 inches away from stems to avoid rot while still protecting roots.
Pruning Payoff: Once your plants hit 18 inches, focus on removing suckers (those little shoots in leaf axils) rather than heavy pruning. I also snip off any leaves touching the soil—this simple step cuts down on disease by 70% in my garden. And don't forget those 1 tablespoon crushed eggshells around each plant—they're a calcium boost that prevents blossom-end rot.
Pro Tips for Planting Anaheim Peppers
- Took me a while to figure these out, so here are the secrets that make all the difference with your Anaheim peppers.
- The Heat Factor: That 60°F soil temperature is non-negotiable for Anaheims.
- Planting Depth Secret: When you're planting those 18-inch-apart transplants, bury them just ½ inch deeper than the root ball.
Frequently asked questions
Got questions about growing Anaheim peppers?
You’re not alone! Here are answers to the most common concerns to help you cultivate a thriving harvest with confidence.
When is the best time to plant Anaheim peppers?
Plant Anaheim peppers after the last frost when soil temperatures reach at least 60°F (15°C). In warmer climates, start seeds indoors 8–10 weeks before the last frost, or direct-sow after April. For cooler regions, wait until late spring or early summer for optimal growth.
How do I know if my Anaheim peppers need more heat?
Anaheim peppers thrive in full sun (6–8+ hours daily) and warm soil. If leaves yellow or growth stalls, they may need more heat. Use black plastic mulch or a greenhouse to warm soil, or choose a sunnier spot. Avoid planting near large trees that cast shade.
Can I grow Anaheim peppers in containers?
Yes! Choose a 5-gallon+ container with drainage holes and well-draining potting mix. Place containers in a sunny spot and water consistently. Dwarf varieties like ‘Lunchbox’ work well in pots, but larger plants may need staking for support.
What should I do if my Anaheim peppers get pests?
Common pests include aphids, spider mites, and hornworms. Combat them with neem oil (for soft-bodied pests) or handpick hornworms. Encourage beneficial insects like ladybugs, and remove affected leaves. Avoid overwatering, which attracts pests.
Why aren’t my Anaheim peppers producing fruit?
Low fruit production often stems from lack of pollination, insufficient sunlight, or over-fertilizing with nitrogen. Hand-pollinate flowers with a brush, ensure full sun, and use a balanced fertilizer (like 10-10-10). Stress from extreme heat or drought can also reduce yields—keep plants consistently moist.
Wrapping up and next steps
Planting Anaheim peppers is a rewarding journey that brings bold flavors and vibrant harvests to your table! 🌱 With the right soil, sunlight, and care, you’ll soon be enjoying fresh, homegrown peppers perfect for salsas, stuffing, or grilling. Don’t wait—start your seeds or seedlings today!
Ready to dive in? Grab your gardening gloves and get planting! For extra tips, check out our companion planting guide to maximize your pepper patch’s potential. Happy growing! 🌿