Trees
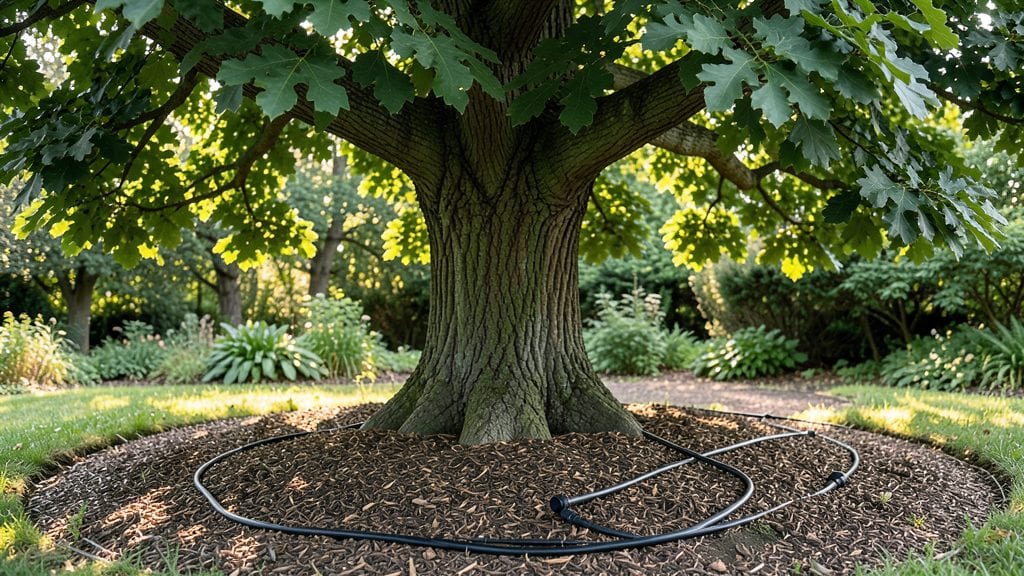
Planting trees outdoors isn't just about digging a hole—it's about setting them up for a lifetime of healthy growth that outlasts your garden plans. 🌱 I've learned that the first year determines whether a tree thrives or struggles, and it all starts with the right spot, soil, and care routine.
The difference between a weak stem and a sturdy trunk often comes down to these early choices.
You'll need a few basic tools—a shovel, mulch, and a watering can—but the real secret is understanding your tree's needs. Some love full sun, others prefer shade; some need moist soil while others tolerate drought.
My fragrant magnolia nearly died because I planted it too close to the foundation, but after moving it to a sunnier, airier spot, it's now the showstopper of my yard.
By following the right watering schedule and protecting young roots, you'll watch that first flush of new leaves appear within weeks. A well-planted tree can grow 12-24 inches per year, and with proper care, it'll reward you with shade, beauty, and even fruit for decades.
The key is patience—trees don't rush, and neither should you.
This works for any climate, from desert oaks to rainforest palms, as long as you match the tree to its environment. Let's get those roots settled so you can enjoy the canopy for years to come.
📚 In This Guide
- What you need
- Instructions
- Tips and common mistakes
- Wrapping up and next steps
What you need
- ● Tree seedlings/saplings: Choose 1–3 native or climate-appropriate species (e.g., oak, maple, or fruit trees). Opt for 1–3 ft tall for easier handling.
- ● High-quality potting soil: 2–3 bags (10–20 lbs each) of organic, well-draining mix (e.g., Miracle-Gro Garden Soil).
- ● Planting hole tools: 1 shovel (round-point for digging)
- ● 1 garden trowel (for precision)
- ● Mulch: 1–2 bags (3–5 cu. ft.) of shredded bark or wood chips to retain moisture.
- ● Watering supplies: 1 garden hose with adjustable nozzle
- ● OR 1 watering can (5+ gallons) for smaller trees
- ● Fertilizer: Slow-release granular fertilizer (e.g., Osmocote Smart-Release) or organic compost (1–2 bags).
- ○ Staking kit (optional but recommended for young trees): 2–3 stakes + tree ties.
- ● Soil amendments: Gypsum (for clay soil) or perlite (for sandy soil) to improve drainage.
- ● Tree guards: Plastic or metal protectors to shield trunks from pests.
- ● Drip irrigation system: For automated watering (great for large canopies!).
- ● Pruning shears: Bypass pruners (for shaping and maintenance).
- ● Gloves + knee pads: For comfort during planting!
Instructions for planting trees that thrive year-round
Here’s how to plant trees that grow strong, stay healthy, and keep their foliage lush through every season.
🪴 Step 1: Dig the Perfect Hole for Your Tree
Start by marking the planting spot with a stake or shovel. The hole should be twice as wide as the root ball but no deeper—this prevents soil compaction around the roots. I dig mine with the shovel first to loosen the soil, then widen it with my hands to avoid tearing the roots later.
Loosen the soil at the bottom of the hole with a garden fork or trowel. This helps roots spread out quickly instead of circling the hole. If your soil is heavy clay, mix in a few handfuls of compost or sand to improve drainage. The goal is to create a welcoming space where roots can establish without fighting compacted earth.
🌱 Step 2: Position the Tree Correctly in the Hole
Gently remove the tree from its container and tease the roots apart if they’re circling. Place it in the hole so the top of the root ball sits 1-2 inches above ground level. This prevents water from pooling around the trunk, which can cause rot. I always check by comparing the root flare (where roots meet the trunk) to the surrounding soil line.
Fill the hole with native soil, tapping it down lightly as you go to remove air pockets. Don’t pack it too tightly—you want the soil to settle naturally around the roots. Leave a slight depression around the base to catch water during irrigation. This ensures moisture reaches the roots instead of running off.
💧 Step 3: Water Deeply to Settle the Soil
Give the tree a thorough watering right after planting—at least 10 gallons for a small tree, more for larger varieties. Water slowly to let it soak in, then wait 15-20 minutes before adding more if the soil isn’t damp 6 inches down. This step is critical; it helps the soil settle and eliminates air gaps around the roots.
Mulch the base with 2-3 inches of organic mulch, keeping it 6 inches away from the trunk to prevent moisture buildup. I use shredded bark or wood chips because they break down slowly and improve soil structure over time. Avoid piling mulch too high—it can suffocate the roots and attract pests.
☀️ Step 4: Provide the Right Light and Support
Most trees need 6+ hours of sunlight daily, but young trees benefit from some afternoon shade in hot climates. If planting in a windy area, stake the tree temporarily to prevent leaning. I use two stakes and a soft tie to give the trunk flexibility—too tight, and you’ll damage it as it grows.
Watch for signs of stress in the first few weeks: yellowing leaves or wilting mean the tree isn’t getting enough water, while brown edges could signal too much sun. Adjust care based on what you see—trees are resilient, but they need consistent conditions to thrive. A healthy tree will show new growth within 4-6 weeks.
⏰ Step 5: Schedule Year-Round Care
Water deeply once a week during the first year, more often in extreme heat. After that, most mature trees only need water during droughts. I check soil moisture by digging down 6 inches—if it’s dry, it’s time to water. Fertilize lightly in spring with a balanced formula, but avoid heavy feeding—it can burn young roots.
Prune dead or crossing branches in late winter or early spring before new growth starts. This keeps the canopy open and reduces disease risk. I always sterilize my pruners with rubbing alcohol between cuts to prevent spreading infections. With proper care, your tree will grow strong and healthy for decades.
Tips & tricks for planting trees that thrive year-round
A few simple hacks can make all the difference between a struggling sapling and a thriving tree that keeps its canopy lush through every season.
The Hole Depth Secret: When digging your hole in Step 1, resist the urge to make it deeper than the root ball—this actually suffocates roots by trapping moisture. I've seen many gardeners dig too deep, thinking it gives roots more room, but the opposite happens. The key is that wide, shallow space where roots can spread horizontally instead of struggling upward.
Root Flare Visibility: In Step 2, that 1-2 inch elevation above ground level isn't just about drainage—it's about making the root flare (where roots meet trunk) clearly visible. This natural junction should sit slightly above soil level. If buried, it can cause girdling as the trunk grows. I always trace the flare with my finger before planting to ensure proper positioning.
Watering Timing: That 15-20 minute wait after your initial 10 gallons in Step 3 is crucial. Many people rush to add more water immediately, but this prevents proper soil settling. The pause lets soil particles shift into place around the roots, creating a stable foundation. I set a timer and use this time to check for proper moisture penetration 6 inches down.
Mulch Layering: The 2-3 inch mulch layer in Step 3 isn't just about moisture retention—it's about creating a microclimate. I always spread it in concentric circles, thicker near the outer edges and thinner near the trunk. This prevents moisture buildup right against the bark while still protecting roots. Plus, organic mulch improves soil structure over time as it breaks down.
Pro Tips for Outdoor Planted Trees
- A few simple hacks can make all the difference between a struggling sapling and a thriving tree that keeps its canopy lush through every season.
- The Hole Depth Secret: When digging your hole in Step 1, resist the urge to make it deeper than the root ball—this actually suffocates roots by trapping moisture.
- Root Flare Visibility: In Step 2, that 1-2 inch elevation above ground level isn't just about drainage—it's about making the root flare (where roots meet trunk) clearly visible.
Frequently asked questions
Got questions about keeping your outdoor planted trees thriving year-round? You’re not alone! Here are some of the most common concerns—and their simple, actionable solutions.
What’s the best time of year to plant outdoor trees?
The ideal window is early spring or fall—when soil is workable but not scorching. Avoid planting in extreme heat or frost, as roots struggle to establish. For bare-root trees, plant while dormant (late winter/early spring). Container-grown trees can go in anytime, but watering becomes critical in summer!
How often should I water newly planted trees?
Water deeply 2–3 times per week for the first year (or daily in extreme heat). Aim for 1–1.5 inches of water per session—soak the root zone, not just the surface. Mulch (2–4 inches) helps retain moisture. Pro tip: Use a soil probe to check depth; if dry at 6 inches, water again!
Can I plant trees in winter? What about frost-sensitive varieties?
Winter planting is possible in mild climates (Zones 7–10), but avoid freezing temps. For frost-sensitive trees (e.g., citrus, magnolias), wait until spring. If you must plant in winter, protect roots with mulch and water sparingly—focus on spring/summer growth when roots can expand safely.
What if my tree’s leaves turn yellow or wilt? How do I troubleshoot?
Yellow leaves often signal overwatering, nutrient deficiency, or root rot. Check soil moisture (soggy = drain better; dry = water deeply). Wilted leaves? Underwatering or pests could be culprits. Inspect for aphids/mites on undersides. Adjust care: fertilize in spring (balanced 10-10-10) and prune dead branches.
Are there low-maintenance tree alternatives for small yards?
Opt for dwarf varieties (e.g., Japanese maple, dwarf fruit trees) or native species like serviceberry or crepe myrtle. These need minimal pruning and adapt to tight spaces. Bonus: Drought-tolerant options (e.g., olive trees) cut watering needs by 50%!
Still stumped? Drop your tree’s species and climate zone in the comments—we’ll help diagnose!
Wrapping up and next steps
Transforming your outdoor space with healthy, thriving trees is a rewarding journey that blends nature with creativity! 🌳 By mastering year-round care—from seasonal pruning to soil enrichment—you’re not just planting trees; you’re nurturing a living legacy. Start small, stay consistent, and watch your canopy flourish into a vibrant, sustainable oasis.
Ready to take the next step? Pick one tree this season and apply these hacks—your future self (and the birds!) will thank you. Happy planting! 🌱