Diseases
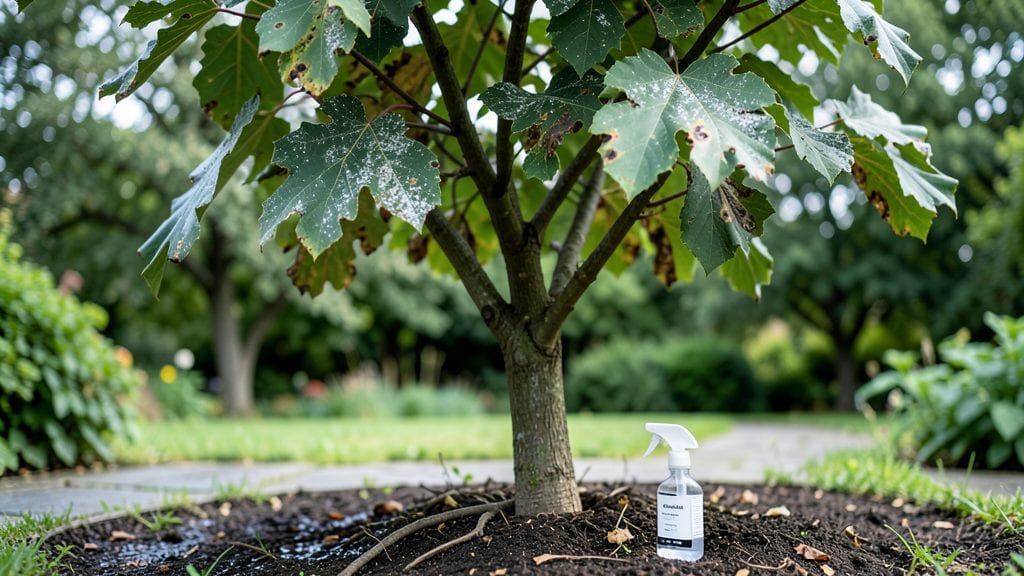
Mulberry plant diseases can turn your lush trees into sad shadows faster than you think. 🌿 I’ve seen powdery mildew turn leaves white in weeks and root rot collapse branches overnight—until I learned the early warning signs and organic fixes that actually work.
The key isn’t just sprays; it’s understanding why your mulberry’s struggling before the damage spreads.
Most problems start with humidity or poor airflow—like powdery mildew’s white dust or leaf spot’s brown spots. Root rot sneaks in when soil stays soggy too long, while pests like scale insects weaken plants so diseases move in.
The good news? Mulberries are tough once you catch issues early. A simple mix of neem oil, baking soda, and proper pruning keeps them thriving.
You’ll spot the difference in just a few weeks: no more wilting leaves, no more mysterious holes. Instead, your mulberry will burst with deep green, glossy foliage and those sweet berries you planted it for. The secret is acting fast—once you recognize the symptoms, the fixes are straightforward.
Works for backyard trees, container mulberries, or even those stubborn ones in tight spaces. Let’s get your plants back to their best—without chemicals or guesswork.
Root Causes of Mulberry Ailments
Understanding why mulberry plants fall prey to diseases is the first step toward preventing and treating them. These issues rarely arise in isolation—they’re often the result of a perfect storm of environmental, biological, or cultural factors. Let’s break down the key culprits and how they create conditions for trouble.
Fungi are the most common villains in mulberry plant diseases, thriving in damp, warm conditions. Here’s why they strike:
- High Humidity & Poor Airflow Mulberry leaves act like tiny sponges when humidity hovers above 70% for prolonged periods. Fungal spores (like those causing anthracnose or powdery mildew) latch onto wet surfaces and germinate.
Stagnant air—common in dense plantings or shaded groves—traps moisture, giving fungi a foothold. Actionable fix: Prune for airflow and avoid overhead watering.
- Wounded Bark or Leaves Physical damage (from pruning, hail, or pests) creates entry points for fungi. Canker diseases, for example, exploit cracks in the bark, while leaf spot fungi target torn or chewed foliage. Actionable fix: Sterilize tools with 70% alcohol and avoid heavy pruning during wet seasons.
- Organic Debris Buildup Fallen leaves, fruit mummies, or old mulch provide a fungal smorgasbord. Pathogens like Colletotrichum (cause of fruit rot) overwinter in decaying matter, ready to reinfect when conditions warm up. Actionable fix: Clear debris 3–4 feet around plants and compost it away from the grove.
Bacteria move like wildfire, especially in warm, rainy weather. Unlike fungi, they don’t need spores—they hitch rides on water, tools, or insects. Common triggers include:
- Splashing Water Rain or irrigation splashing onto leaves can disperse bacteria like Xanthomonas (culprit behind bacterial blight), which oozes from infected tissue. Actionable fix: Use drip irrigation and avoid wetting foliage.
- Contaminated Tools or Hands Pruners, gloves, or even your fingers can transfer bacteria from plant to plant. Bacterial leaf scorch, for instance, spreads via sap-contaminated tools. Actionable fix: Sanitize tools with bleach solution (1 part bleach to 9 parts water) between cuts.
- Stress from Overwatering or Drought Mulberries under water stress (too much or too little) weaken defenses, making them vulnerable to bacterial invasions. Actionable fix: Maintain consistent soil moisture (1–2 inches deep) and mulch to retain even hydration.
Some diseases aren’t caused by microbes at all—they’re delivered by pests. For example:
- Sap-Sucking Insects (Aphids, Scale, Whiteflies) These pests weaken plants by draining sap, creating sticky honeydew that fosters sooty mold (a black fungal growth). Actionable fix: Blast off pests with water sprays or introduce ladybugs for natural control.
- Boring Insects (Mulberry Pyralid Moth Larvae) Larvae tunneling into stems or fruit can introduce secondary infections like bacterial rot. Actionable fix: Remove infested fruit promptly and apply neem oil as a deterrent.
- Viral Hitchhikers (Aphids Spread Them) Viruses like mulberry mosaic rely on aphids to jump from plant to plant. Infected leaves show mottling or stunting, but the virus itself can’t survive without its insect taxi. Actionable fix: Use reflective mulch to deter aphids and monitor for early signs.
Sometimes, the problem isn’t a pathogen at all—it’s the perfect storm of conditions that weaken the plant:
- Temperature Swings Mulberries struggle with sudden cold snaps (below 20°F) or heatwaves (above 90°F).
Cold stress cracks bark, inviting fungi, while heat stress wilts leaves, making them prone to sun scald or bacterial entry. Actionable fix: Use row covers in winter and provide shade cloth in summer.
- Poor Soil Drainage Waterlogged roots suffocate roots, leading to root rot (often caused by Phytophthora fungi). Compacted or clay-heavy soils worsen the issue. Actionable fix: Amend soil with compost or perlite and raise beds if drainage is poor.
- Nutrient Imbalances Over-fertilization with nitrogen (without potassium) weakens cell walls, making plants susceptible to diseases. Conversely, deficiencies in zinc or magnesium stunt growth, inviting pests. Actionable fix: Test soil annually and balance fertilizers with potassium-rich amendments (like wood ash).
💡 Pro Tip: Keep a disease diary noting weather patterns, pruning dates, and pest outbreaks. Patterns emerge over time—like noticing anthracnose flares after heavy June rains—and help you predict and prevent future issues.
Quick Fixes for Mulberry Plant Ailments
When your mulberry tree starts showing signs of distress, acting fast can mean the difference between a full recovery and permanent damage. Below are practical, organic solutions tailored to the most common mulberry plant diseases, along with prevention tips to keep your tree thriving. No harsh chemicals needed—just targeted care!
Cause: Overwatering, poor drainage, or fungal invasion in soggy soil.
How to Fix It: 🔥 Step 1: Drain the Water Stop watering immediately and let the soil dry out. If your mulberry is in a container, move it to a well-draining spot or repot it with fresh, sterile potting mix.
🍳 Step 2: Prune the Damage Use sterilized pruning shears (wipe with rubbing alcohol) to trim away any blackened, mushy roots or stems. Healthy tissue should be firm and light-colored.
👨🍳 Step 3: Boost Soil Health Amend the soil with perlite, sand, or coconut coir to improve drainage. For organic antifungal support, mix in 1 cup of neem cake or composted oak leaves per square foot of soil.
⏰ Step 4: Monitor & Adjust Water only when the top 2 inches of soil are dry. Consider installing drainage pipes if your tree is in a low-lying area.
💡 Prevention Tip: Mulch with wood chips (not leaves) to retain moisture without smothering roots. Avoid over-potting—ensure containers have drainage holes!
Cause: High humidity, poor airflow, or crowded foliage creates the perfect breeding ground for this fungal disease.
How to Fix It: 🔥 Step 1: Isolate & Clean Remove heavily infected leaves (wear gloves!). Dispose of them in the trash—not compost—to prevent spread.
🍳 Step 2: Spray Organic Fungicide Mix 1 tbsp baking soda + 1 tsp horticultural oil + 1 quart water in a spray bottle. Apply early in the morning on dry leaves. Reapply every 7–10 days until the mildew disappears.
👨🍳 Step 3: Improve Airflow Thin out dense branches to allow sunlight and air to circulate. If growing in a greenhouse, use a fan on low for 1–2 hours daily.
✨ Prevention Tip: Preventative spray works best! Apply the baking soda mix once a month during humid seasons. Space mulberry trees 8–10 feet apart to reduce crowding.
Cause: Dry conditions and dusty leaves attract these sap-sucking mites, causing stippled, yellowing foliage.
How to Fix It: 🔥 Step 1: Blast Them Off Hose down the tree with water (early morning or late evening) to dislodge mites. Use a strong stream to reach undersides of leaves.
🍳 Step 2: Introduce Beneficial Predators Release lacewings or ladybugs (available at garden centers) to eat mites naturally. For a DIY solution, spray neem oil (1 tsp per quart of water) every 5 days.
👨🍳 Step 3: Increase Humidity Mulberries love moisture! Mist leaves daily or place a tray of water near the plant. Grouping plants together also raises humidity.
🌡️ Prevention Tip: Dusty leaves = mite magnet. Wipe leaves with a damp cloth every 2 weeks to remove debris. Avoid over-fertilizing with nitrogen—it attracts pests!
Cause: Fungal spores thrive in wet, warm conditions, causing dark, sunken lesions on leaves and fruit.
How to Fix It: 🔥 Step 1: Remove Infected Parts Prune and destroy (do not compost) all spotted leaves, twigs, or fruit. Sterilize your tools after each cut.
🍳 Step 2: Apply Copper Fungicide Use an organic copper spray (like copper sulfate) every 2 weeks until new growth appears. Follow label instructions for dilution.
👨🍳 Step 3: Improve Drainage & Spacing Ensure the tree isn’t sitting in standing water. If in a garden bed, raise the soil level slightly. Space new mulberry plants 10+ feet apart to prevent airborne spore spread.
🎯 Prevention Tip: Water at the base (not overhead) to keep leaves dry. In fall, rake up and remove all leaf litter from under the tree.
A healthy mulberry resists diseases better!
Follow these year-round tips: - Fertilize lightly in spring with compost or worm castings (avoid synthetic nitrogen). - Prune in late winter to remove dead wood and improve airflow. - Rotate crops if growing mulberries in a small garden—don’t plant them in the same spot yearly. - Test soil pH (ideal: 6.0–7.0).
Adjust with lime (to raise) or sulfur (to lower) if needed.
🚨 Emergency Alert: If your mulberry shows sudden wilting, oozing sap, or severe defoliation, it may be infected with bacterial blight—a tougher foe. In this case, remove the tree immediately to prevent spread, and replace it with a disease-resistant variety like Morus alba ‘Illinois Everbearing.’
By tackling issues early and organically, your mulberry tree can bounce back stronger than ever—ready to produce juicy berries and lush foliage for seasons to come! 🌿💚
Frequently asked questions
Why do mulberry leaves turn yellow and drop so suddenly?
Yellowing leaves with sudden drop-off often signal nutrient deficiency (like iron or magnesium) or root stress from overwatering. Check soil moisture—roots need well-draining soil. If leaves show yellowing between veins, it’s likely iron chlorosis. Fix with chelated iron or composted oak leaves.
Can I save my mulberry tree if it has blackened stems?
Blackened stems usually mean root rot or canker disease. Prune back dead wood below the blackened area with sterilized tools. Improve drainage immediately by amending soil with perlite and avoid watering until soil dries. Severe cases may require replanting.
How often should I spray mulberry trees for powdery mildew?
Spray every 7–10 days during humid seasons with a mix of 1 tbsp baking soda + 1 tsp horticultural oil + 1 quart water. Apply in the early morning for best results. For prevention, thin foliage to improve airflow and avoid overhead watering.
Are mulberry diseases contagious to other plants?
Yes! Fungal diseases like anthracnose or powdery mildew spread via spores, while bacterial diseases (like blight) transfer through water or tools. Isolate infected trees immediately and sterilize pruners with bleach solution (1:9 ratio). Avoid composting diseased plant debris.
What’s the best organic fungicide for mulberry leaf spot?
Use copper fungicide (like copper sulfate) or a neem oil spray (1 tsp per quart of water). Apply every 2 weeks until new growth appears. Remove all infected leaves and improve airflow by pruning dense branches.