Planting
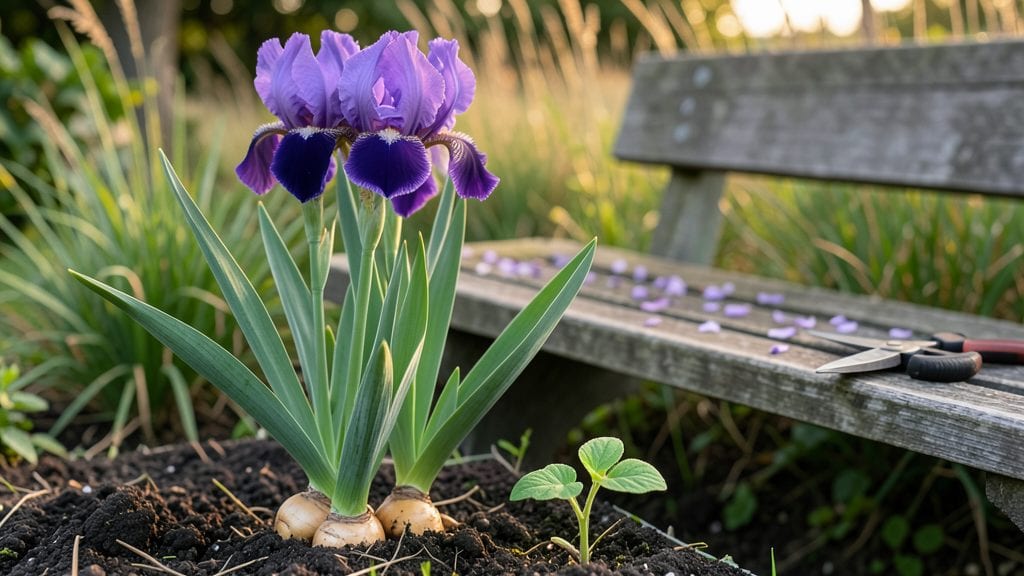
Getting iris planting depth right means your rhizomes will thrive—too deep or too shallow, and you risk stunted blooms or even plant death.
Struggling with iris plants that refuse to bloom? The secret often lies beneath the soil—planting depth is everything. Get it wrong, and your irises may never reach their full potential.
Most gardeners assume deeper is better, but irises actually need half their rhizome exposed to sunlight. This simple rule keeps them healthy and encourages vibrant blooms every spring.
Below, I’ll break down the exact depth for your iris variety, how soil type affects placement, and the one mistake that kills rhizomes faster than anything else.
Optimal iris planting depth by variety: rhizome vs. bearded iris rules
Planting irises at the correct depth is the difference between vibrant blooms and struggling rhizomes. Unlike bulbs, iris rhizomes need specific exposure to thrive. Too deep, and they rot; too shallow, and they dry out.
Each iris variety has unique needs, so let’s dive into the ideal planting depth for your garden.
For bearded irises, the most popular type, the rhizome crown (where leaves meet roots) should sit just above soil level. This ensures the rhizome stays dry and prevents rot.
Siberian irises, on the other hand, prefer a slightly deeper placement—about 1 inch below soil—while Dutch irises (often grown in containers) need their rhizomes barely covered.
Here’s a quick reference to avoid common mistakes:
| Iris Variety | Crown Placement | Soil Exposure | Bloom Impact |
|---|---|---|---|
| Bearded Iris | Top of rhizome at soil level | Upper half exposed | Maximizes blooms |
| Siberian Iris | 1 inch below soil | Minimal exposure | Prevents winter dieback |
| Dutch Iris | Barely covered (1/2 inch) | Mostly exposed | Encourages compact growth |
The eyes of the rhizome (the tiny buds where new growth emerges) must face upward. If planted upside down, they’ll fail to sprout. After planting, water thoroughly to settle the soil around the rhizome, but avoid overwatering—excess moisture is the #1 killer of irises.
For bearded irises, space rhizomes 12-24 inches apart to allow airflow. Siberian irises can be closer (6-12 inches), while Dutch irises thrive in containers with well-draining soil. Mulch lightly after planting to retain moisture without smothering the rhizome.
Season matters too. Plant bearded irises in early fall (6-8 weeks before frost) so they establish roots before winter. Siberian irises prefer spring planting, while Dutch irises can go in anytime their container soil stays cool. Avoid planting in hot, dry weather—rhizomes need time to acclimate.
If your irises aren’t blooming, check the planting depth first. Over-deep rhizomes rot; shallow ones dry out. Dig up struggling plants and adjust—expose the crown for bearded irises or bury Siberian irises slightly deeper. With the right depth, your irises will reward you with bold, vibrant blooms for years.
Pro tip: Mark your iris beds with stakes or flags to avoid disturbing rhizomes during weeding. Irises hate being moved, so once planted correctly, leave them be! 🌱
Common iris planting mistakes and how to fix them
If your iris rhizomes aren't blooming like they should, the issue might be lurking just below the surface. Incorrect planting depth is one of the most common mistakes gardeners make, often leading to stunted growth or no flowers at all.
The good news? Most of these issues are easily fixable with the right adjustments.
I've seen over-planting and under-planting both cause problems. Too deep, and your rhizomes suffocate; too shallow, and they dry out. The key is finding that sweet spot where the rhizome's "eyes" (those tiny buds) peek just above the soil line. Let's fix these mistakes step by step.
Planting iris rhizomes too deep (below 2 inches) smothers growth and prevents blooming. The rhizome's "eyes" must stay exposed to sunlight to trigger flowering. If buried too deep, they'll rot or produce only foliage with no flowers.
First, check your rhizome orientation. Many gardeners accidentally plant them upside down, which stops growth completely. The thicker, fleshy bottom should face downward, while the top with "eyes" must stay above soil level. If you're unsure, look for the root growth—it naturally points downward.
Another frequent error is planting in heavy clay soil without amendment. Clay holds too much moisture, causing rhizome rot. Mix in sand or compost to improve drainage. For sandy soils, add organic matter to retain moisture. Always plant in well-draining soil—irises hate soggy roots.
Fixing these mistakes is simple. For over-deep planting, gently dig up the rhizome and reposition it so the eyes are just visible above soil. If the rhizome is rotting, trim away damaged sections with sterilized shears and replant immediately.
For shallow planting, add a thin layer of soil around the base but avoid burying the eyes.
After adjusting depth, give your irises a light watering to settle the soil. Avoid heavy watering for the first week to prevent root disturbance. In full sun locations, your irises should bloom within 2-3 weeks of proper planting.
If they still don't bloom, check for nutrient deficiencies—irises need phosphorus-rich fertilizer in early spring.
Remember, iris rhizomes are hardy once planted correctly. With the right depth and soil conditions, they'll reward you with stunning blooms for years. Happy planting—your garden will thank you! 🌷