Container Gardens
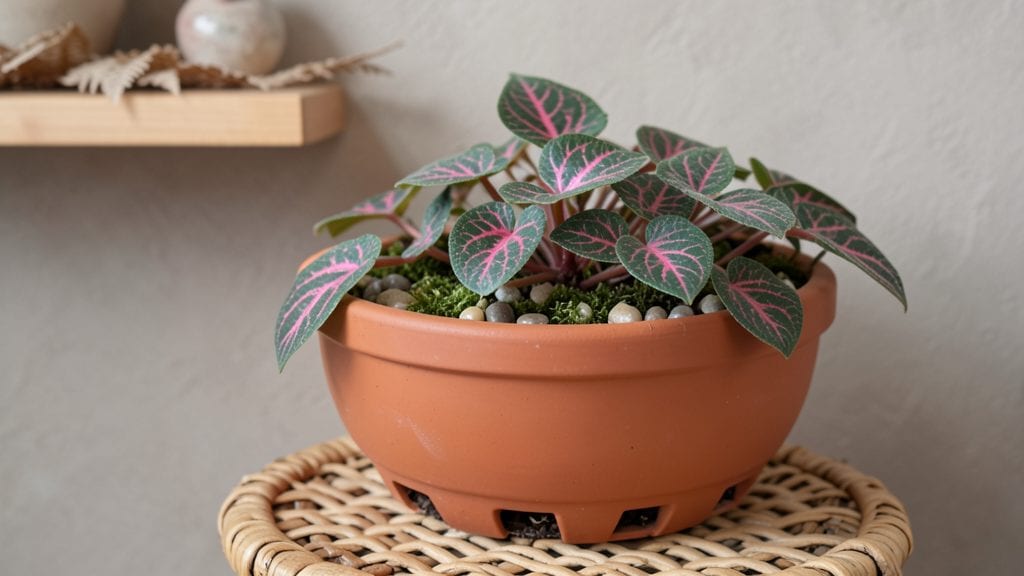
Transforming a bare wall into a lush indoor plant bed brings life to small spaces without taking up floor space. 🌿 I’ve turned my apartment’s blank hallway into a thriving vertical garden that doubles as decor, and it only took a few hours and a handful of supplies.
The key is matching the right plants to your light conditions while keeping the setup simple enough to maintain.
You’ll need a sturdy frame (wood or metal works best), waterproof fabric or a pre-made vertical planter, and lightweight potting mix designed for containers. For low-light spots, opt for snake plants, pothos, or ZZ plants—they thrive with minimal fuss.
If your space gets better light, ferns, ivy, or small ferns will add texture and color. Drainage is critical, so add a tray underneath to catch any overflow.
By the time you’re done, you’ll have a custom green wall that purifies the air, adds natural beauty, and becomes the focal point of any room. The best part?
It grows more vibrant with each passing week as the plants fill in. Whether you’re renting or just love the look, this project adapts to any indoor space.
Fair warning: once you start, you’ll want to expand it. I added a second tier after my first one looked too empty—now it’s a full conversation piece. The hardest part isn’t the building; it’s choosing which plants to add next. Let’s get your space growing!
📚 In This Guide
- What you need
- Instructions
- Tips and common mistakes
- Wrapping up and next steps
What you need
- ● Container or Planter: Depth: At least 6–12 inches (deeper for root-heavy plants like ferns).
- ● Width: Minimum 12 inches (wider for sprawling plants like pothos).
- ● Material: Wood (cedar or redwood for durability), fabric grow bags, or plastic with drainage holes.
- ● Growing Medium: 6–8 quarts of well-draining potting mix (e.g., cactus/succulent mix or peat-based blend for moisture retention).
- ○ Optional: Perlite or orchid bark (1 part) to improve aeration.
- ● Drainage Layer: 1–2 inches of gravel, hydroponic clay pebbles, or broken terracotta pots.
- ● Plants: 3–5 low-light to medium-light plants (e.g., pothos, spider plants, fittonia, or calatheas).
- ● Size: Small starter plants (4–6 inches tall) for even spacing.
- ● Drill or screwdriver (if pre-drilling drainage holes).
- ● Measuring tape (to mark plant spacing).
- ● Scissors or utility knife (for cutting fabric planters or trimming excess material).
- ● Spray bottle (for misting plants post-planting).
- ○ Optional: Waterproof liner (for fabric planters).
- ● Decorative moss or coir fiber (for a natural, rustic look).
- ● Light Source: Near a bright, indirect window (east or north-facing ideal).
- ● Watering Schedule: Check soil moisture weekly (adjust for humidity levels).
- ● Space: Flat surface or wall-mounted shelf (ensure weight capacity).
Step-by-step instructions for building your indoor plant bed
Here's how to create a lush vertical garden that brings nature indoors without taking up floor space.
🪴 Step 1: Gather Your Materials and Tools
Start by collecting everything you'll need. You'll want a sturdy wooden pallet (cleaned and sanded), landscape fabric (to prevent soil from falling through), 4-6 gallons of potting mix (lightweight and well-draining), and 10-12 small plants (like succulents, herbs, or trailing plants). Grab a utility knife, scissors, measuring tape, and gloves to protect your hands.
Double-check that your pallet is dry and free of splinters. If it’s not already, sand down any rough edges so you don’t risk snagging your hands or plants later. This is the foundation, so take your time—skipping this step can lead to a wobbly or unstable bed.
🌱 Step 2: Prepare the Pallet and Add Landscape Fabric
Lay the pallet flat on a stable surface, like a table or the floor. Cut the landscape fabric to fit snugly over the entire top of the pallet, leaving about 2 inches of extra fabric on all sides. This fabric keeps soil from slipping through the gaps in the wood while still allowing water to drain.
Secure the fabric by tucking the excess edges into the spaces between the pallet slats. If needed, use small staples or hot glue (sparingly) to hold it in place. The goal is to create a smooth, even base for your soil—no lumps or uneven spots.
💧 Step 3: Fill the Pallet with Potting Mix
Spread the 4-6 gallons of potting mix evenly across the fabric, filling the pallet to about 1 inch below the top edge. Use your hands to gently press the soil down, removing any air pockets. This ensures roots can grow without struggling to push through compacted soil.
Leave the top layer slightly loose so you can easily tuck in plants later. Avoid packing it too tightly—you want the soil to stay aerated and drain well. If you notice any gaps in the fabric after filling, tuck them under the soil to keep everything contained.
☀️ Step 4: Plant Your Selections and Arrange for Growth
Start by placing your 10-12 small plants in the soil, spacing them about 4-6 inches apart to give them room to grow. Larger plants or those that spread (like mint or creeping thyme) should go toward the edges, while taller plants can go toward the back. Press the soil gently around each plant to secure it.
For trailing plants, like string of pearls or creeping jenny, position them near the edges so their vines can cascade down the sides. Water lightly after planting to help the soil settle and encourage roots to establish quickly. This is where your vertical garden starts to take shape!
⏰ Step 5: Water, Position, and Maintain Your Indoor Oasis
Water your new plant bed thoroughly until water drains from the bottom. Let it sit for 10-15 minutes, then drain any excess water from the saucer or tray below. Place your pallet in a spot with bright, indirect light—near a window works well, but avoid direct sunlight, which can dry out the soil too quickly.
Check the soil every 2-3 days and water when the top ½ inch feels dry. Rotate the pallet occasionally so all plants get even light exposure. With care, your indoor plant bed will thrive, adding greenery and life to any small space.
Tips & tricks for perfect indoor plant beds
Building a vertical garden doesn't have to be tricky—these simple strategies will help you create a thriving indoor oasis that lasts for years.
Foundation First: Don't skip sanding that wooden pallet! I learned this the hard way after getting splinters while planting. Use medium-grit sandpaper to smooth all edges, especially where your hands will brush against it. A well-prepared foundation prevents wobbles and keeps your plants safe from rough surfaces.
Fabric Fit Matters: When cutting the landscape fabric, leave those extra 2 inches on all sides—it's crucial for preventing soil loss. If you're using a pallet with wide gaps, consider doubling up the fabric in high-risk areas. This extra layer creates a more secure barrier while still allowing proper drainage.
Soil Strategy: The 1-inch gap from the top edge isn't just for looks—it prevents soil from spilling over when you water. After filling, use your fingers to create gentle mounds around the edges. This subtle elevation helps contain moisture and keeps your workspace cleaner during watering sessions.
Plant Placement Pro Tip: For that Instagram-worthy look, arrange trailing plants like string of pearls along the front edge. I like to weave them through the slats slightly so they drape beautifully. This creates visual interest while making the most of your vertical space—every inch counts in small apartments!
Pro Tips for Indoor Plant Bed
- Building a vertical garden doesn't have to be tricky—these simple strategies will help you create a thriving indoor oasis that lasts for years.
- Foundation First: Don't skip sanding that wooden pallet!
- Fabric Fit Matters: When cutting the landscape fabric, leave those extra 2 inches on all sides—it's crucial for preventing soil loss.
Frequently asked questions
Got questions about creating your own indoor plant bed? You’re not alone!
Here are some of the most common concerns—and their simple solutions—to help you get started with confidence.
What’s the best soil mix for an indoor plant bed?
Use a lightweight, well-draining potting mix designed for containers or vertical gardens. Avoid heavy garden soil, which can compact and suffocate roots. For moisture retention, blend in perlite or coconut coir (20-30%). Pro tip: Add a handful of orchid bark for aeration if your plants love humidity!
How often should I water my indoor plant bed?
Check moisture levels weekly—stick your finger 1 inch deep into the soil. Water thoroughly until it drains from the bottom, then wait until the top layer feels dry. Overwatering is the #1 killer! Adjust frequency based on humidity (lower in winter) and plant type (succulents need less than ferns). A spray bottle helps mist foliage for tropical varieties.
Can I reuse the same indoor plant bed materials year after year?
Yes! Clean and disinfect fabric pockets, planters, or trellises with a 10% bleach solution (1 part bleach to 9 parts water) to kill pests and fungi. Replace old soil and refresh mulch annually. Upcycle materials like old frames or pallets for a sustainable twist—just ensure they’re pesticide-free!
What if my plants look leggy or droopy?
Leggy growth usually means lack of light. Rotate your plant bed weekly and supplement with a grow light (12-16 hours/day). Drooping can signal underwatering or root bound—check for dry soil or roots circling the edges. Prune leggy stems to encourage bushier growth and repot if roots are crowded. Fertilize lightly with a balanced liquid feed every 4-6 weeks!
Are there space-saving alternatives to fabric pockets?
Try hanging macramé planters, tiered shelves, or wall-mounted gutters for a sleek look. For minimalists, stacked ceramic pots or a vertical hydroponic system (like a Kratky setup) cuts bulk while boosting greenery. Repurpose a ladder or bookshelf by drilling holes for small pots—creative and functional!
Wrapping up and next steps
Creating an indoor plant bed is more than just a trend—it’s a breath of fresh air (literally!) for any small space. Whether you’re a green thumb or a beginner, this vertical garden oasis brings life, color, and natural beauty into your home while purifying the air.
The best part? You don’t need a sprawling yard—just a little creativity and some basic supplies.
Now that you’re inspired, why not take the next step? Start small with a single shelf or expand into a full wall of greenery. Your future self (and your plants!) will thank you. Happy growing! 🌱✨