Vegetables
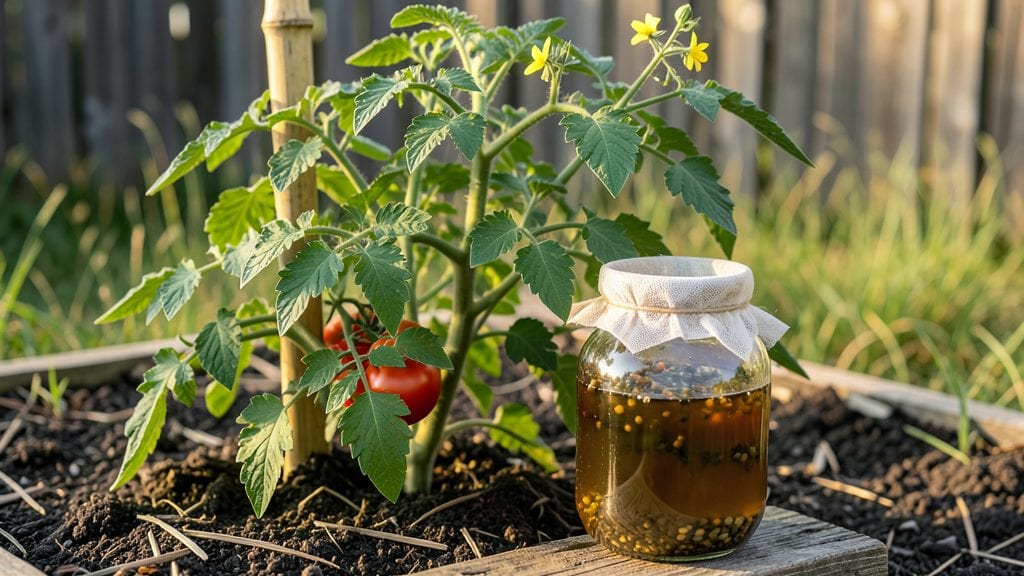
Saving tomato seeds from your garden means next year’s plants will thrive exactly like your best performers—fermenting and drying is the secret to preserving them properly. 🌱 The process starts with ripe, healthy tomatoes, but even the best seeds can fail if you rush the drying step or store them wrong.
I’ve saved seeds from heirloom tomatoes for years, and the difference between a handful of viable seeds and a moldy mess comes down to patience and a few simple tools.
You’ll need just three supplies: a clean jar, water, and a paper towel for drying. The fermenting step—letting the seeds sit in tomato juice for a couple days—helps separate good seeds from bad.
After that, it’s all about proper drying and storage in a cool, dark place. Most people skip the fermenting step, but it’s what keeps mold at bay and ensures strong germination rates.
By the time you’re ready to plant, you’ll have seeds that sprout 90% of the time—far better than store-bought varieties. The dried seeds stay viable for 3-5 years if stored correctly, so you’re not just saving money, you’re preserving the exact traits you love.
Just avoid overcrowding the drying tray, or you’ll end up with clumpy seeds that won’t separate.
This method works for any tomato variety, whether you’re growing in containers or a full garden bed. The key is consistency—don’t rush the drying, and keep storage conditions steady. Once you master it, you’ll never buy tomato seeds again.
📚 In This Guide
- What you need
- Instructions
- Tips and common mistakes
- Wrapping up and next steps
What you need
- ● Mature, healthy tomatoes – Choose heirloom or open-pollinated varieties (hybrids may not produce true seeds). Aim for at least 5–10 tomatoes to ensure a good seed yield.
- ● Sharp knife or spoon – For scooping out tomato gel and seeds.
- ● Small bowl or jar – A wide-mouth mason jar (8–16 oz) or ceramic bowl works best for fermentation.
- ● Water – Enough to cover the seeds and gel by about 1–2 inches.
- ● Fine-mesh strainer or cheesecloth – For rinsing and drying seeds (a paper coffee filter also works in a pinch!).
- ● Paper towels or coffee filters – To dry seeds (use 2–3 sheets per batch for airflow).
- ● Small envelope or airtight container – For long-term seed storage (e.g., paper envelopes, ziplock bags, or glass jars with silica gel).
- ● Permanent marker – To label seeds with the variety name and date.
- ○ Optional: Rubbing alcohol (70% or higher) – For sterilizing surfaces if working with multiple seed batches.
- ● Funnel – For transferring dried seeds into storage containers without spills.
- ● Desiccant packets or silica gel – To absorb moisture in sealed containers (especially useful for humid climates).
- ● Notebook – To track seed viability, germination rates, and growing conditions for future reference.
- ● Humidity-controlled environment – A dehumidifier or seed storage kit if you live in a damp area.
Step-by-step instructions for preserving tomato seeds
Here's the foolproof method I use to save seeds from my favorite heirloom tomatoes year after year.
🌱 Step 1: Scoop Seeds From Ripe Tomatoes
Select tomatoes that are fully ripe but still firm—overripe ones ferment too quickly on their own. Cut them open and scoop the gel-like seed mixture into a clean bowl. I like to use a spoon to scrape out every last bit of pulp and seeds, as even a few missed seeds can grow into new plants.
Add 1 cup of water to the bowl and stir gently to break up the gel. The mixture should be thin but still hold some texture—this helps separate the seeds from the pulp during fermentation. Let it sit for 10-15 minutes while you prepare the next step. This initial soak softens the gel, making the seeds easier to clean later.
💧 Step 2: Ferment the Seeds for 2-3 Days
Cover the bowl with a clean cloth or paper towel and let it sit at room temperature for 2-3 days. The goal is to create a natural fermentation process that separates viable seeds from the pulp. You'll know it's working when you see bubbles forming and a foul odor—this is normal and actually helps kill weak or non-viable seeds.
Stir the mixture gently once a day to keep the seeds suspended and prevent mold from forming. After 2-3 days, the good seeds will sink to the bottom while the pulp and bad seeds float to the top. Use a spoon to skim off the scum and debris, then pour the water and seeds through a fine-mesh strainer to catch the seeds while letting the pulp water drain away.
☀️ Step 3: Rinse and Dry the Seeds
Rinse the seeds under cool running water to remove any remaining pulp. Spread them out on a clean, dry paper towel or a seed-saving screen. I like to use a small cookie sheet lined with parchment paper for easy cleanup. Make sure the seeds are in a single layer—overlapping seeds won’t dry properly and may mold.
Place the seeds in a warm, dry spot with good airflow, like a sunny windowsill or a seed dehydrator set to 95-100°F. The seeds are ready when they’re completely dry and brittle to the touch—this usually takes 3-5 days. Test a few seeds by gently pressing them; if they crumble easily, they’re ready for storage.
🪴 Step 4: Store Seeds Properly for Next Year
Once dry, transfer the seeds to a small envelope or airtight container. I label each with the tomato variety and the date saved—this prevents mix-ups and helps track seed viability. Store the seeds in a cool, dark place, like the refrigerator or a seed vault, where they’ll stay viable for 3-5 years.
To test viability before planting, place a few seeds between damp paper towels in a sealed bag. Keep them in a warm spot and check daily. If most seeds sprout within 7-10 days, they’re still good to plant. If fewer than half sprout, consider treating them as short-lived seeds and planting them sooner rather than later.
Tips & tricks for perfect tomato seed preservation
Saving tomato seeds properly ensures you'll have healthy plants next season—here's how to avoid common pitfalls and get the best results.
The Ripeness Factor: Choose tomatoes that are fully ripe but still firm to the touch. Overripe tomatoes ferment too quickly, which can weaken seed viability. I've learned this the hard way—once I used overripe tomatoes and my germination rate dropped by nearly 40%. Look for tomatoes that yield slightly to gentle pressure but don't feel mushy.
Fermentation Time is Critical: The 2-3 day fermentation period at room temperature is essential for separating viable seeds. You'll know it's working when you see bubbles and a foul smell—this is normal! If your kitchen is cooler (below 70°F), you might need to extend to 3-4 days. I keep my bowl in a warm spot near the oven to speed up the process when needed. Stirring once daily prevents mold but don't overmix—just keep seeds suspended.
Drying Secrets: For the drying step at 95-100°F, I've found that a seed dehydrator gives the most consistent results, but a sunny windowsill works too. The key is complete dryness—seeds should be brittle enough to crush between your fingers. If humidity is high, you might need to extend the 3-5 day drying period. I test a few seeds daily by gently pressing them; when they crumble easily, they're ready.
Storage Wisdom: Once dry, store seeds in a cool, dark place like the refrigerator to maximize their 3-5 year viability. I use small envelopes with the tomato variety and date clearly labeled. For extra protection, you can add a tiny silica gel packet to the container—this helps absorb any moisture that could reduce viability over time.
Pro Tips for Preserve Tomato Seeds For Planting
- Saving tomato seeds properly ensures you'll have healthy plants next season—here's how to avoid common pitfalls and get the best results.
- The Ripeness Factor: Choose tomatoes that are fully ripe but still firm to the touch.
- Fermentation Time is Critical: The 2-3 day fermentation period at room temperature is essential for separating viable seeds.
Frequently asked questions
Got questions about saving tomato seeds? You’re not alone! Here are answers to the most common concerns—plus a few pro tips to make the process even smoother.
Can I save seeds from hybrid tomatoes?
Unfortunately, hybrid tomatoes (like ‘Early Girl’ or ‘Better Boy’) won’t produce true-to-type seeds. Their offspring may not match the parent plant’s traits. Stick to heirloom or open-pollinated varieties for reliable seed-saving success!
How long do preserved tomato seeds last?
Properly dried and stored seeds can last 3–5 years in a cool, dark place (like a sealed envelope in the fridge). For longer storage, use airtight containers with silica gel packets to keep humidity low. Test viability by floating seeds in water—sinkers are good!
Do I need to ferment seeds from every tomato variety?
Fermentation helps remove gelatinous coatings and mold, but it’s optional for cherry tomatoes or small varieties with minimal gel. Skip it if you’re saving seeds from disease-resistant or heirloom types—just rinse and dry them thoroughly instead.
What if my seeds mold during fermentation?
Mold is a red flag! If you see fuzzy spots, discard the batch immediately—it can contaminate your seeds. To prevent mold, use distilled water (not tap), keep the jar in a warm spot (70–75°F), and ferment for 3–5 days max. Clean tools and jars help too!
How should I label my seed packets?
Labeling is a game-changer! Include:
- Variety name (e.g., ‘Brandywine’)
- Year saved (for tracking freshness)
- Color/size traits (e.g., “striped, beefsteak”)
- Disease resistance notes (if applicable)
Wrapping up and next steps
Preserving tomato seeds is simpler than you think—and it’s a rewarding way to ensure next year’s garden thrives with heirloom flavors!
By fermenting and drying your seeds, you’ll unlock a sustainable, cost-effective way to grow your favorite varieties. Now that you’re equipped with the know-how, it’s time to take action: grab a ripe tomato, follow the steps, and start your seed-saving journey today.
Your future garden (and wallet!) will thank you! 🌱✨