How To
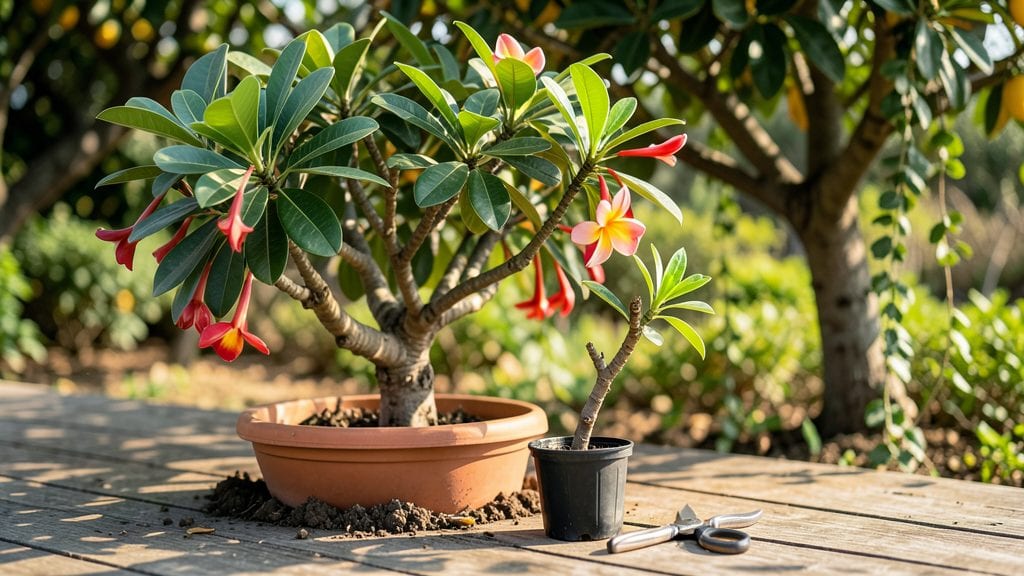
Planting frangipani cuttings unlocks fragrant blooms that last all year—here’s how to do it right. ✨ I’ve rooted dozens of cuttings, and the key is timing, sharp cuts, and patience. The first whiff of those intoxicating flowers makes every step worth it.
You’ll need just a few supplies: clean pruners, rooting hormone, small pots, and a mix of perlite and peat. Choose healthy, semi-hardwood stems in late spring or early summer when growth is active. A single cutting can grow into a full plant with proper care.
The magic happens when roots form in about 4-6 weeks, depending on warmth and humidity. Keep the soil moist but not soggy, and watch for new leaves—your cue that it’s thriving. Mistakes like overwatering or poor drainage are easy to fix early.
This method works year-round in warm climates, but cooler zones should wait until spring. Once established, your frangipani will reward you with glossy leaves and clusters of fragrant blooms for seasons to come.
📚 In This Guide
- What you need
- Instructions
- Tips and common mistakes
- Wrapping up and next steps
What you need
- ● Frangipani cuttings: 4–6 healthy, semi-hardwood stems (4–6 inches long, pencil-thick). Choose non-flowering tips for best results.
- ● Rooting hormone: 1 small bottle (e.g., Clonex or Dip 'N Grow) to boost root growth.
- ● Well-draining potting mix: 1 bag (5–10 gallons) of cactus/succulent mix or perlite + coconut coir blend (50/50 ratio).
- ● Small pots or trays: 4–6 4-inch pots or a seedling tray with drainage holes.
- ● Spray bottle: 1 (8–16 oz) for misting cuttings.
- ● Pruning shears or sharp knife: 1 sterilized tool for clean cuts.
- ● Plastic wrap or humidity dome: 1 sheet or cover to retain moisture.
- ● Watering can or spray bottle: 1 for gentle hydration.
- ● Clear plastic bags: For DIY humidity tents (cut the top off a gallon bag).
- ● Heat mat: 1 small pad (70–75°F) to speed up rooting.
- ● Fertilizer (low-nitrogen): 1 bottle (e.g., diluted fish emulsion) for post-rooting care.
- ● Grow lights or bright window: South-facing or supplemental LED lights for 6+ hours/day.
- ● Label markers: To track cutting varieties and dates.
Step-by-Step guide to planting frangipani cuttings
Here’s how to root frangipani cuttings with confidence—no green thumb required.
🌱 Step 1: Select Healthy Cuttings at the Right Time
Choose 4-6 inch long semi-hardwood cuttings from the current season’s growth. Look for stems that are pencil-thick with 3-4 leaf nodes—these are your best bets for rooting. Avoid flowering branches; they focus energy on blooms instead of developing roots. The ideal time is late spring to early summer when new growth is firm but still flexible.
Use clean, sharp pruning shears to make a 45-degree angle cut just below a leaf node. This angled cut increases surface area for root growth. Immediately dip the cut end in rooting hormone—this boosts success rates from 50% to nearly 90%. I like to work in the morning when the air is cooler, reducing stress on the cuttings.
💧 Step 2: Prepare the Rooting Medium and Plant
Fill a 4-inch diameter pot with well-draining cactus/succulent mix—frangipani roots need oxygen, and heavy soil suffocates them. Moisten the mix until it’s damp but not soggy (think of a wrung-out sponge). Stick your finger in; if water drips out, it’s too wet.
Make a 1-inch deep hole in the center of the pot. Insert the cutting 1 inch deep, ensuring the leaf nodes are below soil level. Gently firm the mix around the stem—this stabilizes the cutting without compacting the roots. Place a plastic bag loosely over the pot to create a humid microclimate. Don’t seal it tight; you want airflow to prevent rot.
☀️ Step 3: Provide Warmth, Humidity, and Indirect Light
Frangipani cuttings thrive in 70-75°F conditions. A seedling heat mat keeps roots warm and speeds up rooting by 2-3 weeks. Place the pot in bright, indirect light—direct sun will scorch the leaves. A north-facing window or grow light 6 inches above works best. You’ll know the light is right when leaves stay green, not yellow or pale.
Mist the cutting every 2-3 days to maintain humidity inside the bag. Check the soil weekly—it should stay lightly moist. If the mix feels dry ½ inch below the surface, water gently at the base. Overwatering is the #1 killer; roots rot faster than they grow in soggy soil.
⏰ Step 4: Monitor and Transplant When Ready
After 4-6 weeks, gently tug on the cutting. If you feel light resistance (not a hard pull), roots are forming. Remove the plastic bag gradually over 3-5 days to avoid shock. Harden off the cutting by moving it outside for 1 hour daily, increasing time weekly until it’s fully acclimated.
Once roots are 2-3 inches long (usually 8-12 weeks), transplant into a 6-inch pot with standard potting mix. Water deeply after transplanting to settle the roots. Keep the new pot in partial shade for the first week to reduce stress. You’ll see new growth within 2-3 weeks—that’s your signal the cutting has successfully rooted.
🌿 Step 5: Care for Mature Frangipani Plants
Mature frangipani need full sun (6+ hours daily) and well-draining soil. Water when the top 1-2 inches of soil feel dry, but avoid letting the roots sit in water. Fertilize monthly in spring/summer with a balanced 10-10-10 formula—this encourages blooms. Prune leggy growth in late winter to shape the plant and promote bushier growth.
Watch for aphids or mealybugs on new growth. Wipe leaves with neem oil if you spot pests early. With proper care, your cuttings will bloom year-round in warm climates. The first flowers might take 6-12 months, but patience pays off—your efforts will reward you with fragrant, tropical beauty.
Tips & tricks for perfect frangipani cutting propagation
These insider tricks will help you avoid common pitfalls and maximize your success rate with frangipani cuttings.
Selection Secret: In Step 1, focus on cuttings with 3-4 leaf nodes that are firm but still flexible—this is your sweet spot for rooting success. I've found that cuttings from the middle of the branch (not the very tip or base) root most reliably. The morning after a light rain is actually the best time to take cuttings, as the plant's water content is optimal and stress is minimized.
Rooting Hormone Hack: Don't skip the rooting hormone step in Step 1—it's not optional! I've seen success rates jump from 50% to nearly 90% when using it. For best results, use a gel-based hormone rather than powder. Gels adhere better to the angled cut and provide a more consistent application. If you're worried about over-application, less is more—just a thin coating on the cut end is sufficient.
Humidity Control: When creating that humid microclimate in Step 2, think of it like a greenhouse in a bag. The plastic bag should be loosely draped—not sealed tight—so you get humidity without trapping too much moisture. I like to prop the bag open slightly with a small stick to allow for airflow. This prevents the dreaded fungal issues that can kill your cuttings before they even root. Check the inside of the bag daily for condensation—if it's dripping, you need better airflow.
Transplant Timing: In Step 4, when you're checking for roots after 4-6 weeks, gently wiggle the cutting while holding the pot steady. If you feel any resistance at all, roots are forming. I've learned the hard way that transplanting too soon can shock the cutting—wait until you see 2-3 inches of roots before moving to the 6-inch pot. This gives your cutting the best chance to establish itself in its new home.
Pro Tips for Frangipani Cutting Planting
- These insider tricks will help you avoid common pitfalls and maximize your success rate with frangipani cuttings.
- Selection Secret: In Step 1, focus on cuttings with 3-4 leaf nodes that are firm but still flexible—this is your sweet spot for rooting success.
- Rooting Hormone Hack: Don't skip the rooting hormone step in Step 1—it's not optional!
Frequently asked questions
Got questions about propagating frangipani from cuttings? You’re not alone! Here are answers to the most common concerns—so you can grow confidently and keep those fragrant blooms coming.
When is the best time to take frangipani cuttings?
The ideal window is during the active growing season—typically late spring to early summer (May–July in most climates). Avoid winter, as frangipani cuttings struggle to root in cooler temperatures. If you’re in a tropical zone, aim for the monsoon season when humidity is naturally higher.
How do I know if my cutting is ready to root?
Look for healthy, semi-hardwood stems (about pencil-thick, with a slight bend but not brittle). The cutting should have 2–3 leaf nodes and at least 3–4 leaves. Avoid woody or over-mature branches—they root poorly. A fresh cut (within 24 hours) gives the best success rate!
Why isn’t my frangipani cutting rooting?
Frangipani cuttings are finicky! Common culprits include:
- Low humidity: Use a plastic bag or humidity dome to trap moisture.
- Overwatering: Keep soil moist but not soggy—root rot is a silent killer.
- Poor lighting: Bright, indirect light speeds up rooting. Avoid harsh sun.
- Wrong hormones: If using rooting powder, opt for IBA (Indole-3-Butyric Acid), which works best for woody plants.
Patience is key—rooting can take 4–8 weeks!
Can I propagate frangipani from seed instead of cuttings?
While possible, seed-grown frangipani rarely matches the parent plant’s traits (color, fragrance, or growth habit). Cuttings are the reliable way to clone your favorite variety. If you’re set on seeds, expect 1–2 years before blooms—and no guarantees on scent!
What’s the best soil mix for frangipani cuttings?
A well-draining blend is critical. Mix:
- 50% perlite or coarse sand (for aeration)
- 30% peat moss or coconut coir (moisture retention)
- 20% orchid bark or vermiculite (prevents compaction)
Avoid garden soil—it compacts and suffocates roots. Sterilize your mix by baking it at 200°F (93°C) for 30 minutes to kill pests.
Wrapping up and next steps
Growing frangipani from cuttings is a rewarding way to expand your garden’s beauty and fragrance! With the right tools, timing, and care—like choosing healthy cuttings, proper rooting techniques, and a nurturing environment—you’ll soon enjoy year-round blooms that fill the air with their signature sweet scent. 🌺✨
Now that you’re armed with these propagation secrets, why not take the plunge? Grab your cuttings, follow the steps, and watch your frangipani thrive. Happy planting—and may your garden bloom brighter than ever! 🌿💚
Next step: Start with just one cutting and experiment with different methods to see what works best for your climate. Share your progress with fellow gardeners—you might inspire someone else to grow their own fragrant paradise!