Pruning
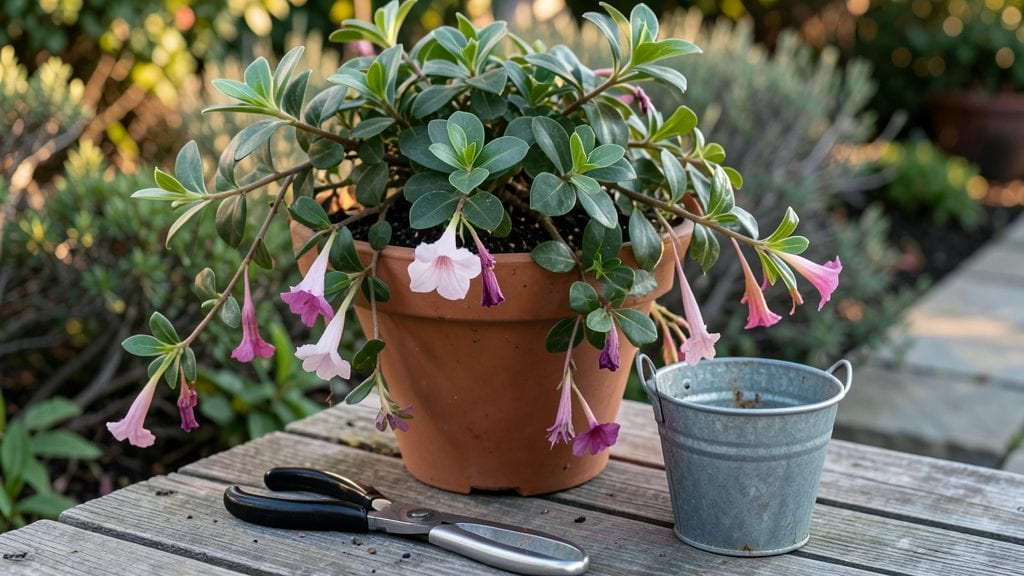
Pruning dipladenia plants turns a single season of blooms into year-round color—and I’ve learned the hard way that timing matters more than technique. ✨ My first attempt left the plant looking like a sad, leggy stick, but after mastering the four-season trim schedule, my dipladenia now bursts with flowers from spring through fall.
The key? Cutting at the right nodes, not just whenever you feel like it.
You’ll need just three tools: sharp pruning shears, rubbing alcohol for sterilization, and a small spray bottle for post-prune care. Most people overthink this—it’s not about precision art, but about encouraging new growth where you want it.
Start with the lightest trim in late winter to shape the plant before new shoots appear, then repeat after each major bloom cycle.
What you’ll end up with is a dipladenia that’s bushier, healthier, and packed with flowers—not just a few straggly stems. The air circulation improves, pests have fewer hiding spots, and the plant focuses energy on blooms instead of sparse, weak growth.
Even my black thumb can’t mess this up once you know the basics.
This method works for container dipladenias, hanging baskets, or in-ground plants—just adjust the trim frequency based on your climate. Let’s get those shears ready and turn your plant into a nonstop floral show.
📚 In This Guide
- What you need
- Instructions
- Tips and common mistakes
- Wrapping up and next steps
What you need
- ● Pruning shears: Bypass pruners (sharp, clean, and sterilized with rubbing alcohol or bleach). Avoid anvil pruners—they can crush stems.
- ● Hand pruners: For smaller stems or tight spaces (e.g., Felco F-2 or similar, 5-inch blades).
- ● Gloves: Garden gloves (nitrile-coated for grip and protection from sap, which can irritate skin).
- ● Disinfectant: 70% isopropyl alcohol or bleach solution (1 part bleach to 9 parts water) to sterilize tools between cuts.
- ○ Pruning saw: Optional for thick, woody stems (e.g., Fiskars X27 or similar).
- ● Rubbing alcohol or hydrogen peroxide: 3% solution to clean pruning wounds.
- ○ Trimming rope or twine: Optional for supporting heavy growth (e.g., 3/16-inch polyester rope).
- ● Weather check: Prune on a dry, overcast day or in early morning to reduce stress on the plant.
- ● Watering schedule: Water the plant 1–2 days before pruning (well-hydrated stems are easier to cut cleanly).
- ● Sunlight access: Ensure your workspace is near the plant (or move it temporarily) to avoid dropping cuttings in shade.
- ● Cleanup supplies: Garden waste bag or bucket for clippings (Dipladenia sap can stain!).
- ○ Sharpener: Optional but handy—a pruner sharpener or fine-grit sandpaper to maintain tool sharpness.
Step-by-Step guide to dipladenia pruning for continuous blooms
Dipladenia thrives on regular pruning—here’s how to shape it year-round for nonstop color.
✂️ Step 1: Early Spring Pruning (Late February–March)
Start by cutting back one-third of the plant’s height using clean, sharp pruners. Focus on removing dead or leggy stems first—they sap energy from new growth. Dipladenia blooms on new wood, so aggressive pruning now encourages dense, bushier growth later. I always sterilize my tools with rubbing alcohol to prevent bacterial infections.
Make cuts just above a leaf node or bud, angling slightly downward to allow water to run off. Avoid cutting into old wood (woody stems)—this triggers fewer blooms. After trimming, fertilize lightly with a balanced 10-10-10 formula to support regrowth. You’ll see fresh, vibrant shoots within 3-4 weeks if temperatures stay above 55°F.
☀️ Step 2: Mid-Summer Maintenance (June–July)
Dipladenia blooms best with light pinching during summer. When you spot spent flowers, trim the stem back to the nearest leaf node—this redirects energy to new buds instead of seed production. I check plants weekly during peak bloom season; a single deadhead can mean 50% more flowers in the next flush.
If your dipladenia looks crowded, thin out 10-15% of the oldest stems at the base. This improves airflow and reduces fungal risks. Water deeply after pruning to help roots recover. You’ll notice new side shoots emerging within 2 weeks, signaling the plant is responding well.
🌿 Step 3: Fall Renewal (October–November)
As temperatures drop below 60°F, dipladenia slows down—this is your cue for a light shaping trim. Remove any yellowing or diseased leaves first, then prune back overly long stems by half. The goal here isn’t to force new growth but to clean up the plant for winter dormancy.
Reduce watering slightly but keep soil evenly moist—never dry. If your dipladenia is in a pot, move it to a sheltered spot (like a garage or under eaves) if frost threatens. You’ll see minimal regrowth this late in the season, but the pruning ensures a stronger base for spring.
⏰ Step 4: Late Winter Dormant Trim (January)
Dipladenia enters dormancy in winter—this is the final prep before spring. Prune back any remaining dead stems and shape the plant to your desired form. I often use this step to correct any awkward growth from summer. Cut just above a healthy bud to encourage outward growth.
After trimming, reduce watering by half but keep soil lightly moist. If indoors, provide bright, indirect light (like a south-facing window). You’ll see new growth within 4-6 weeks, signaling it’s ready for spring’s heavy blooming cycle.
Tips & tricks for perfect dipladenia pruning
Mastering the art of dipladenia pruning takes patience and precision—here's how to avoid common pitfalls while maximizing those vibrant blooms.
The Heat Factor: Temperature plays a crucial role in your dipladenia's recovery after pruning. In Step 1, when you're cutting back one-third of the plant's height, keep an eye on the thermometer—growth won't accelerate below 55°F. I've seen plants stall completely when temperatures dip unexpectedly. If you're in a cooler climate, consider using a small greenhouse or cold frame to maintain consistent warmth during the critical 3-4 week regrowth period.
Technique Tip: The angle of your cuts matters more than you might think. In all pruning steps, make your cuts just above a leaf node or bud at a 45-degree angle—this prevents water from pooling on the cut surface, which can lead to rot. I learned this the hard way after losing several stems to fungal infections. For the early spring pruning (Step 1), focus on creating an outward growth pattern by cutting slightly above the node to encourage bushier development.
Seasonal Strategy: Dipladenia responds differently to pruning depending on the season. During the mid-summer maintenance (Step 2), when you're doing that light pinching, I recommend working during the cooler parts of the day—early morning or late afternoon—to reduce stress on the plant. The 2-week window for new side shoots to emerge is your gauge for success here. If you notice yellowing leaves after pruning, it's often a sign of over-pruning or environmental stress rather than a problem with the technique itself.
Fertilization Insight: That balanced 10-10-10 fertilizer mentioned in Step 1 should be applied two weeks after pruning, not immediately. I've found this timing gives the plant enough energy to focus on root recovery before pushing new growth. For the fall renewal (Step 3), skip the fertilizer entirely—your plant needs to prepare for dormancy, not stimulate new growth that won't survive winter. Use this time to focus on cleaning up rather than feeding.
Pro Tips for Dipladenia Plant Pruning
- Mastering the art of dipladenia pruning takes patience and precision—here's how to avoid common pitfalls while maximizing those vibrant blooms.
- The Heat Factor: Temperature plays a crucial role in your dipladenia's recovery after pruning.
- Technique Tip: The angle of your cuts matters more than you might think.
Frequently asked questions
Got questions about keeping your Dipladenia thriving with the right pruning? Here are some of the most common ones—plus expert answers to keep those blooms coming year-round!
When is the best time to prune Dipladenia for maximum blooms?
Prune your Dipladenia after it blooms in spring or early summer (around May-June) to encourage new growth and more flowers. A light trim in late summer (August-September) can also promote fall/winter blooms in warmer climates. Avoid heavy pruning in winter unless you’re in a frost-free zone—focus on shaping instead!
How much can I cut back my Dipladenia without harming it?
You can safely prune up to 1/3 of the plant in one session, but avoid over-cutting. For woody stems, trim just above a leaf node or bud to encourage branching. If you’re reviving a leggy Dipladenia, prune gradually over 2-3 sessions to avoid shocking the plant. Think of it like a haircut—better short and sweet than a drastic chop!
My Dipladenia isn’t blooming after pruning. What went wrong?
If your Dipladenia skips blooms, check these fixes:
- Light levels: Ensure it gets bright, indirect sunlight (6+ hours daily).
- Pruning timing: Prune after blooming, not before.
- Fertilizer: Use a balanced bloom booster (like 20-20-20) every 4-6 weeks.
- Stress: Avoid drastic pruning in winter or during heatwaves.
Can I prune Dipladenia in winter? What about frost?
In frost-free zones, a light pruning in winter (December-January) can remove dead or weak stems. However, if frost is expected, wait until spring—Dipladenia is tropical and sensitive to cold. If your plant gets frost damage, trim only the blackened/brown parts and protect it from further cold.
What if I don’t prune my Dipladenia at all?
Skipping pruning won’t kill your Dipladenia, but it’ll grow leggy, with fewer blooms and a messy shape. Over time, older stems may become woody and produce less flowers. Pruning keeps it compact, bushier, and blooming longer. Think of it as a spa day for your plant—neglect is cute, but maintenance is magical!
Are there alternatives to traditional pruning for Dipladenia?
Yes! Try these low-maintenance options:
- Pinching: Snip the tips of new growth (not flowers) to encourage bushiness.
- Deadheading: Remove spent blooms to redirect energy to new flowers.
- Topiary: Shape it into a hedge or spiral for a decorative look.
- Propagate cuttings: Use pruned stems to grow new plants in water or soil!
Wrapping up and next steps
Mastering the art of dipladenia plant pruning is your ticket to a vibrant, blooming garden all year round! 🌸 By following the four seasonal trims—spring, summer, fall, and winter—you’ll keep your plant healthy, encourage lush growth, and enjoy stunning flowers with minimal effort.
The key lies in timing, technique, and a little patience.
Now that you’re equipped with the know-how, grab those shears and get pruning! Start with a light trim this spring, and soon, your dipladenia will reward you with nonstop color. Need a refresher? Bookmark this guide or jot down your notes—your future blooms will thank you! 🌿