Diseases
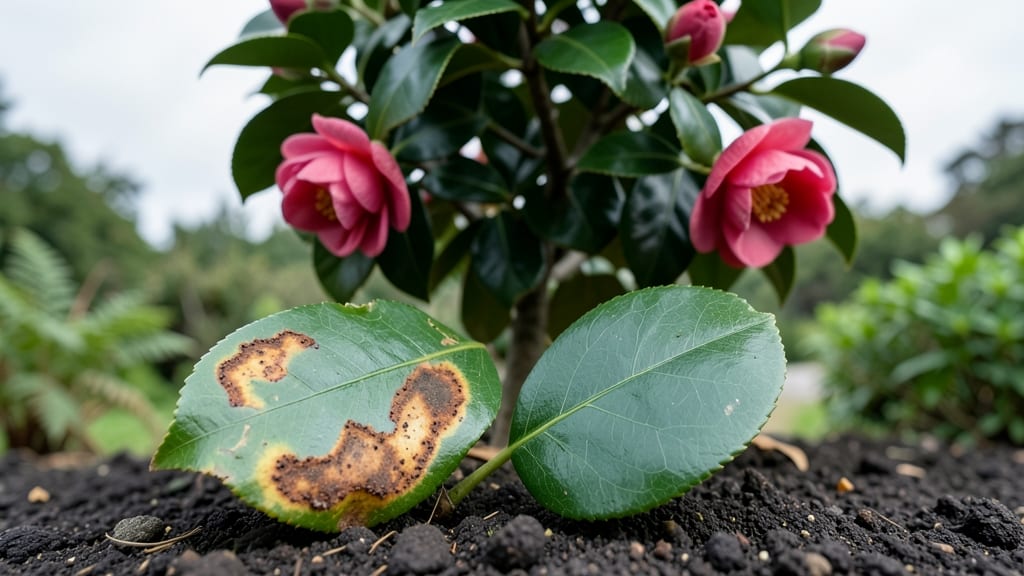
Camellia plant diseases can turn your glossy evergreen into a sad, spotted mess—unless you know what to look for. 🌿 I’ve spent years watching camellias go from thriving to tragic, and the key to saving them is spotting the right symptoms early.
Petal blight, bacterial blight, and fungal infections all leave distinct clues, from dark spots on leaves to slimy stems. The good news? Most can be stopped with simple fixes once you recognize them.
These diseases thrive in damp, shady conditions—exactly where camellias love to grow. That’s why prevention starts with airflow: prune for sunlight, avoid overhead watering, and clean up fallen petals and leaves.
I’ve cured multiple blights just by adjusting these habits, and the results are dramatic. Your camellia’s health depends on breaking the cycle before it starts.
You’ll learn to match symptoms to solutions, from copper fungicide sprays for petal blight to hydrogen peroxide rinses for bacterial spots. The right treatment isn’t just about stopping the spread—it’s about giving your plant the fighting chance it deserves.
By the end, you’ll spot trouble before it takes hold and restore your camellia’s lush, disease-free glory.
This works for both old favorites and new plantings, in containers or in the ground. Whether you’re dealing with a single leaf spot or a full-blown outbreak, these steps will get your camellia back on track. Let’s turn those brown spots into green victories.
Root Causes of Camellia Ailments
Camellias are stunning evergreens, but their lush foliage and delicate blooms make them vulnerable to a variety of fungal and bacterial infections. Understanding why these diseases strike is the first step to prevention—and recovery. Let’s break down the science behind the most common culprits, from environmental stressors to microbial invaders.
Fungal diseases like anthracnose and brown blight thrive in damp, stagnant environments. Here’s why:
- Poor Airflow: Camellias planted too closely together or in shaded, enclosed spaces trap moisture. Fungal spores splash from soil to leaves, creating ideal breeding grounds.
- Excessive Watering: Overwatering—especially at the base of the plant—keeps roots and foliage soggy. Fungi like Phytophthora (root rot) exploit this by decomposing plant tissues for nutrients.
- Rain or Dew: Prolonged leaf wetness (over 12 hours) weakens the plant’s cuticle, allowing pathogens to penetrate. Camellia petal blight, for example, spreads rapidly when flowers sit damp overnight.
Pro Tip: 💡 Space plants 4–6 feet apart, water at the soil level (not overhead), and prune for airflow. Use a rain guard to shield blooms during heavy downpours.
Camellias don’t just get sick from above—they inherit problems from the ground up. Here’s how soil-borne fungi take hold:
- Contaminated Soil: Fungi like Fusarium or Pythium survive in old garden beds, especially if previous plants (e.g., rhododendrons or azaleas) were diseased. Spores lie dormant until conditions are right.
- Organic Matter Buildup: Thick mulch or decomposing leaves create a warm, moist microclimate perfect for fungal growth. Botrytis (gray mold) often starts here, then spreads to petals.
- Poor Drainage: Clay-heavy or compacted soil traps water, suffocating roots and inviting Phytophthora. Even "healthy" soil can become a petri dish if it doesn’t dry between waterings.
Action Step: ✨ Before planting, test soil pH (camellias prefer 5.5–6.5) and amend with perlite or sand to improve drainage. Solarize soil in spring by covering it with clear plastic for 4–6 weeks to kill pathogens.
Camellias under stress are like open doors for diseases. Common triggers include:
| Stressor | How It Helps Diseases |
|---|---|
| Nutrient Deficiencies (e.g., nitrogen, magnesium) | Yellowing leaves (chlorosis) signal poor health, making plants more susceptible to anthracnose. |
| Physical Damage (pruning cuts, hail, pests) | Open wounds let bacterial blight enter. Sawdust from pruning tools can even spread pathogens between plants! |
| Pest Infestations (scale, spider mites) | Pests like camellia scale excrete honeydew, which fosters sooty mold—a fungal secondary infection. |
| Extreme Temperatures (frost, heatwaves) | Cold shock weakens cell walls, while heat stress reduces photosynthesis, leaving plants vulnerable to gray mold. |
Prevention Tip: 🌡️ Monitor soil moisture with a moisture meter (aim for 1–1.5 inches of water per week). Fertilize in early spring with a balanced 10-10-10 formula to boost immunity.
Even well-meaning gardening habits can invite disease. Here’s how:
- Pruning During Wet Seasons: Cutting camellias in fall or winter (when fungi are active) creates entry points for bacterial leaf spot. Always sterilize tools with 70% isopropyl alcohol between cuts.
- Planting Too Deep: Burying the graft union (visible bump on young camellias) strangles the plant, making it susceptible to root rot. The graft should sit 1–2 inches above soil.
- Ignoring Dead Wood: Dying branches harbor fungi like Nectria, which can jump to healthy tissue. Remove and dispose of (not compost) infected debris immediately.
Quick Fix: ⏰ Prune in late winter (dormant season) and thin out crowded branches to improve sunlight penetration.
By addressing these root causes—water management, soil health, plant resilience, and smart horticulture—you’ll dramatically reduce your camellia’s risk of fungal infections. The key? Act before the symptoms appear.
Fixing Camellia Diseases Step by Step
Reviving your camellia’s health starts with the right approach—whether it’s a fungal infection, pest invasion, or environmental stress. Below are practical, step-by-step solutions tailored to each issue, plus prevention tips to keep your plant thriving long-term. Let’s get those blooms back to their glory! 🌿✨
Fungal diseases like petal blight, anthracnose, or root rot thrive in damp, stagnant conditions. Act fast to stop the spread and restore balance.
🔥 Step 1: Remove Infected Parts Immediately
- Prune affected leaves, stems, or flowers with sterilized shears (wipe with rubbing alcohol between cuts).
- Dispose of debris in a sealed trash bag—do not compost infected plant material.
- Focus on airflow: Thin out dense foliage to improve circulation around the plant.
🍳 Step 2: Apply Fungicide (Organic or Chemical)
Choose a copper-based fungicide (like Bordeaux mixture) or a neem oil solution (1 tsp neem oil + 1 quart water + a drop of dish soap) for organic control.
- Spray thoroughly on both sides of leaves and stems, especially where lesions appear.
- Reapply every 7–10 days until new growth emerges (signs of recovery).
- For root rot: Dig up the plant, trim blackened roots, repot in fresh, well-draining soil, and water lightly until established.
🌡️ Step 3: Adjust Care to Prevent Recurrence
- Water at the base (avoid overhead spraying).
- Space plants 3–5 feet apart to reduce humidity buildup.
- Mulch lightly (2–3 inches) to regulate soil moisture without suffocating roots.
- Avoid wetting foliage in late afternoon/evening (fungi love nighttime dampness).
Aphids, scale, or spider mites weaken camellias by sapping sap. Early intervention is key—these pests multiply fast!
👨🍳 Step 1: Isolate and Inspect
- Check undersides of leaves and new growth for pests.
- Quarantine heavily infested plants to prevent spread to others.
🔪 Step 2: Blast or Brush Off Pests
- Strong water spray: Use a hose nozzle to dislodge aphids or soft-bodied insects.
- Cotton swabs + rubbing alcohol: Dab scale insects (they’ll dry out and fall off).
- Insecticidal soap: Mix 1.5 tbsp mild soap + 1 quart water, spray directly on pests (reapply every 5–7 days).
🎯 Step 3: Introduce Natural Predators or Barriers
- Ladybugs or lacewings: Release beneficial insects (available at garden centers).
- Sticky traps: Place yellow traps near plants to catch flying pests.
- Reflective mulch: Aluminum foil or white plastic around the base confuses mites.
Yellowing leaves, stunted growth, or bud drop? Your camellia might be overwatered, underwatered, or in the wrong spot.
💡 Step 1: Diagnose the Issue
| Symptom | Likely Cause | Quick Fix |
|---|---|---|
| Yellow leaves | Overwatering or poor drainage | Let soil dry 2 inches deep between waterings; amend soil with perlite. |
| Brown, crispy edges | Underwatering or sunburn | Water deeply 2x/week; provide afternoon shade in hot climates. |
| Bud drop | Temperature shock or drought | Mulch to retain moisture; avoid sudden cold snaps. |
🌱 Step 2: Adjust Soil and Location
- Test soil pH: Camellias thrive in acidic soil (5.0–6.5).
Add sulfur or peat moss if needed. - Improve drainage: Mix in compost or sand if soil stays soggy. - Relocate if needed: Move to partial shade (especially in hot zones) or shelter from wind.
- 🌡️ Monitor humidity: Use a hygrometer—aim for 40–60% humidity.
Dehumidifiers or fans help in greenhouses. - 🍂 Clean up yearly: Rake and dispose of fallen leaves/petals (fungal spores hide here!). - 💪 Strengthen immunity: Feed with acid-loving fertilizer (like 8-3-9) in early spring and fall. - 🌧️ Rainy season prep: Space out watering; fungicides applied before rains stick better.
Remember: Patience is key—some diseases take 4–6 weeks to fully resolve. Stick with the plan, and your camellia will bounce back stronger than ever! 🌸💪
Frequently asked questions about camellia plant diseases
What are the first signs of fungal infections in camellias?
Look for dark, sunken spots on leaves (anthracnose) or slimy, discolored patches on petals (petal blight). Early symptoms often appear as small yellow or brown speckles that grow larger over days. Check both leaf undersides and flower buds—these are prime infection zones.
Can I use household items to treat bacterial blight?
Yes! Mix 1 tablespoon baking soda with 1 quart water and a drop of dish soap for a gentle spray. Apply every 7 days until symptoms fade. For stubborn cases, hydrogen peroxide (3% solution) can disinfect wounds when sprayed on affected areas.
Why do my camellia leaves turn yellow even after treating diseases?
Yellowing often signals overwatering or nutrient deficiencies (like iron chlorosis). Test soil moisture—it should dry 2 inches deep between waterings. Amend soil with chelated iron or sulfur if pH is too high (camellias prefer 5.5–6.5).
How do I prevent diseases when planting new camellias?
Start with sterilized soil (solarize for 4–6 weeks) and disease-free stock. Space plants 4–6 feet apart for airflow, and water at the base (never overhead). Use copper fungicide as a preventative spray before rainy seasons.
Will pruning help stop the spread of camellia diseases?
Remove infected leaves/stems with sterilized shears (wipe with rubbing alcohol) and dispose of debris in sealed bags. Prune in late winter to reduce fungal spores in the air and improve sunlight penetration.