Propagation
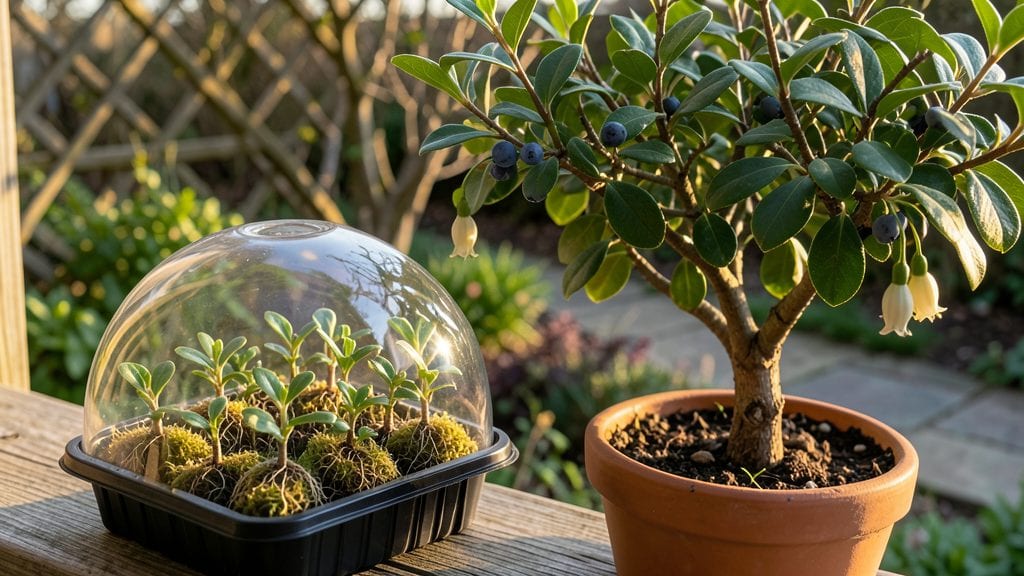
Blueberry plant propagation through rooted stems in water is the fastest way to multiply your bushes without digging up mature plants. 🌱 I’ve turned a single cutting into a thriving 3-foot plant in just one growing season, and the best part?
You don’t need fancy tools—just sharp scissors, a jar, and patience. The key is timing: late spring or early summer when new growth is firm but still flexible, not woody.
Most people assume propagation requires a greenhouse, but I’ve rooted cuttings on a kitchen windowsill with basic supplies. Grab a clean jar, fill it with room-temperature water, and snip a 4- to 6-inch stem just below a leaf node—where roots will sprout.
Change the water every 3 days to prevent bacteria, and within 4 weeks, you’ll see fine white roots forming. The trick is keeping the cutting in bright, indirect light while avoiding direct sun that can scorch new growth.
Once roots reach about 2 inches long, transplant your cutting into a pot with acidic potting mix (blueberries hate alkaline soil). Keep the soil moist but not soggy, and within 3 months, you’ll have a sturdy young plant ready for the garden.
The first harvest won’t come for a couple of years, but the satisfaction of growing your own from a simple cutting? That’s instant gratification.
This method works for both lowbush and highbush varieties, though highbush types root more reliably. If you’re in a warm climate, you can propagate year-round, but cooler zones should stick to late spring.
The biggest mistake? Using stems that are too old or too young—aim for pencil-thick growth that’s still green and flexible. Now grab those pruners and let’s grow!
📚 In This Guide
- What you need
- Instructions
- Tips and common mistakes
- Wrapping up and next steps
What you need
- ● Blueberry plant cuttings: 4–6 healthy, pencil-thick stems (4–6 inches long) with at least 2–3 leaf nodes each. Choose from non-flowering tips for best results.
- ○ Sharp pruning shears or scissors: Clean and sterilized to avoid disease. (Optional: A rooting hormone powder or gel for faster root growth.)
- ● Clean water: Filtered or distilled (chlorine can harm cuttings). Use 1–2 cups per container.
- ● Clear glass jars or containers: 8–16 oz size with straight sides (e.g., mason jars, baby food jars). (Must fit cuttings snugly—no wobbling!)
- ● Plastic wrap or humidity dome: To retain moisture (e.g., a plastic bag with holes or a propagator lid).
- ● Bright, indirect light source: A sunny windowsill (east or west-facing) or a grow light (12–14 hours/day).
- ● Well-draining potting mix: For transplanting later (e.g., 50% peat moss, 30% perlite, 20% sand).
- ● Rooting hormone: Speeds up root development (follow package instructions).
- ● Small pebbles or marbles: Place at the jar’s bottom to stabilize cuttings.
- ● Spray bottle: For gentle misting to maintain humidity.
- ● Label markers: To track cutting dates and varieties.
Step-by-Step guide to propagating blueberry plants from stem cuttings
Here's how to grow new blueberry plants from cuttings in just four weeks—no greenhouse needed.
🌱 Step 1: Select and Prepare Healthy Stems
Choose 4-6 inch long stems from healthy, disease-free blueberry bushes in late spring or early summer. Look for green, flexible growth with 3-4 leaves—thick stems root best. Use clean, sharp pruners to cut just below a leaf node (the small bump where leaves attach). Remove the lower leaves, leaving only the top 2-3 leaves to reduce water loss.
Here's the thing—you want stems that are pencil-thick but not woody. If it snaps easily, it's too tender. If it bends like a branch, it's too mature. Dip the cut end in room-temperature water for 10 seconds to help prevent air bubbles from forming when you place it in water later.
💧 Step 2: Root in Water with Proper Light
Fill a clean glass or jar with room-temperature water, leaving 1-2 inches of space at the top. Place the prepared stem so only the bottom 2 inches are submerged—no leaves should touch the water. Use a rubber band or twist tie to secure the stem in place if needed. Roots should start forming in 2-3 weeks if conditions are right.
Set the jar in a spot with bright, indirect light—think east-facing window or under a grow light. Avoid direct sun, which can overheat the water and stress the cutting. Change the water every 3-4 days to prevent bacterial growth. You'll know it's working when tiny white bumps appear along the submerged stem—those are roots!
⏰ Step 3: Monitor and Encourage Root Growth
After 10-14 days, check for root growth by gently tugging on the stem. If it resists slightly, roots are forming. If it slides out easily, wait another week. Once roots reach 1-2 inches long, it's time to prepare for planting. Keep the water level consistent—never let the cutting dry out, but don't submerge it deeper as roots grow.
This is the moment that matters: roots should be 1-2 inches long before transplanting. If roots grow too long in water, they can get tangled—trim any that exceed 3 inches before planting to encourage new root growth in soil. I like to snip them back to 1.5 inches for a fresh start.
🪴 Step 4: Transplant to Soil and Acclimate
Fill a 6-inch pot with a mix of 50% peat moss and 50% perlite—blueberries love acidic, well-draining soil. Make a small hole in the center and gently remove the cutting from water, shaking off excess. Plant it so the roots are covered but the top leaves stay above soil level. Press the soil lightly around the stem to secure it.
Place the pot in partial shade for the first week to reduce stress. Water lightly but keep the soil evenly moist—not soggy. After 7 days, gradually move it to morning sun and then full sun over the next week. You'll see new growth in 2-3 weeks, signaling the plant is established.
☀️ Step 5: Maintain and Care for New Plants
Keep the soil moist but not waterlogged—blueberries hate soggy roots. After 4 weeks, fertilize with a balanced, acidic fertilizer (like 10-10-10) diluted to half strength. Mulch with 2 inches of pine needles to maintain acidity and retain moisture. In 6-12 months, your cutting will be a sturdy young plant ready for the garden!
Real talk: Don't rush transplanting. If roots aren't 1-2 inches long, wait. Rushing leads to weak plants that struggle to establish. Patience here means stronger, healthier blueberry bushes down the road.
Tips & tricks for perfect blueberry plant propagation
These simple tricks will help you avoid common pitfalls and maximize your success with blueberry cuttings.
Stem Selection is Everything: In Step 1, focus on stems that are pencil-thick and have that perfect balance of flexibility. I've learned this the hard way—too thin and they won't root properly; too woody and they take forever. Also, that 10-second room-temperature water dip before placing in water is crucial. It prevents air bubbles from forming around the cut end, which can block water uptake and slow root development.
Lighting Strategy for Root Growth: The bright, indirect light in Step 2 is non-negotiable. I once tried direct sun and ended up with crispy leaves and no roots. Place your jar near an east-facing window or under a grow light for consistent results. Remember, you're looking for tiny white bumps along the submerged stem—those are your roots forming!
Root Trimming Technique: When roots reach 3 inches in Step 3, don't ignore them! Trim back to 1.5 inches before transplanting. This might seem counterintuitive, but it encourages the plant to grow fresh, healthy roots in the soil instead of relying on the long water roots. I've seen cuttings with tangled roots struggle to establish—this simple step makes all the difference.
Transplanting Timing Matters: The 1-2 inch root requirement in Step 4 is critical for success. I've rushed this step before and ended up with weak plants that took months to recover. Give your cuttings time to develop strong roots—they'll thank you with vigorous new growth after transplanting.
Pro Tips for Blueberry Plant Propagation
- These simple tricks will help you avoid common pitfalls and maximize your success with blueberry cuttings.
- Stem Selection is Everything: In Step 1, focus on stems that are pencil-thick and have that perfect balance of flexibility.
- Lighting Strategy for Root Growth: The bright, indirect light in Step 2 is non-negotiable.
Frequently asked questions
Got questions about propagating blueberries? You’re not alone! Here are some of the most common concerns—and straightforward answers to help you grow like a pro.
When is the best time to propagate blueberry cuttings in water?
The ideal window is late spring to early summer (May–June in most zones) when new growth is vigorous. Avoid winter dormancy or extreme heat—both stress plants and reduce rooting success. If you miss this, fall (September) is a backup, but use rooting hormone for better results.
How long does it take for blueberry cuttings to root in water?
With patience, you’ll see roots in 2–4 weeks, but don’t rush! Keep cuttings in bright, indirect light and change the water every 3–4 days. Some varieties (like ‘Duke’ or ‘Bluecrop’) root faster—check your plant’s tags for clues. Pro tip: Roots ≥1 inch mean it’s ready to transplant!
Can I propagate blueberries from store-bought berries?
Nope! Store-bought blueberries are cultivar hybrids (often sterile) and won’t sprout. For propagation, use organic, homegrown berries or cuttings from healthy plants. If you’re curious, try seed germination for wild-type blueberries—but expect slower, less predictable results.
Why are my cuttings rotting or turning yellow?
Overwatering, bacteria, or poor airflow are usually the culprits. Fix it: Use chlorinated or filtered water (let tap water sit 24 hours to off-gas chlorine), trim yellow leaves, and prop cuttings in a jar with just the lower nodes submerged. Fun fact: A splash of hydrogen peroxide (1 tsp per cup) can sterilize water and boost rooting!
Do blueberry cuttings need special soil after rooting?
Yes! Blueberries thrive in acidic, well-draining soil (pH 4.5–5.5). Mix equal parts peat moss, perlite, and pine bark fines. Avoid garden soil—it’s too alkaline. For container growers, top off with sphagnum moss to retain moisture and acidity. Pro tip: Add a handful of cottonseed meal for a slow-release nitrogen boost!
Wrapping up and next steps
Propagating blueberry plants from rooted stems in water is a rewarding—and surprisingly simple—way to expand your berry patch! With just a few supplies and patience, you can grow strong, healthy plants in as little as four weeks.
Whether you’re a seasoned gardener or a beginner, this method offers a cost-effective way to multiply your favorite varieties.
Now that you’re armed with the know-how, why not get started today? Grab a healthy stem, a jar of water, and let nature do the rest. Happy growing—your future blueberry harvests will thank you! 🌱✨