Planting
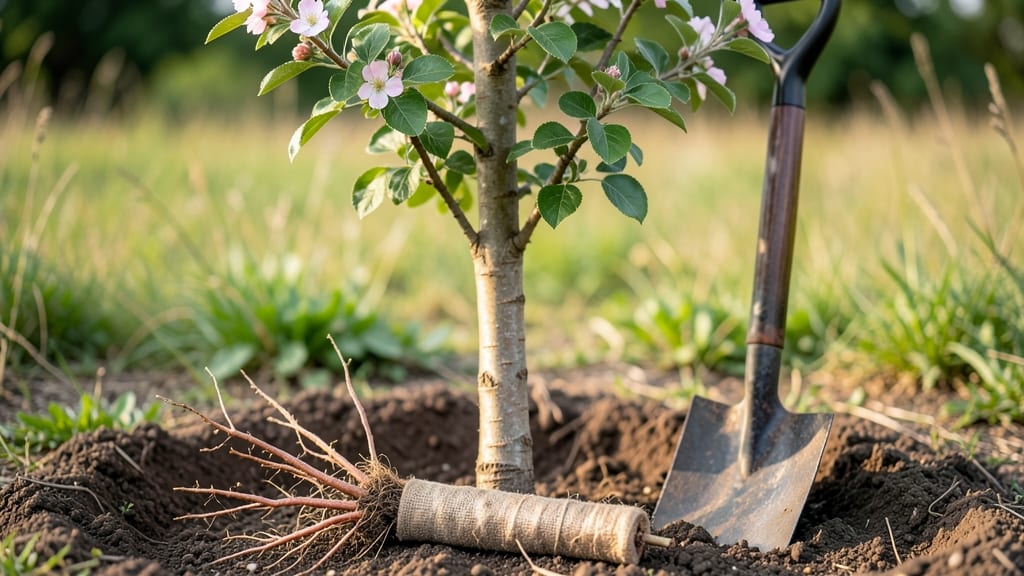
Planting apple trees isn't just about sticking a sapling in the ground—it’s about setting up your future harvests for decades to come. 🌱 I’ve learned the hard way that soil, sunlight, and variety matter more than most guides admit, and these three soil secrets will make the difference between a scraggly tree and one loaded with juicy fruit by year five.
The right soil mix keeps roots happy and hungry for growth, while the perfect spot—six to eight hours of sun daily—turns a bare patch into prime real estate.
Whether you’re planting bare-root saplings in early spring or container-grown trees in fall, spacing them 20 to 25 feet apart (or less for dwarf varieties) prevents future crowding and disease. My first tree nearly choked its neighbor because I ignored this—don’t make that mistake.
Once planted, consistent watering (deep soaks once a week) and a thick layer of mulch keep moisture locked in and weeds at bay. By summer’s end, you’ll see new shoots signaling success, and within three years, those first blossoms will promise the sweet payoff of harvests to come.
The key? Start right, and your tree will repay you for a lifetime.
This works for backyard orchards, small homesteads, or even urban lots with dwarf varieties. Let’s get those roots in the ground—and your future apples on the table.
📚 In This Guide
- What you need
- Instructions
- Tips and common mistakes
- Wrapping up and next steps
What you need
- ● Apple tree saplings: 1–3 (choose disease-resistant varieties like Honeycrisp or Gala for beginners)
- ● Well-draining soil: Test pH (ideal: 6.0–7.0); amend with compost if needed
- ● Organic mulch: 2–3 inches (wood chips or straw to retain moisture)
- ● Fertilizer: Balanced 10-10-10 or citrus-specific blend (follow package rates)
- ● Watering can/hose: With adjustable nozzle for gentle hydration
- ● Shovel: Round-point for digging holes (12–18" wide, 2x sapling depth)
- ● Pruners: Bypass pruners (sterilized with rubbing alcohol)
- ● Garden gloves: Heavy-duty for thorny varieties
- ● Stakes & twine: 3–4 stakes per tree (6+ ft tall) + biodegradable twine
- ○ Soil pH test kit: Optional but highly recommended for accuracy
- ● Tree guard (to protect from pests)
- ● Drip irrigation system (for water efficiency)
- ● Pollination aids (if planting a single variety)
- ● Mycorrhizal fungi (boosts root growth)
Step-by-step instructions for planting apples
Here's how to plant apple trees that thrive year after year—no guesswork involved.
🪴 Step 1: Choose the Right Location and Dig the Hole
Pick a spot with full sun exposure (at least 6-8 hours daily) and well-draining soil. Apples need space—plant each tree 20-25 feet apart to allow proper airflow and future growth. Avoid low-lying areas where cold air collects, as young trees are frost-sensitive.
Dig a hole twice as wide as the root ball but only as deep. The top of the root ball should sit 2-3 inches above ground level to prevent waterlogging. Loosen the soil at the bottom of the hole with a shovel to encourage root spread. If your soil is heavy clay, amend it with 2-3 inches of compost mixed into the bottom layer.
🌱 Step 2: Prepare the Tree and Plant
Remove the tree from its container and gently loosen the roots if they’re circling. If planting bare-root, soak the roots in water for 1-2 hours before planting to rehydrate them. Position the tree in the hole so the graft union (the bump near the base) is 2-4 inches above soil level. This ensures the tree develops strong roots below ground while protecting the graft from rot.
Backfill the hole with native soil, tamping down gently to remove air pockets. Water thoroughly to settle the soil around the roots. Avoid adding mulch yet—wait until after planting to let the soil settle. This step is critical: poor root contact now means weak growth later.
☀️ Step 3: Water and Mulch for Long-Term Health
Water the newly planted tree with 10-15 gallons of water to encourage roots to spread into the surrounding soil. Keep the soil consistently moist (but not soggy) for the first 2-3 weeks2 inches of soil feel damp to the touch.
Apply 3-4 inches of organic mulch (like wood chips or straw) around the base, keeping it 6 inches away from the trunk to prevent rot. Mulch retains moisture, regulates soil temperature, and suppresses weeds—all while feeding the soil over time. Replenish mulch annually in late winter to maintain its benefits.
✂️ Step 4: Prune and Protect for First-Year Growth
Prune the tree immediately after planting to remove any broken or crossing branches. Focus on shaping the tree into an open center (like a vase shape) to promote airflow. Cut back to a strong outward-facing bud or branch. For young trees, aim to remove no more than 25% of the foliage—this ensures the tree can recover and grow.
Install a tree guard or wrap the trunk with tree wrap to protect against pests and winter damage. Avoid plastic wrap, which can trap moisture and cause rot. Monitor the tree regularly for signs of stress, like yellowing leaves or wilting, and adjust watering as needed. Patience here pays off—first-year growth sets the stage for decades of fruit production.
Tips & tricks for perfect apple planting
Planting apple trees is a long-term investment—here's how to set yours up for success from day one.
Sunlight and Spacing Secret: That 6-8 hours of daily sun is non-negotiable for healthy apple trees. I always check sunlight patterns for at least 3 days before planting to confirm the spot gets full sun. The 20-25 foot spacing between trees might seem excessive, but it prevents future crowding that leads to disease and poor fruit quality. Trust me on this—you'll thank yourself when harvest time comes.
Root Ball Placement: In Step 1, when positioning the root ball, make sure those 2-3 inches above ground level are measured from the top of the root ball, not the soil line. The graft union should be clearly visible above the soil—this protects it from rot while allowing roots to develop properly below. I've seen too many trees planted too deep where the graft eventually rots out.
Soil Preparation: The instructions mention amending heavy clay soil with 2-3 inches of compost, but don't stop there. For sandy soils, mix in a bit of peat moss or coconut coir to improve moisture retention. This creates the ideal balance of drainage and water-holding capacity that apple trees love. Think of it as giving your tree a head start with premium soil conditions.
Watering Wisdom: Those first 2-3 weeks of consistent moisture are critical. I set up a simple drip irrigation system on a timer for my trees to ensure they get exactly 10-15 gallons of water each time without overwatering. The key is keeping the top 2 inches of soil damp—not wet. You can test this by sticking your finger in the soil—it should feel like a damp sponge, not a wet washcloth.
Pro Tips for Apple Planting Guide
- Planting apple trees is a long-term investment—here's how to set yours up for success from day one.
- Sunlight and Spacing Secret: That 6-8 hours of daily sun is non-negotiable for healthy apple trees.
- Root Ball Placement: In Step 1, when positioning the root ball, make sure those 2-3 inches above ground level are measured from the top of the root ball, not the soil line.
Frequently asked questions
Got questions about growing your own apple trees? You’re not alone—planting fruit trees can feel tricky at first! Here are answers to the most common questions to help you get started with confidence.
When is the best time to plant an apple tree?
The ideal window is late fall to early spring (before buds swell or after leaves drop). Planting in dormancy reduces stress on the tree, giving roots time to establish before summer heat. For container-grown trees, you can plant in early fall too—just water deeply afterward!
How deep and far apart should I space apple trees?
Dig a hole twice as wide as the root ball but no deeper—plant so the graft union sits 2–4 inches above soil level. Space standard trees 20–25 feet apart (or 12–15 feet for dwarf varieties) to ensure airflow and sunlight. Pro tip: Use a stake for support if your tree is young!
Why did my apple tree leaves turn yellow or curl?
Yellowing leaves often signal nutrient deficiencies (like nitrogen or magnesium) or pests (aphids, mites). Curl could mean herbicide drift or fire blight. Check soil pH (aim for 6.0–7.0) and inspect undersides of leaves. Prune affected branches and apply organic fertilizer or neem oil if needed.
Can I grow apples in containers or small spaces?
Dwarf or columnar varieties (like ‘Columnar Honeycrisp’) thrive in 15–25 gallon pots. Use well-draining soil, a trellis for support, and repot every 2–3 years. Place containers in full sun (6+ hours/day) and water deeply when the top inch of soil dries. Just know: Pollination may require a second tree nearby!
Do apple trees need winter protection?
Young trees (3–5 years old) benefit from mulch (4–6 inches of straw or wood chips) and tree wraps to prevent sunscald. In harsh climates, cover the root flare with extra mulch and avoid heavy snow buildup on branches. Established trees usually handle winter well—just prune dead wood in late winter!
Wrapping up and next steps
Planting apples is a rewarding journey that blends patience with delicious results! 🍏 By mastering the three key soil secrets—drainage, pH balance, and organic matter—you’ll set your orchard up for year-round success.
Whether you’re a beginner or a seasoned gardener, the right preparation ensures healthy trees, bountiful harvests, and fewer pests.
Now that you’re armed with the know-how, take the next step: mark your calendar for planting season and gather your tools. Your future apple pies (and bragging rights!) are waiting—go plant with confidence! 🌱